

- LEGO the Office Ideas Set 21336 Review and Guide - April 21, 2023
- Lego Sanctum Sanctorum Review and Guide - March 3, 2023
- LEGO Treehouse Review & Guide - February 22, 2023
Although I primarily buy LEGO sets based on franchises I’m a fan of such as the LEGO Batmobile Tumbler (Batman) or the LEGO Sanctum Sanctorum (MCU), I also have a soft spot for anything natural. One of my favorite sets is the Jane Goodall Tribute set which was a GWP (Gift With Purchase) that I got last year. Something about the trees, grass, and water really relaxes my soul whenever I look at it.
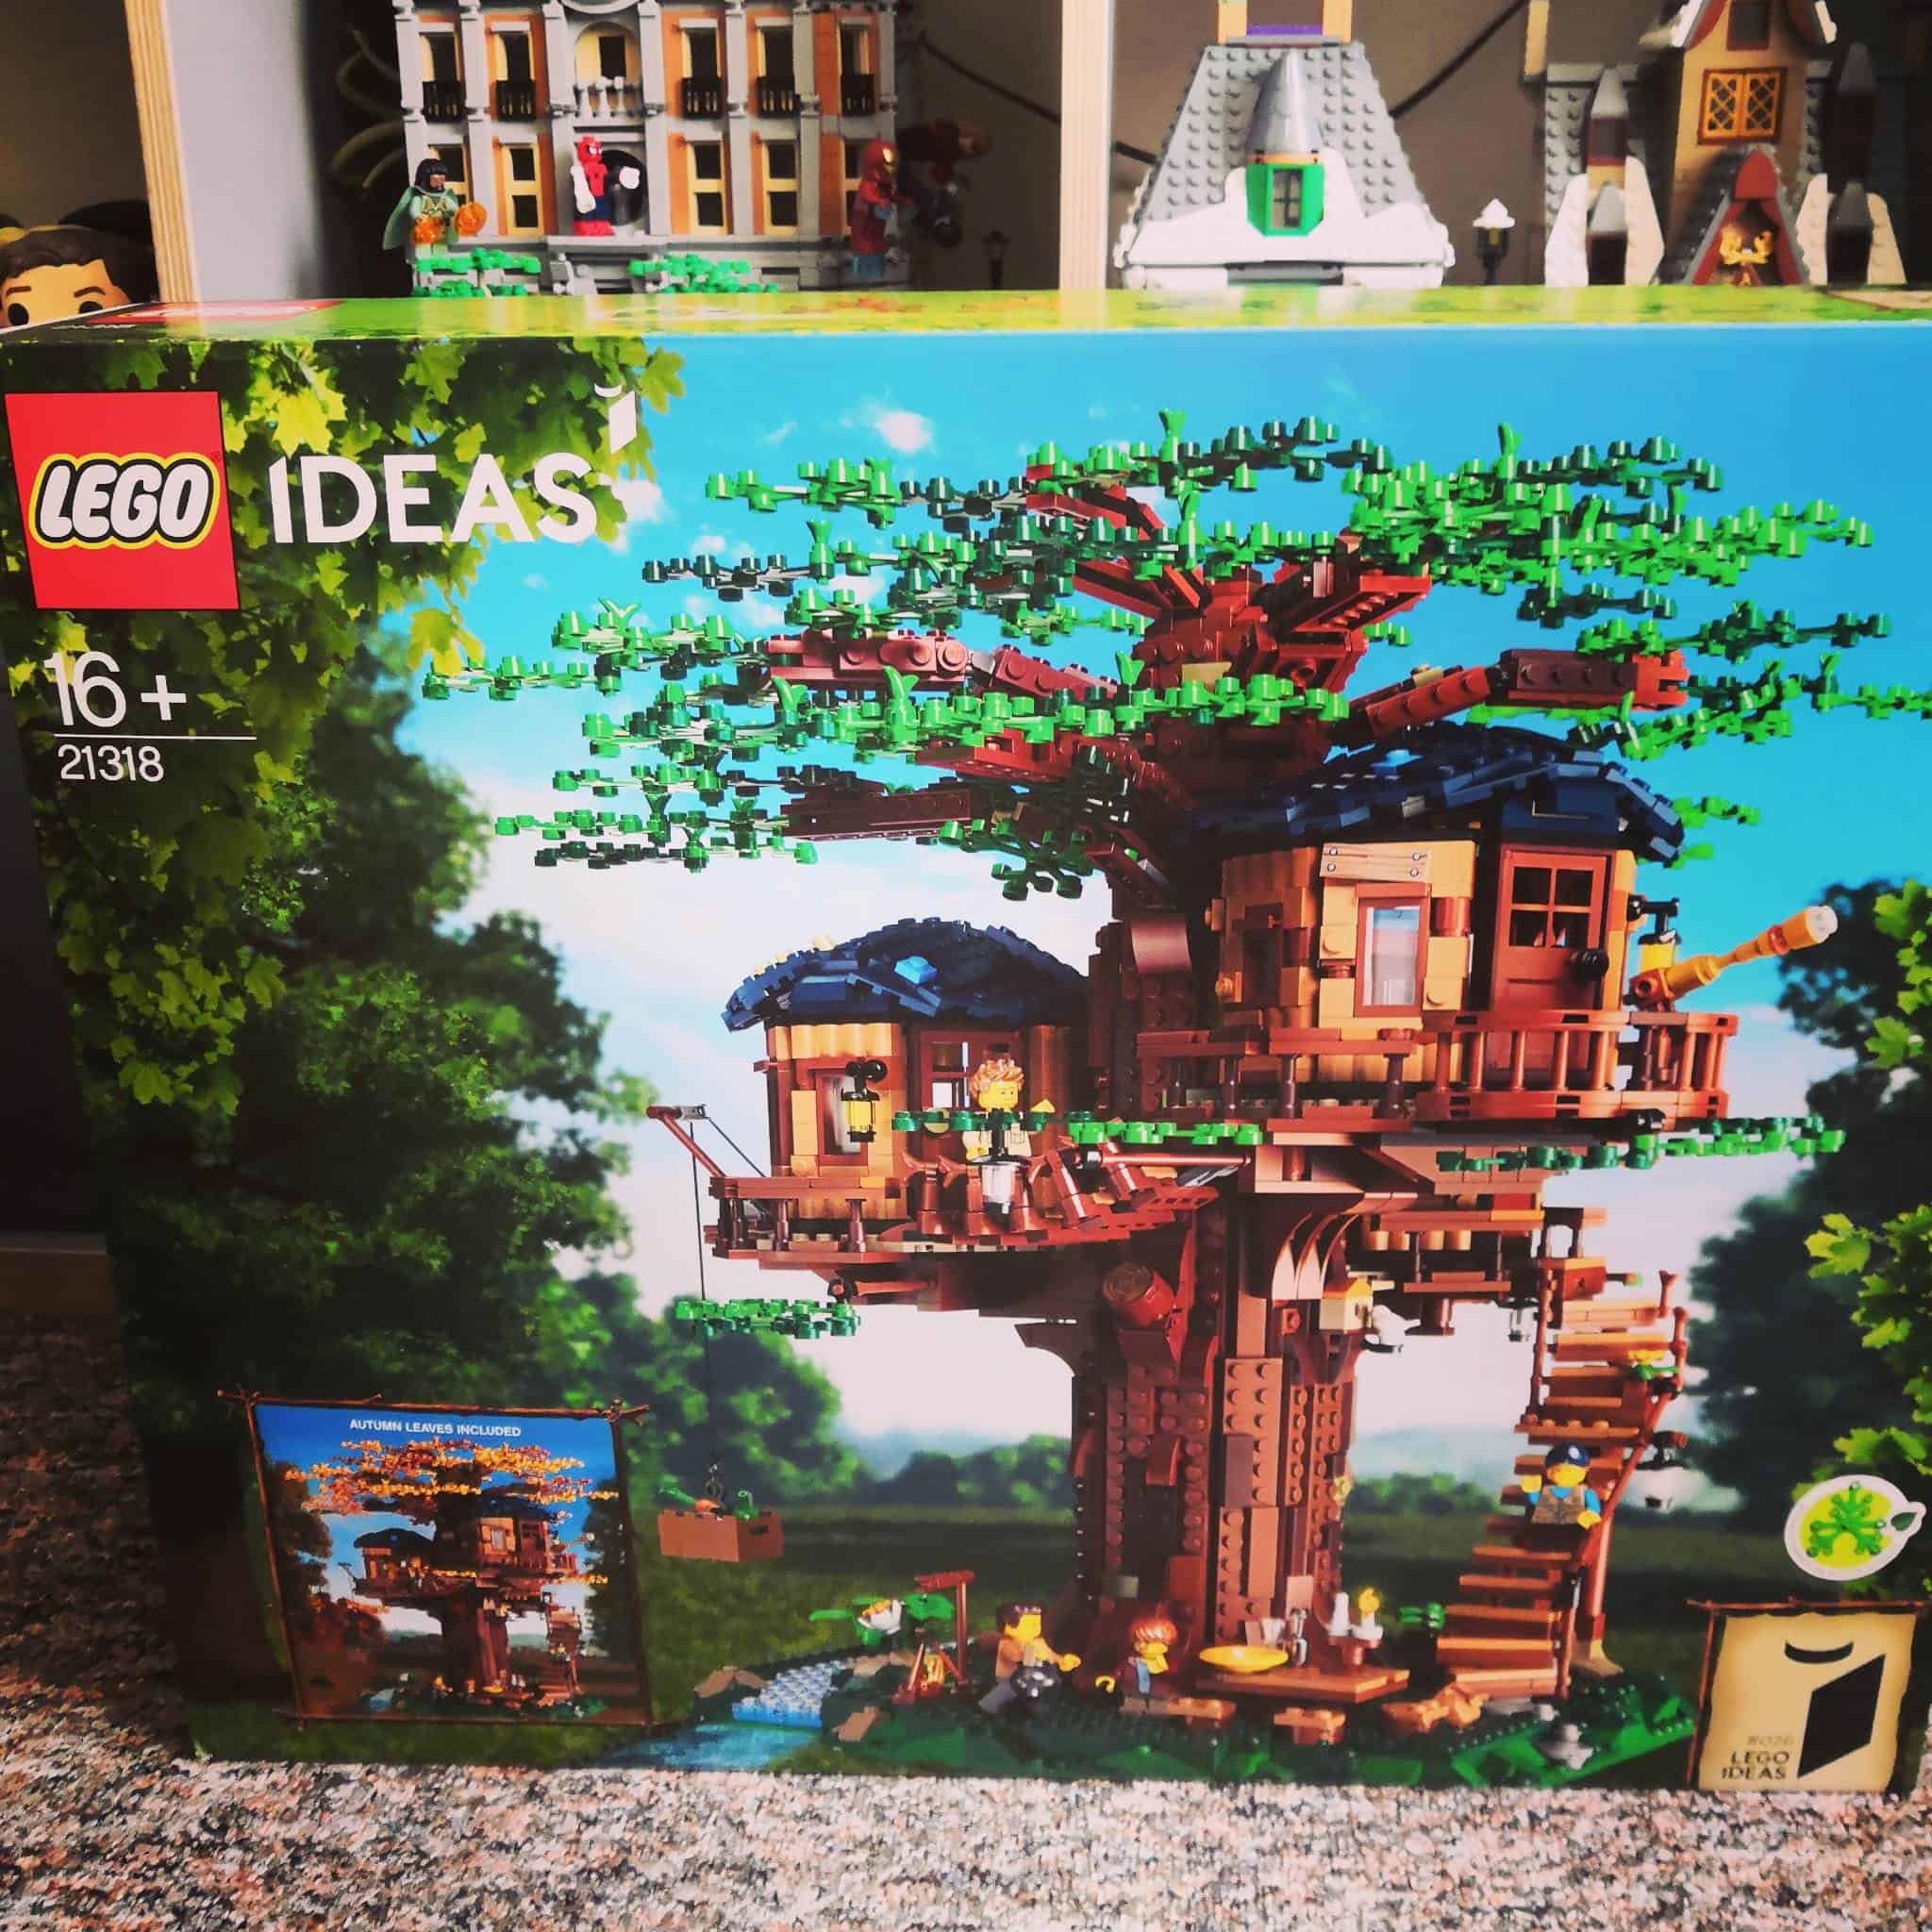
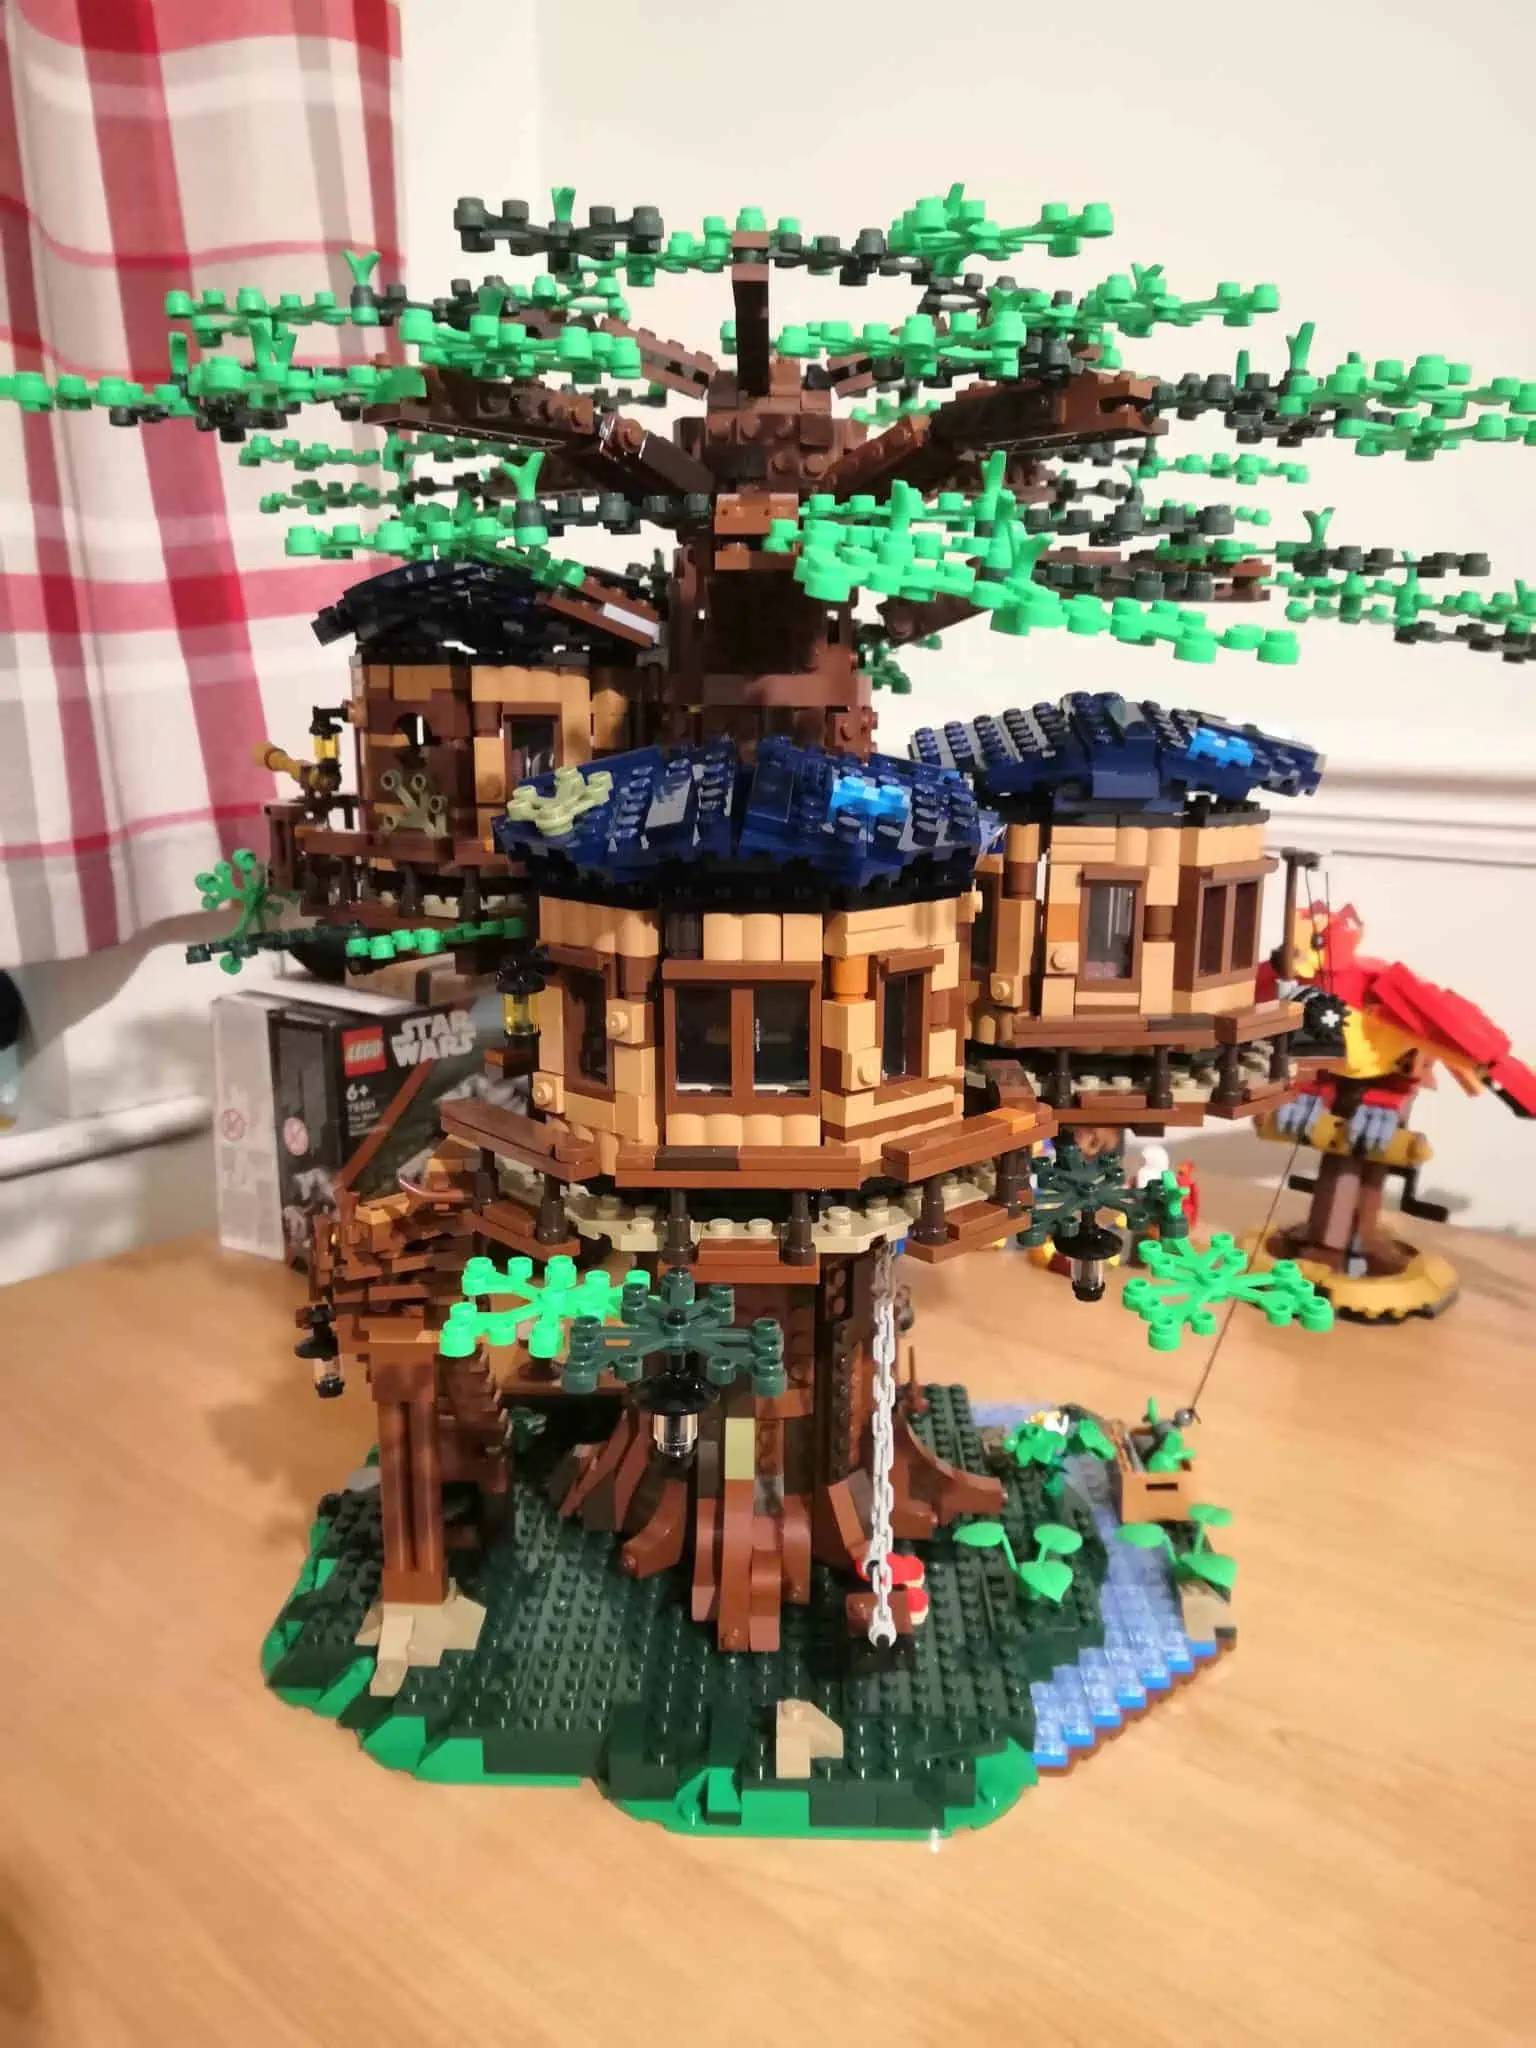
It was that reason that compelled me to buy the LEGO Treehouse 21318 set. I loved the joyous wonder that filled my heart when I saw it in the LEGO Store, and I wanted to be able to feel that in my own home. There’s so much going on in this set, and it makes me feel like I’ve been transported somewhere quiet and free. Life can be busy and stressful, and a nostalgic escape to a treehouse is just what the doctor ordered.
I’ve got to say, this set wasn’t quite what I expected. There’re so many hidden secrets that you discover whilst building it. I can’t wait to share those secrets with you throughout this review and guide! So, read on to find out exactly what I thought about this build, and to discover whether this set is right for you. Also, I make several tree puns in this LEGO Treehouse Review, see if you can spot them all!
Bottom Line Up Front
- Price – $249.99
- Number of Pieces – 3036
- Number of Botanical Elements – 186
- Number of Minifigures – 4
- Age – 16+ (This is accurate, in my opinion)
- Time to Build – 11 hours and 35 minutes
- LEGO Range – IDEAS
Inspiration – Meet Kevin Feeser
This Treehouse set is part of the LEGO IDEAS range. These are designs made by LEGO fans which are then voted on by the community. If a design gets 10,000 votes, LEGO reviews it to decide whether to make it into an official set and every year, a few new designs are approved.
This set was designed by Kevin Feeser, a fan from France who works as a hairdresser. He said, “the idea for the model emerged during an unusual weekend with friends in Robinson Crusoe-style treehouses”. He faced a lot of challenges during the design, such as making the trunk robust enough to support the weight of all 3 cabins.
Overall, he spent 300 hours designing the model over 2 months. This included 6 total redesigns until he got something he considered just right. He explained that it was tricky trying to keep the count under 3,000 pieces. Once it was approved, he worked with a Lego designer called César Carvalhosa Soares to perfect the design.
Ultimately, they ended up with a model that really captures the playful feeling that treehouses invoke. The set feels so connected to nature and is really reminiscent of childhood. Although I never had a treehouse myself, I always dreamed of having one and would see them in shows and comics all the time. It’s exciting to finally have a treehouse of my own, even if it’s not quite big enough to climb!
Tips before You Start
Having built the set, there are a few things I wish I’d known in advance. This section will help you learn from my experience, and hopefully, ensure your build is as smooth as possible!
- This set is heavy – I have no idea why, but this is probably the heaviest set I own, and I own quite a few that are larger than this. Perhaps it’s due to the rigidity of the central trunk, but either way, moving it about is a workout. I’d strongly recommend setting aside a building space where you don’t have to move it around in between stages. I only have one desk, so I struggled to lift it to and from the desk every time I wanted to build the next stage.
- Save the larger stage bags – I tend to throw out the bags once I’ve built each stage. After all, why would I keep a bit of flimsy plastic? Well, I’d forgotten about the seasonal leaves. By the time I’d changed the leaves over, I was left with the smaller bags that the leaves initially come in. I wish I’d kept one of the larger bags and put all the pieces in that. Of course, you can get a special bag/ box to put the spare pieces in instead.
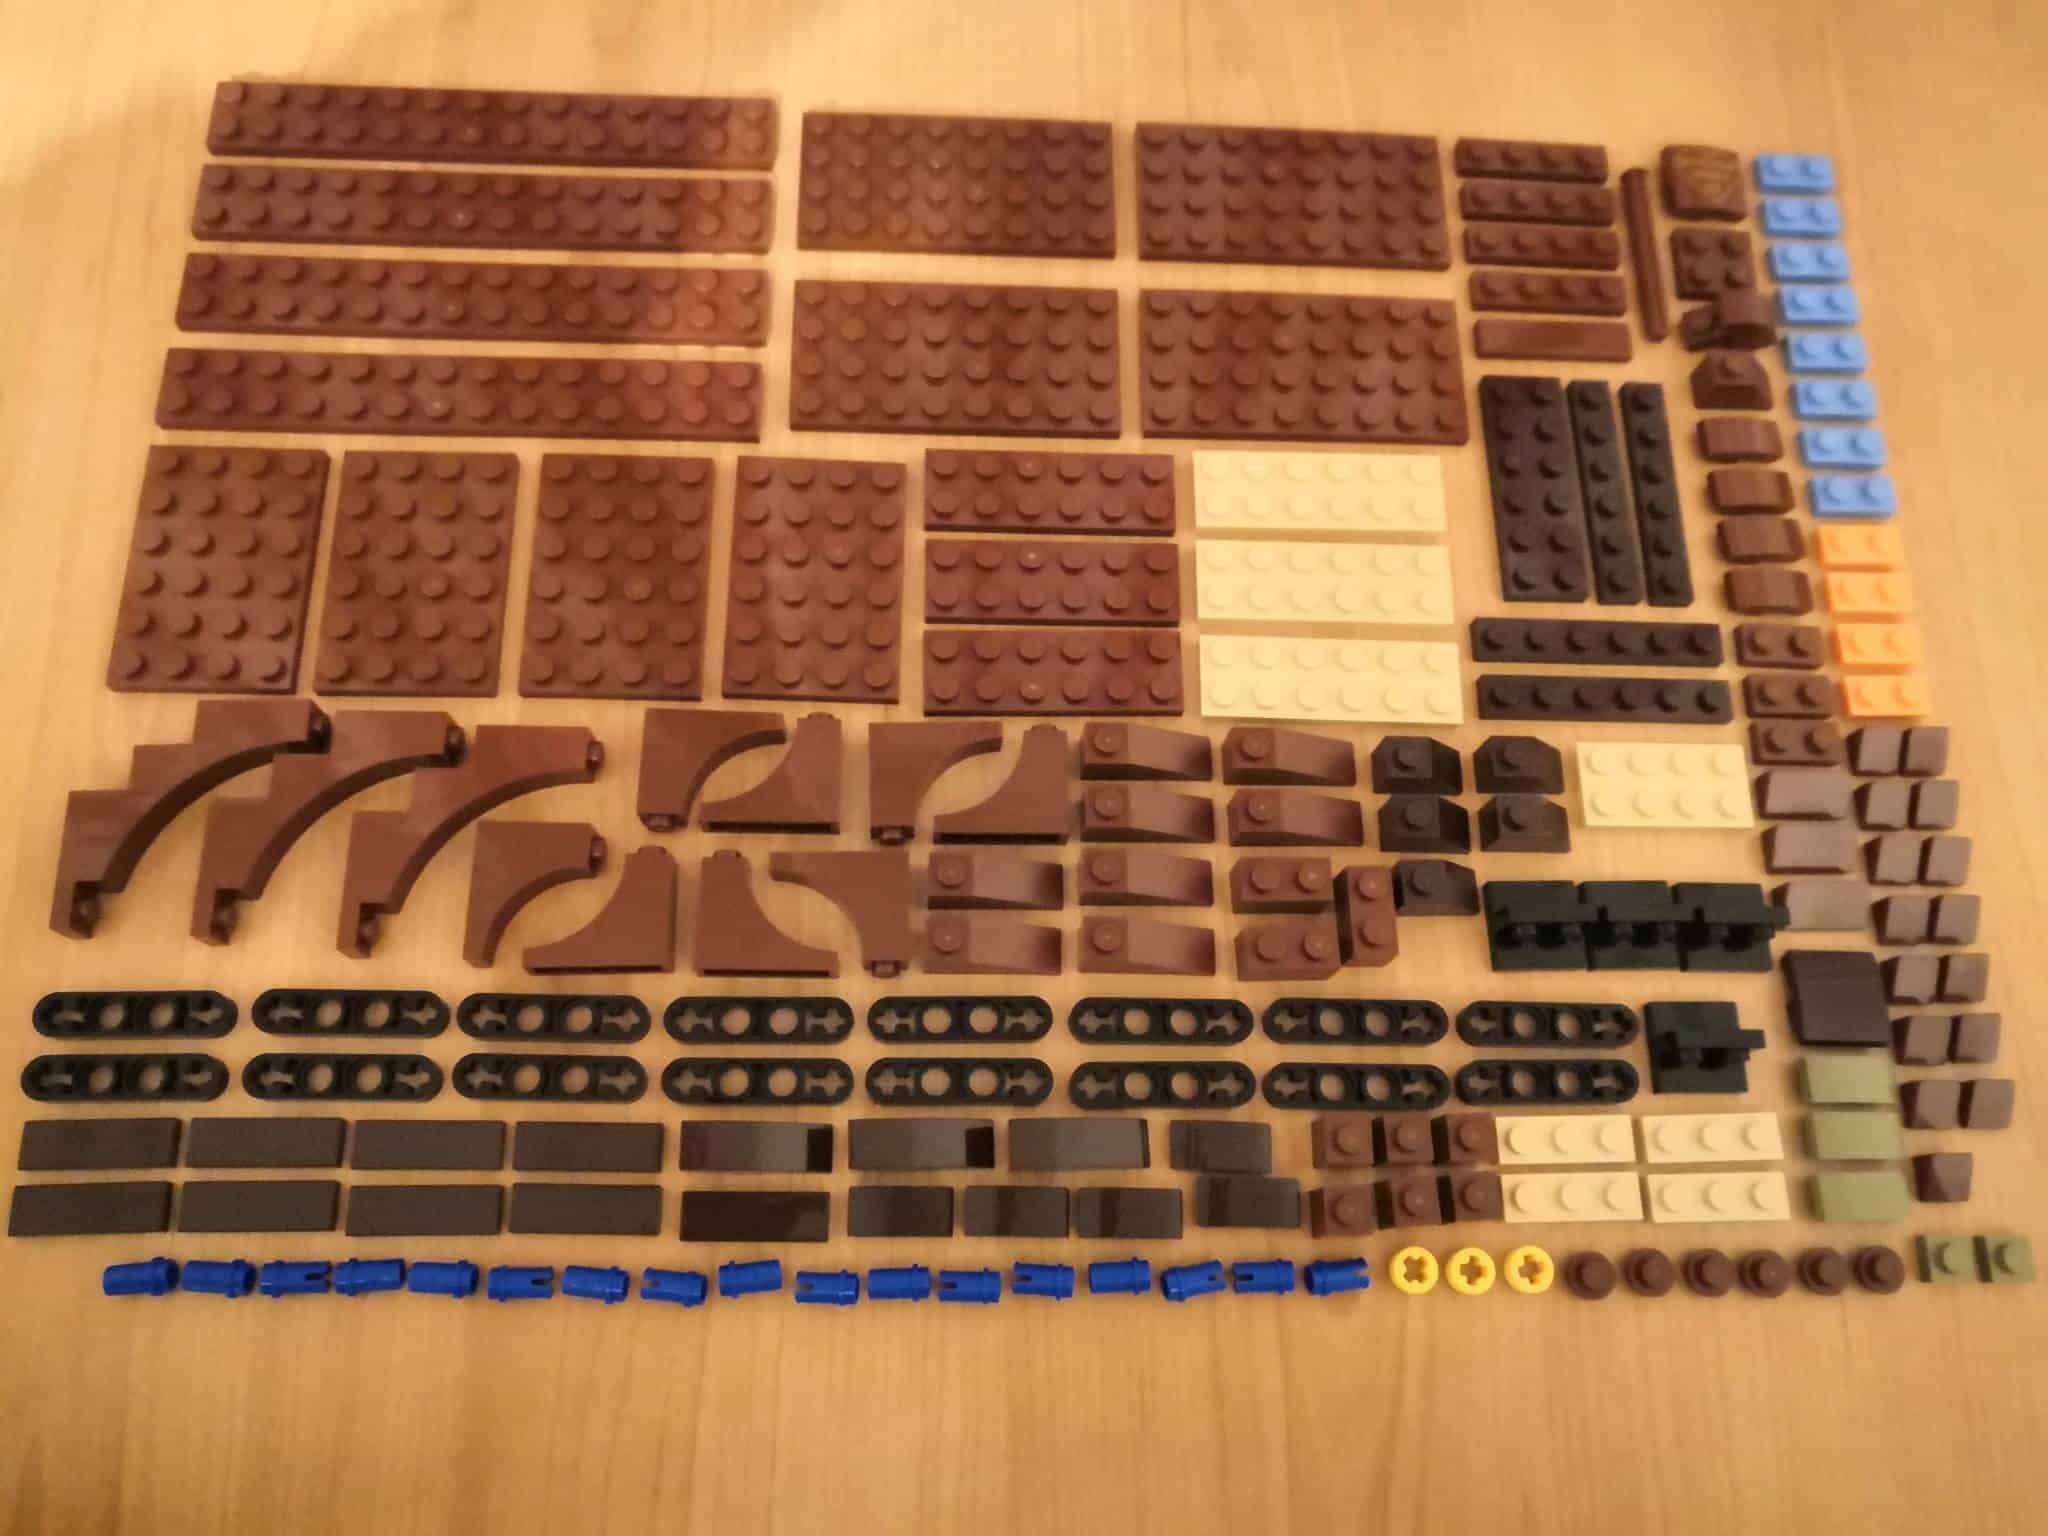
- Have good light – You don’t want to be building this under dull conditions, or you’re going to waste a lot of time squinting at the instructions. The light-brown, dark-brown, black, dark-blue, and dark-green pieces are all so very similar on paper. You’re going to need to be able to recognize the subtle differences in shade, and the best way to do this is to have a bright light overhead. Failing that, your phone’s torch will work.
- Organize your pieces – This will save you so much time. If you separate the pieces in advance, you’ll find that the build will go a lot more smoothly. A lot of the elements are the same color as each other, so trying to find them one at a time can be daunting. If you sort them out right at the start, you can just build without having to worry about searching through a large pile.
Instructions
I hate to say it, but the instructions for this set were a bit frustrating. I’d like to clarify that this is completely not the fault of the designers. The steps themselves were fine, and I feel the build occurred in a smart order. From a model-design perspective, the instructions were ideal.
The issue is in how they were presented to the reader. I think part of the problem is that I’ve built a lot of more modern sets, whereas the Treehouse was released in 2019. The modern sets have a tremendously helpful feature where all the new pieces are highlighted. They have a red outline, so you can see exactly what’s been added with each step.
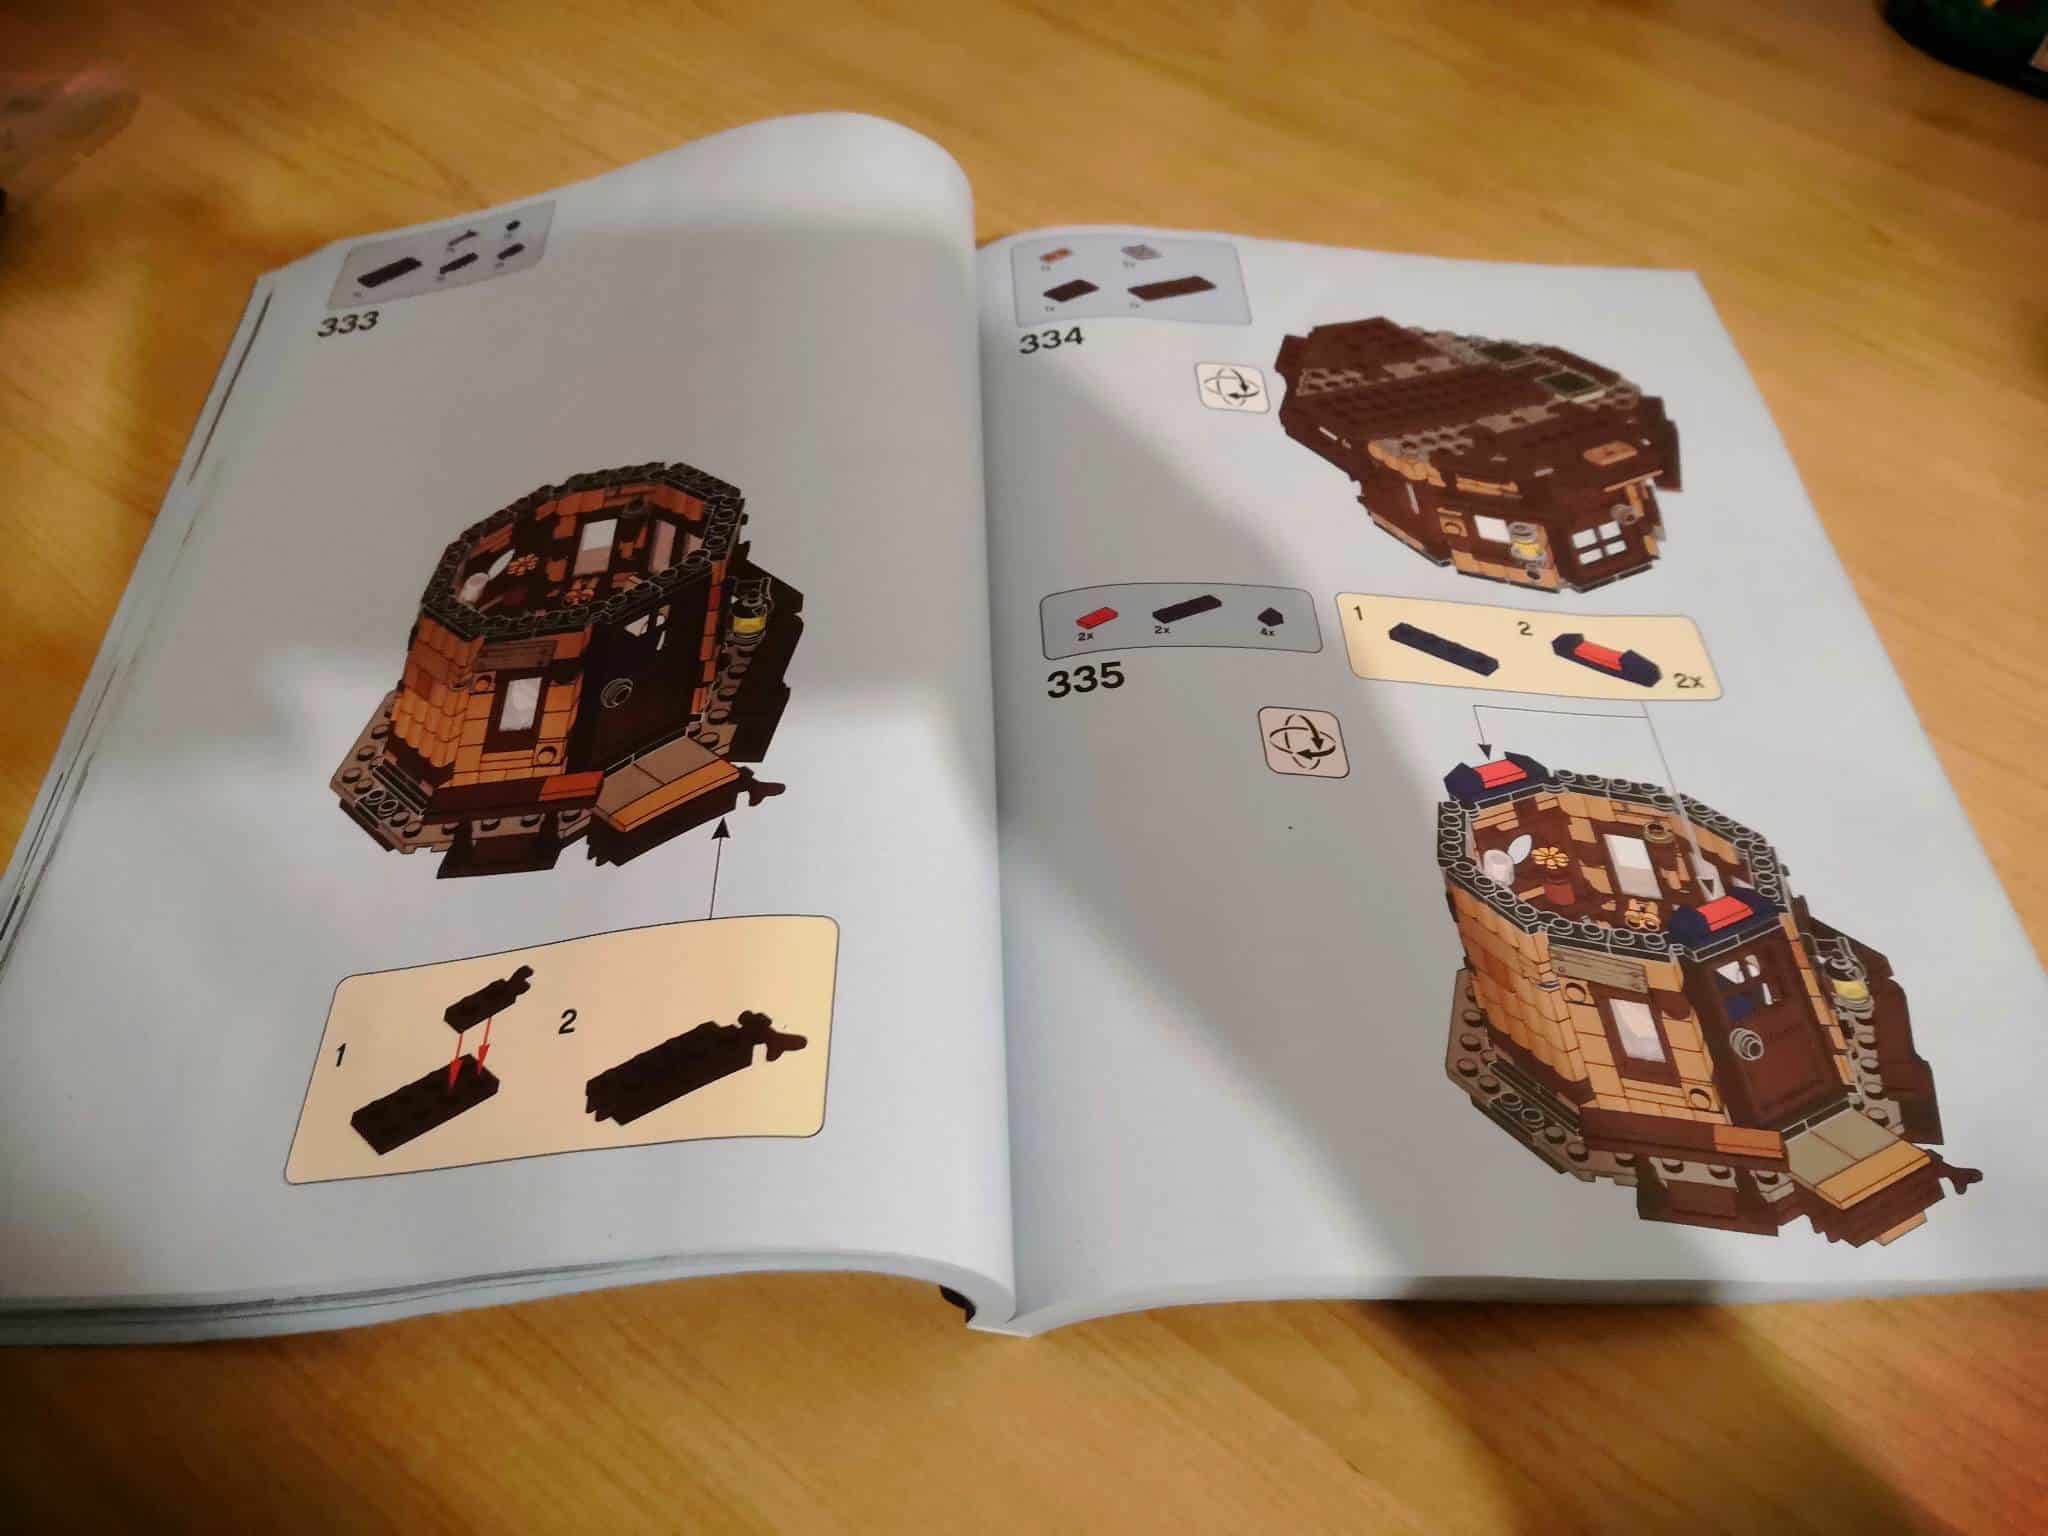
But in this one, I was essentially playing spot the difference. Not a huge issue in theory, as LEGO has done this for a long time, and I have plenty of experience building like this. The problem arises because, with this set, most of the pieces in a given section are the same color (brown on brown, green on green, blue on blue, etc). This made it a real struggle trying to differentiate between each step.
I also never like how incongruous the colors on the page are with the colors of the pieces. This is only ever a problem where sets have a light and dark shade of the same hue. For example, the light-brown pieces look dark-brown in the instructions, which is a problem when a stage has pieces in both colors. I wasted way too much time trying to figure out which shade the instructions were actually calling for.
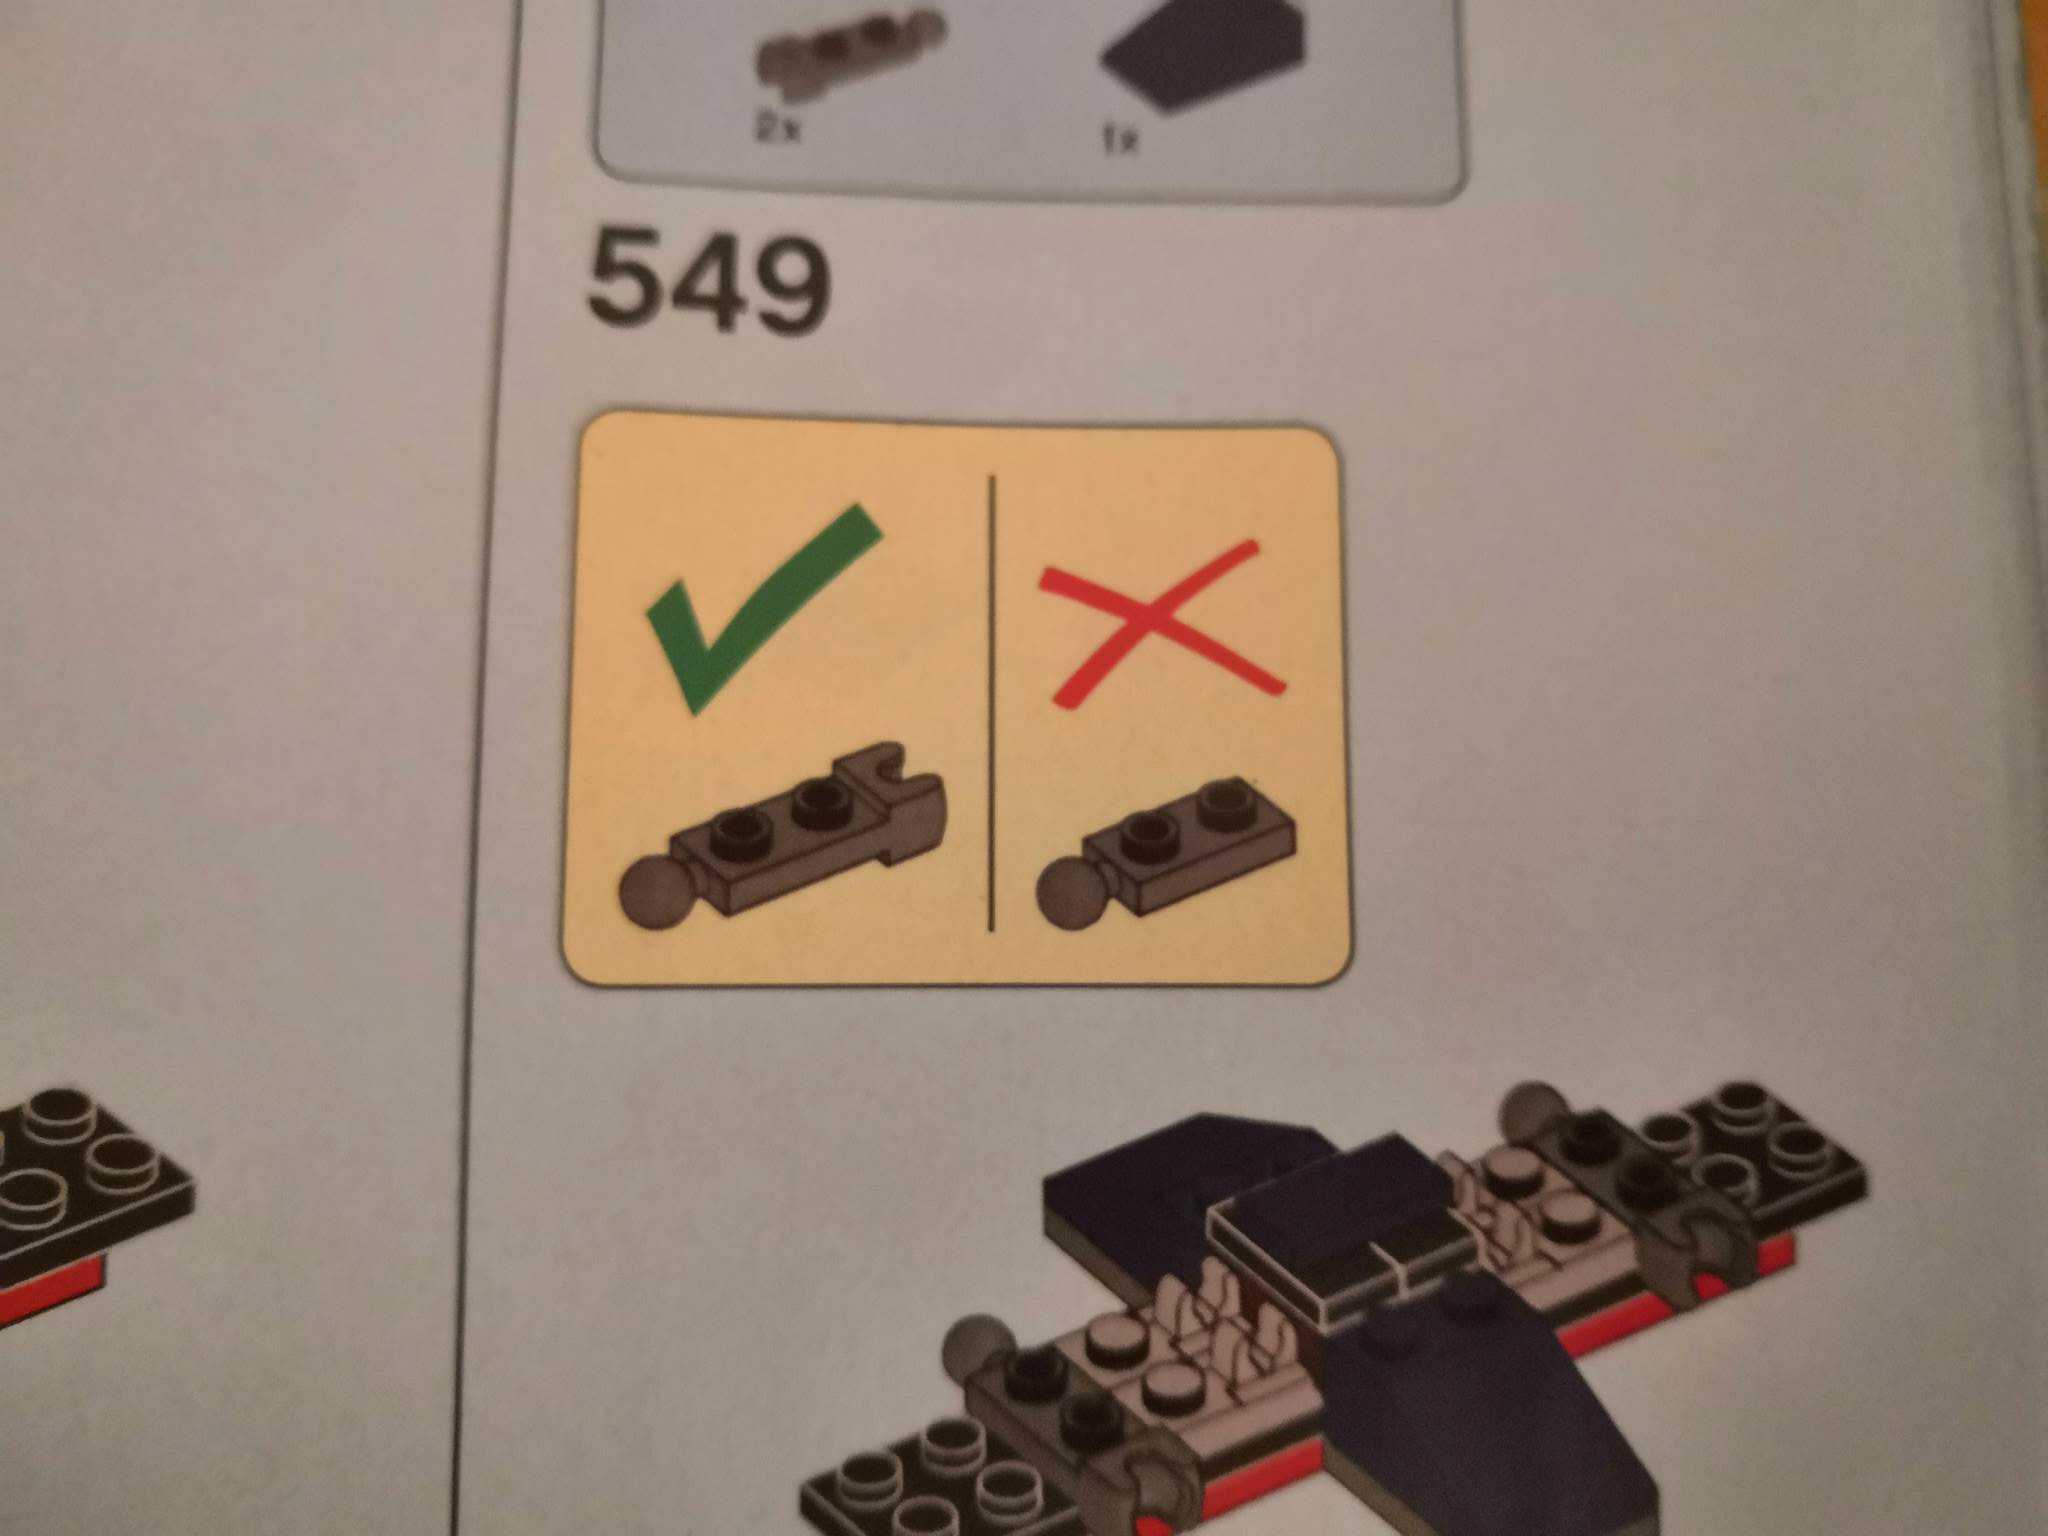
Lastly, the instructions had some weird perspectives that made it very tricky to figure out where sub-builds fitted onto the main build. The sprawling nature of the leaves and branches made for some unusual angles. And as a 3D model was being captured in a 2D image, this was not always done accurately. Sometimes it would look like one area was directly above another when in reality it was diagonally to the left/ right. This threw me off countless times and made me doubt myself.
Building Process
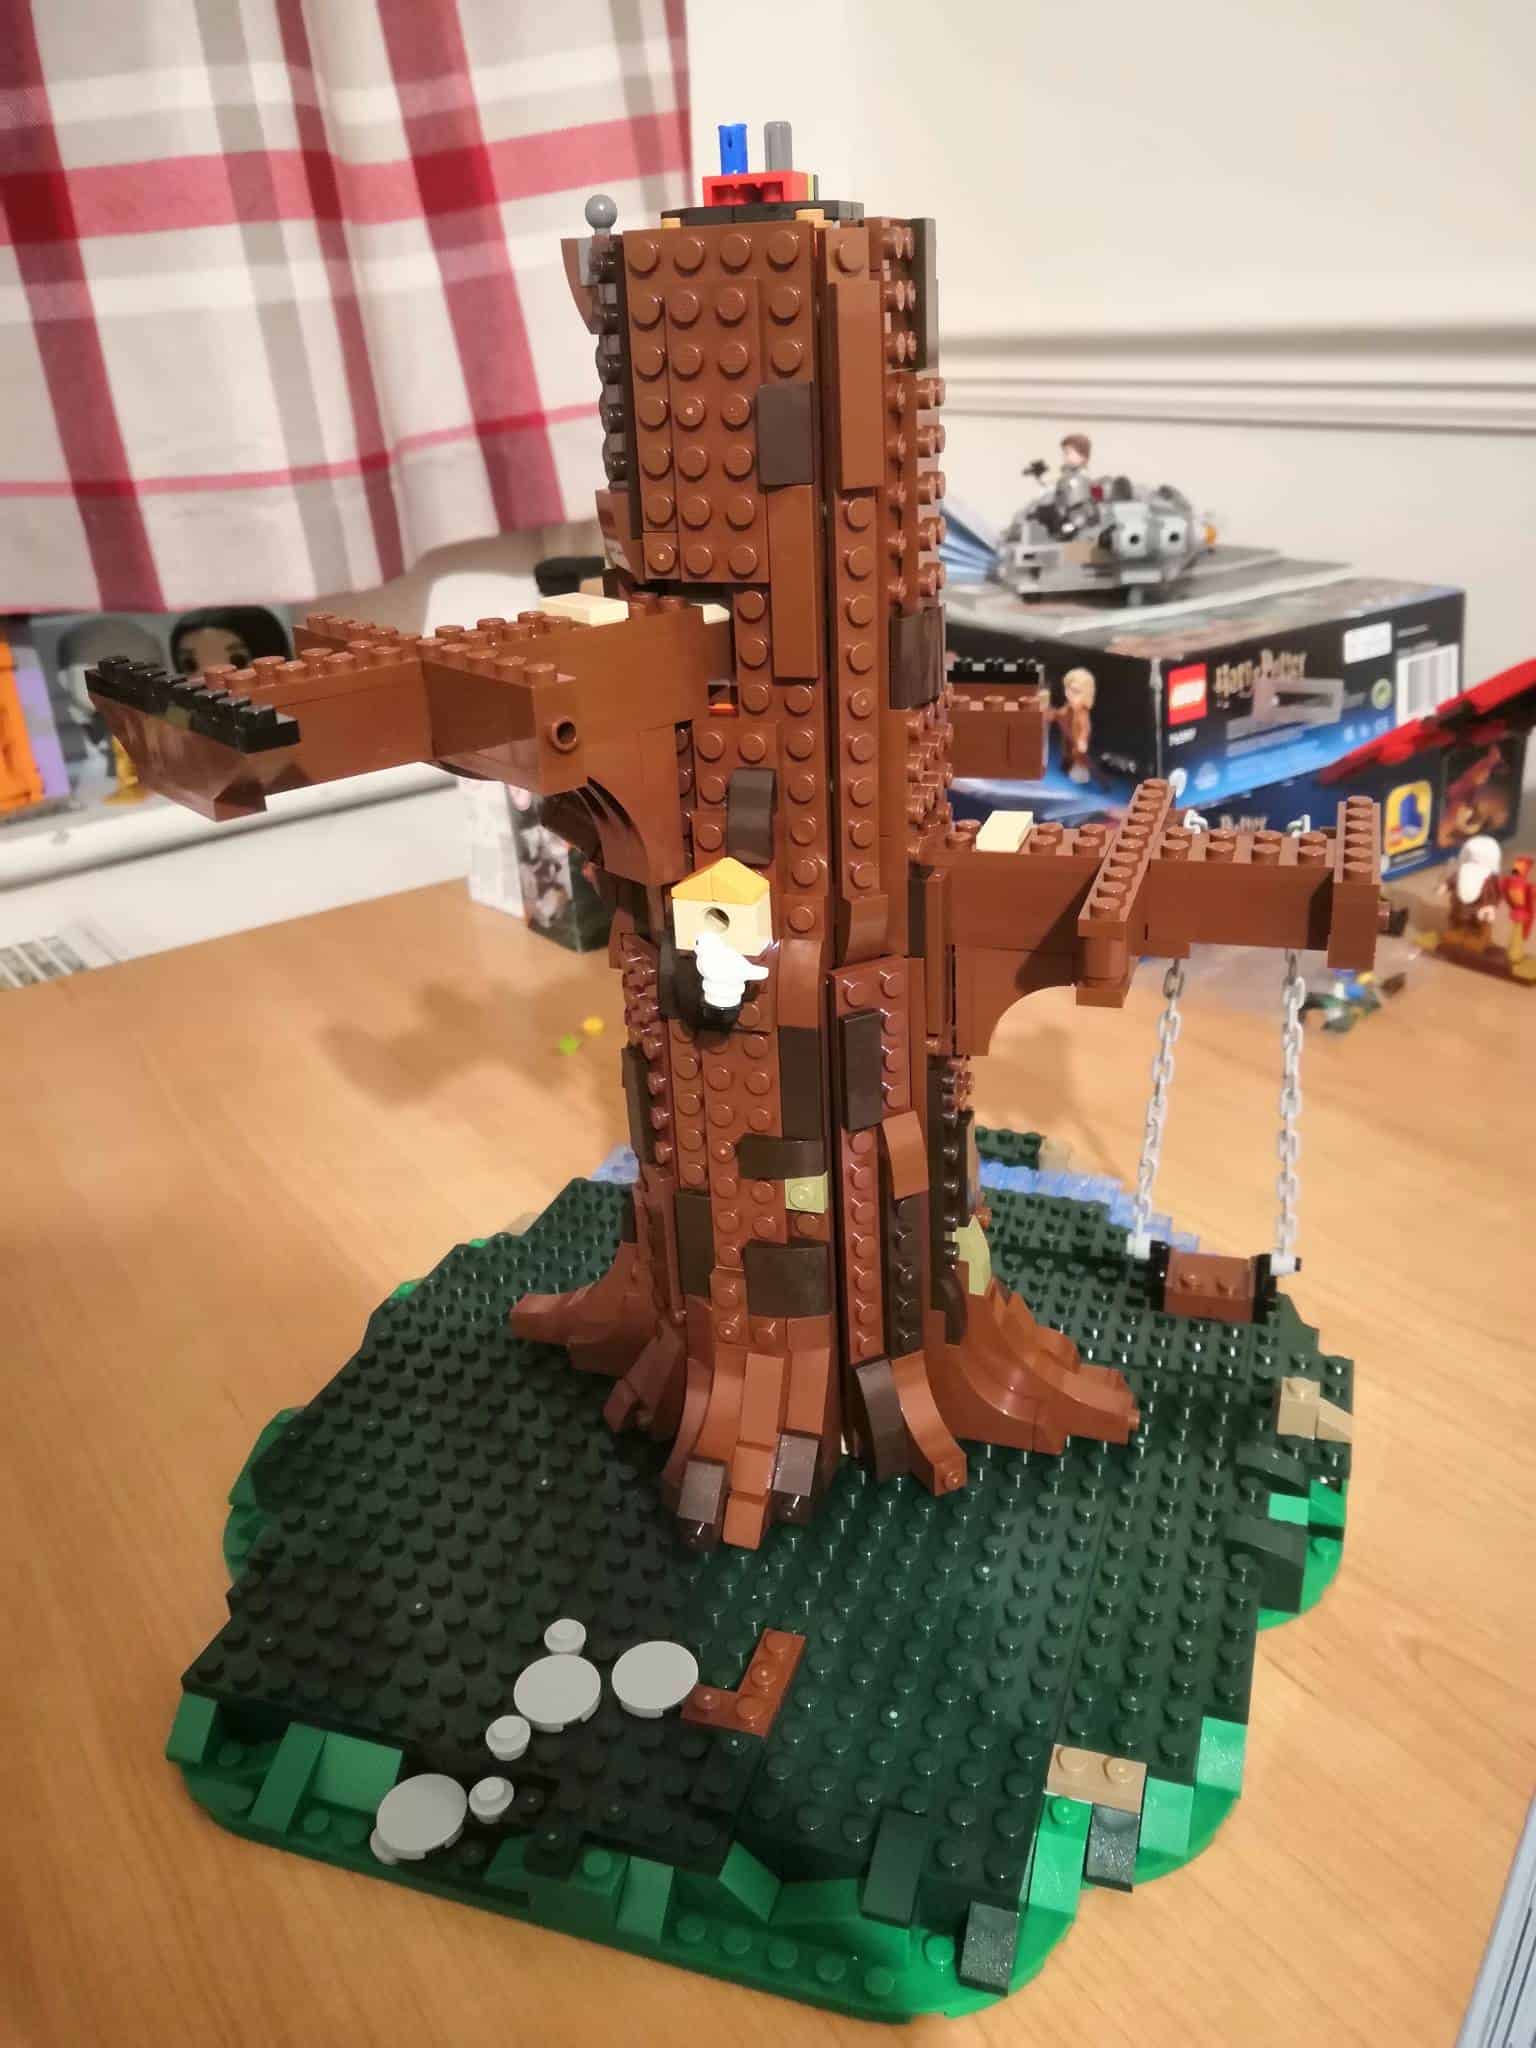
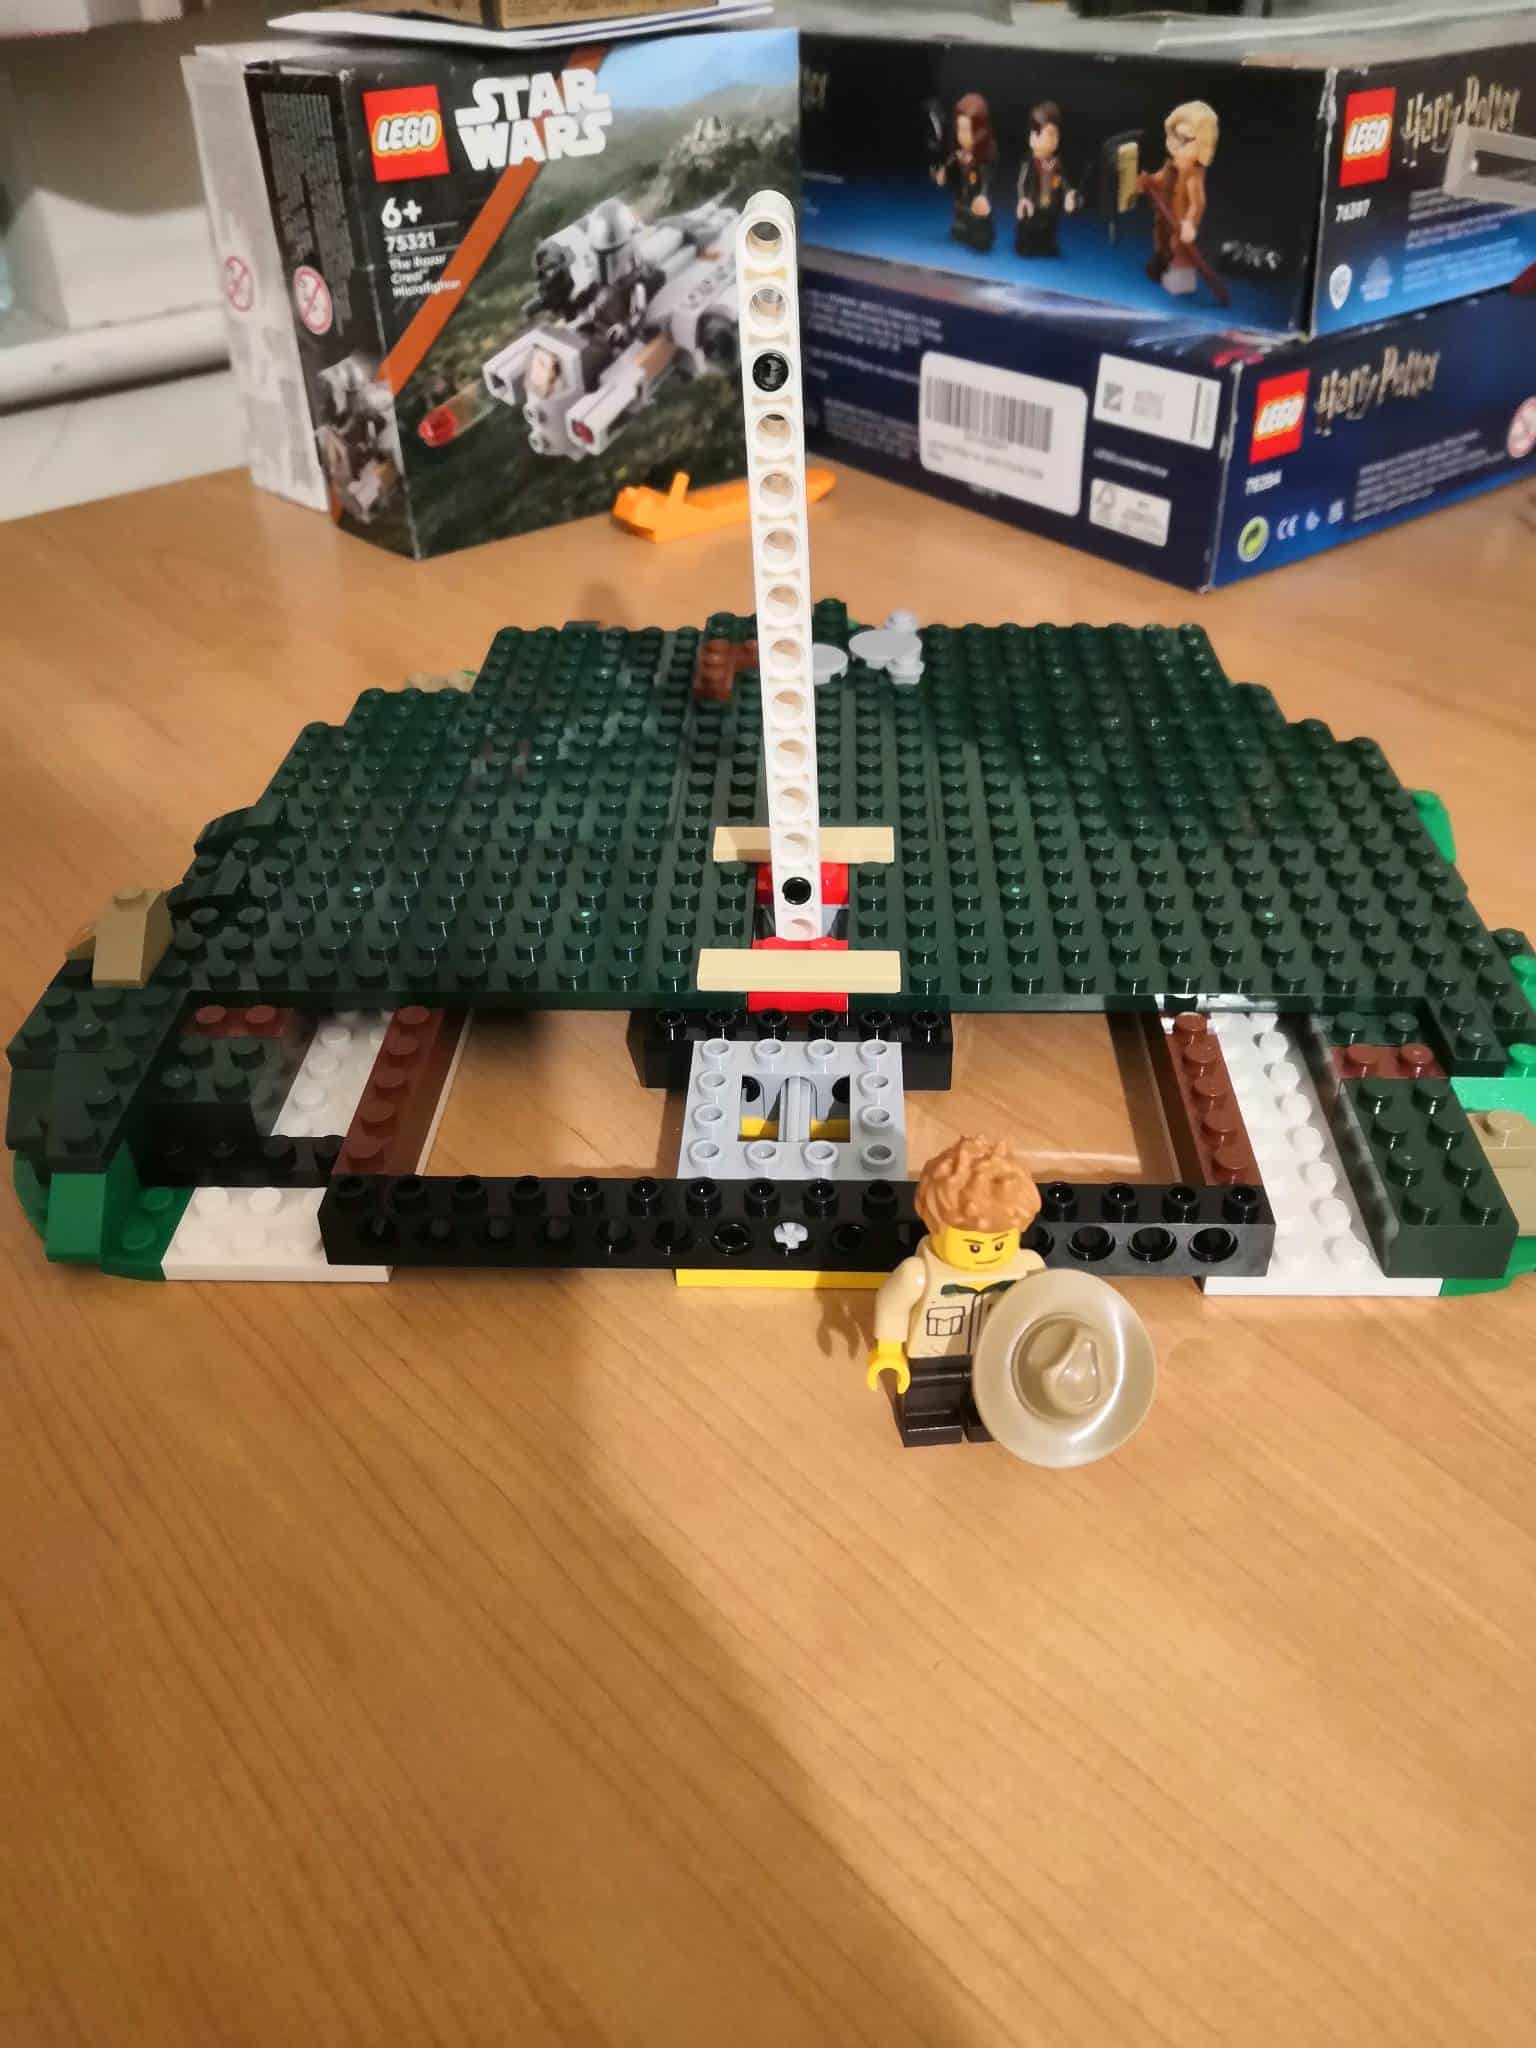
What an interesting build this was! I have so much to say, but I’ll try to keep it succinct. Firstly, it’s not what I expected. The trunk looks so solid on the box, and I’d been curious to see how they made it stable whilst having the plates attached vertically. The answer? Technic pieces!
It seems so obvious, but I never buy Technic sets, and I’ve built so few sets that utilize them, so I kinda forgot that they existed. I’m not a huge fan of them, but in this case, they were a necessity, and they provided a strong base to build the trunk around. They weren’t overused either, so don’t worry if you’re not a fan of the Technic range.
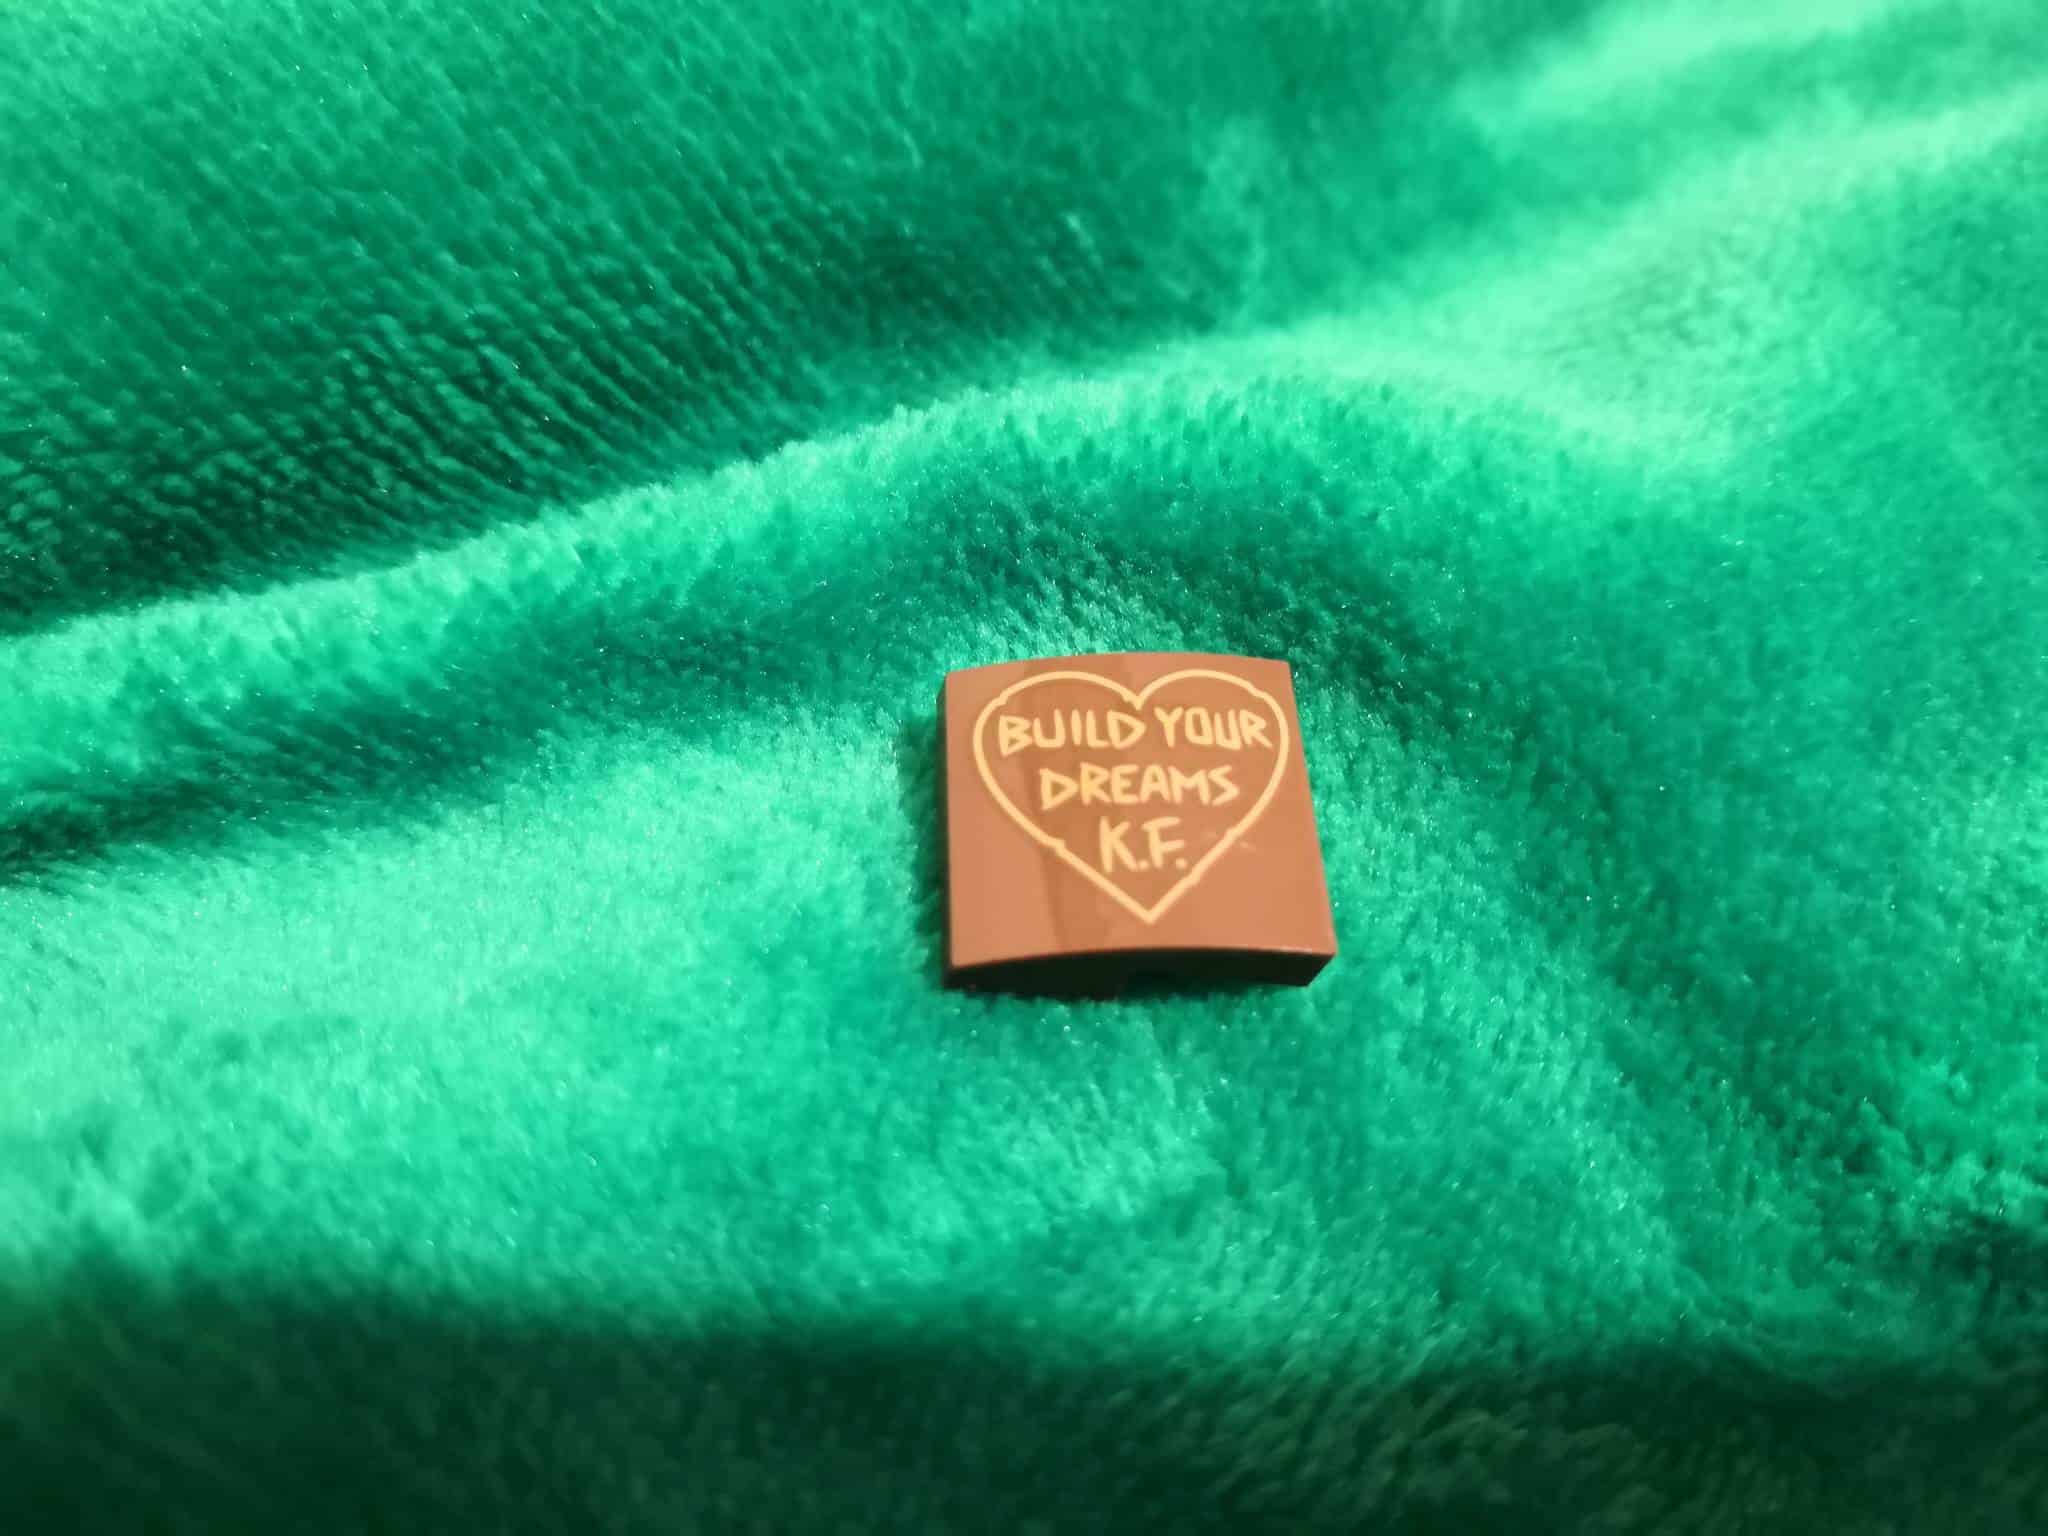
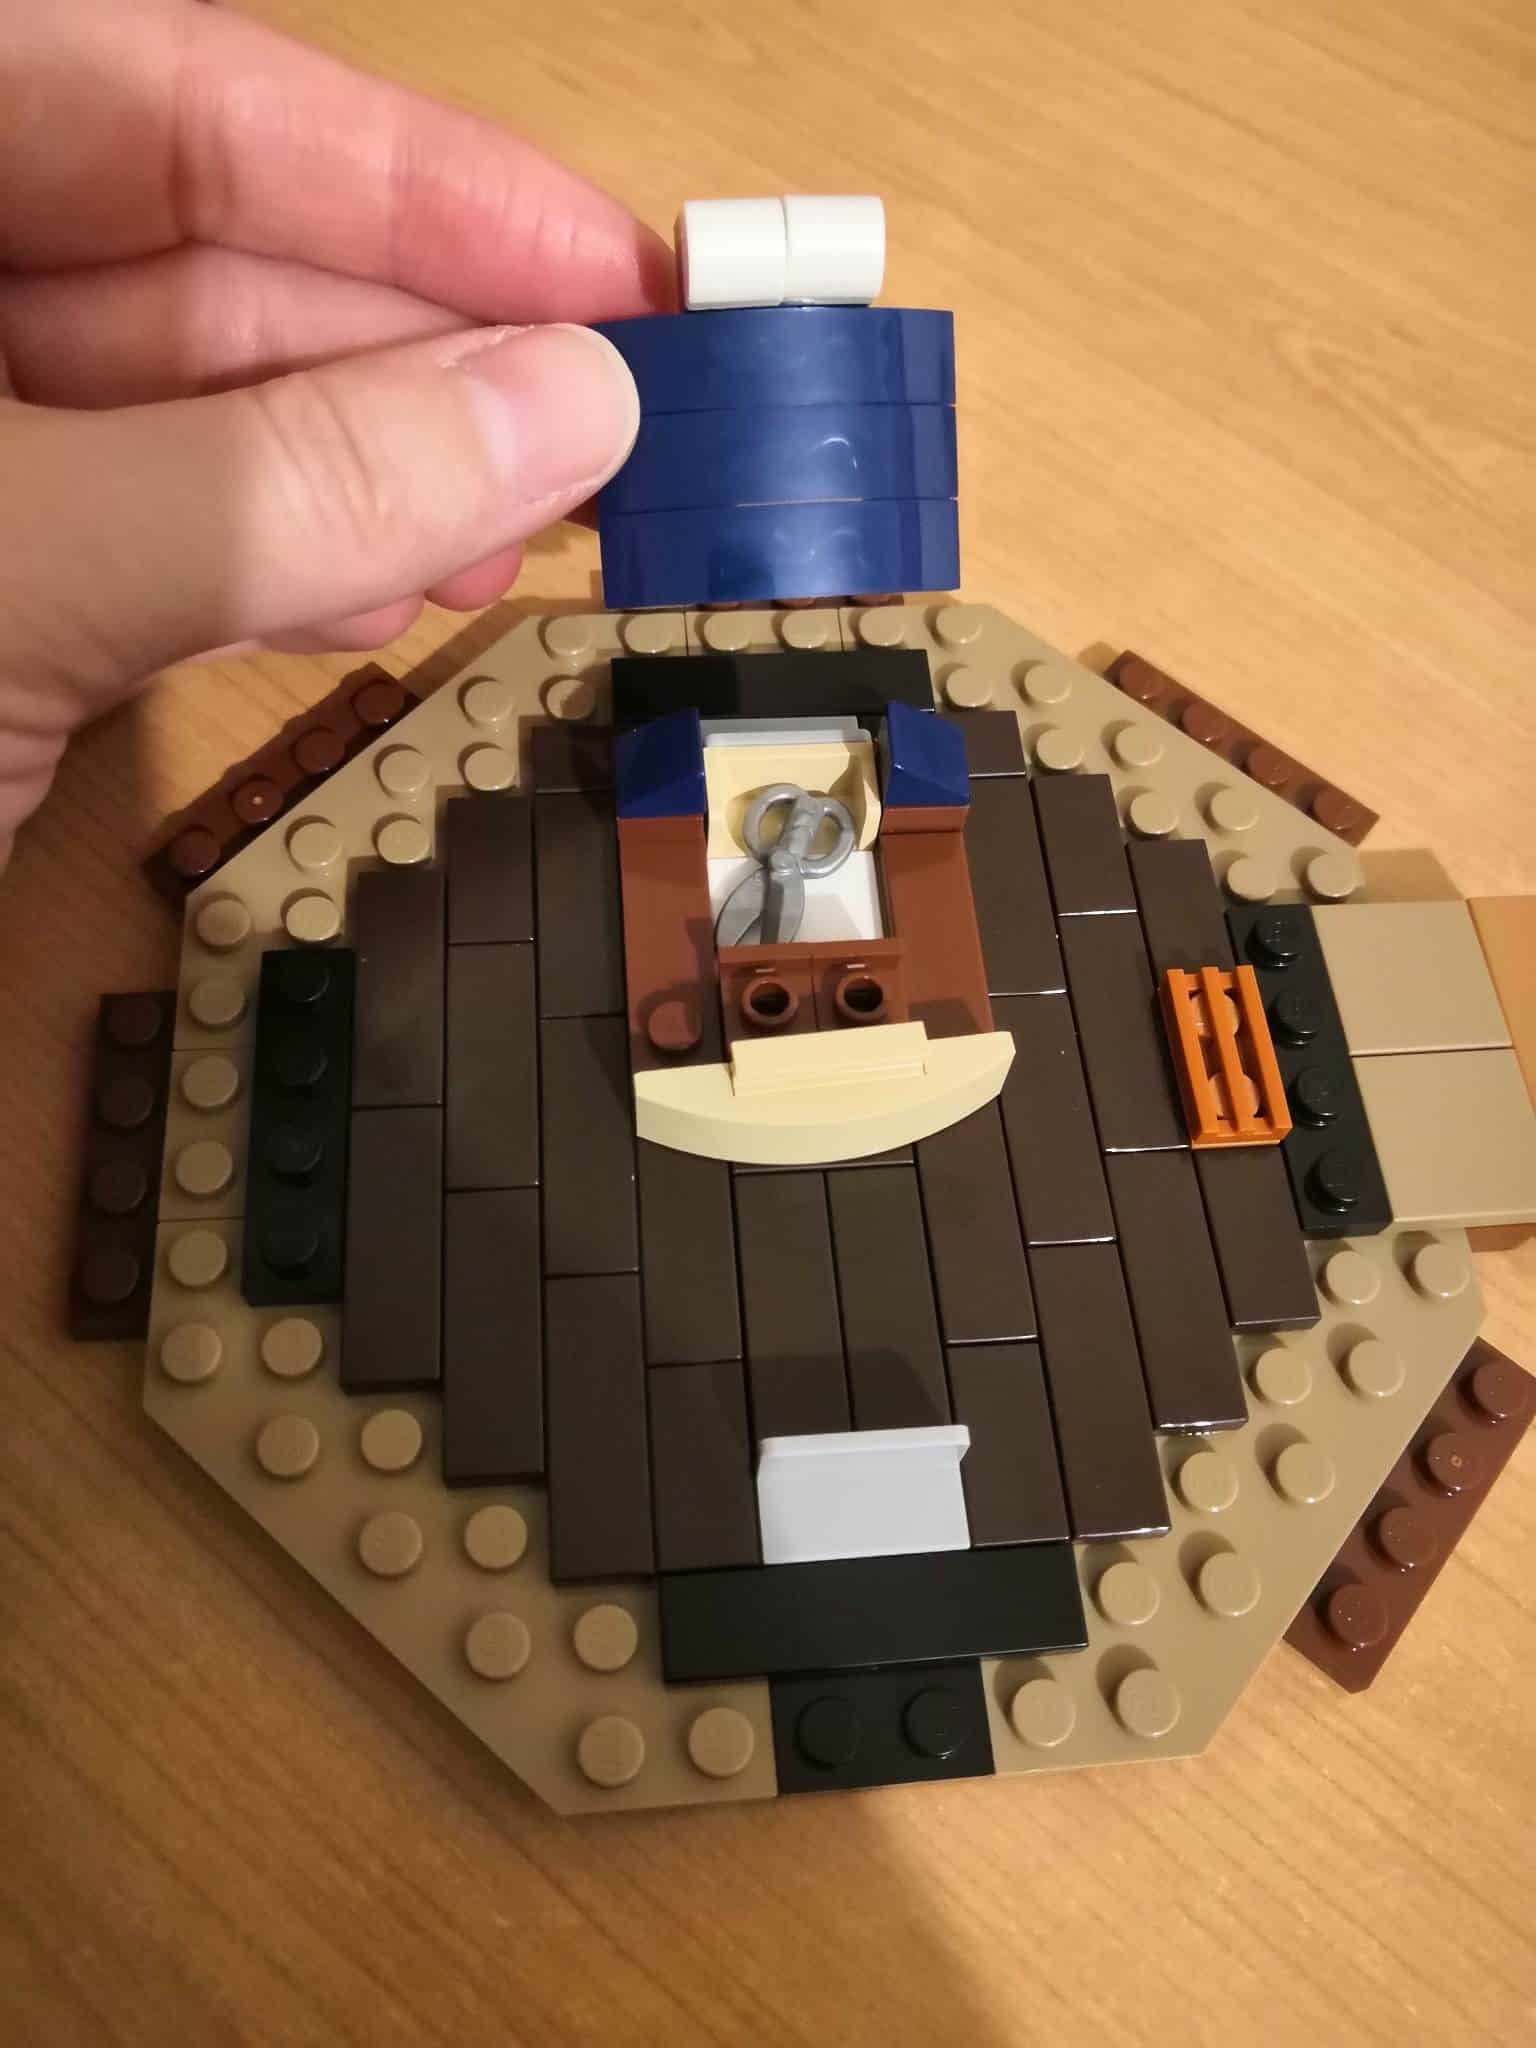
I really liked that the pieces inside the trunk are multi-colored. There’s so much brown in this set, so I’m glad that LEGO chose to mix that up for the pieces that wouldn’t be seen. There’s also a fun treat for the builder at the beginning, as you get to hide a bright yellow crystal under a patch of grass. Stuff like this really rewards you for building it yourself rather than buying a finished model.
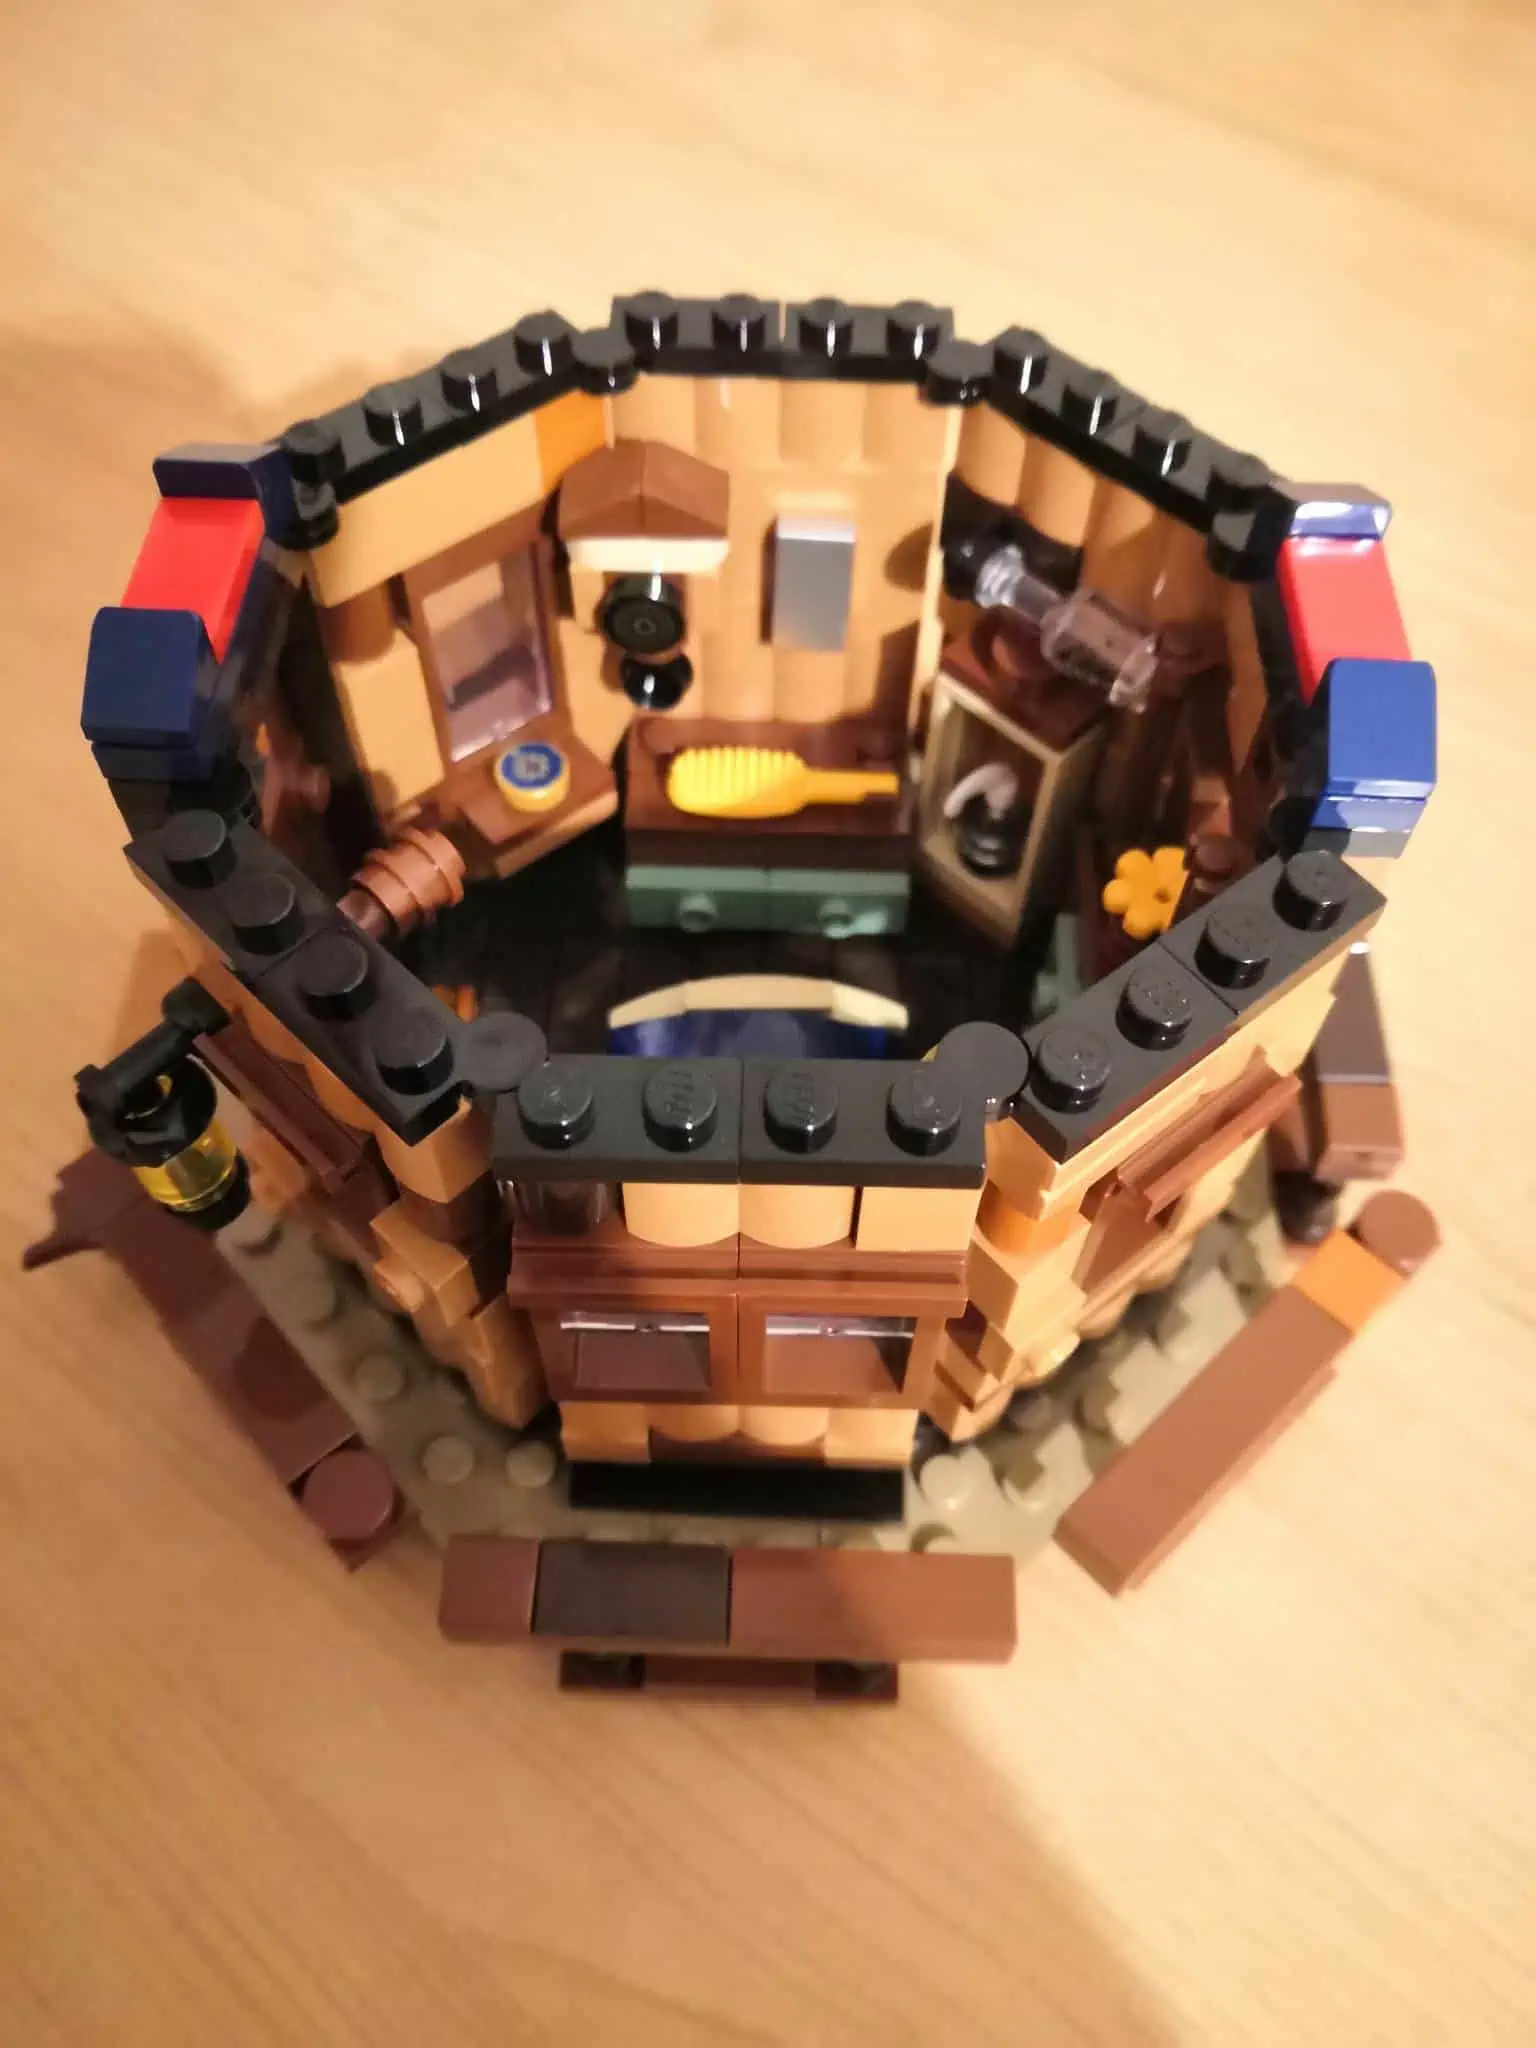
My favorite part of the build was stage 7, where I started on the first cabin. There’s so much detail crammed into such a tiny space, so it was really exciting fitting it all in. I especially loved hiding a pair of scissors under the bed. All the cabins were so different internally (a bedroom, a bathroom, and a kid’s bedroom). This helped the build feel varied and exciting.
The worst part of the cabins was attaching them to the tree. The studs just didn’t want to connect, and I wasted a good 5-10 minutes on each cabin just trying to get it to stay on/ repairing parts that fell off. When I attached the front, the back came off, and when I fixed the back, the front came off. It really was a matter of trial and error until they finally stayed in place.
The end of the build was incredibly boring, unfortunately. Attaching the leaves to branches and then connecting the branches to the tree was a nightmare. It wasn’t difficult, it just sapped the life out of me. I’m not entirely sure how this could’ve been designed to be more fun, as I’m not an expert. I just know that from a construction perspective, I didn’t enjoy it.
Changing the Leaves
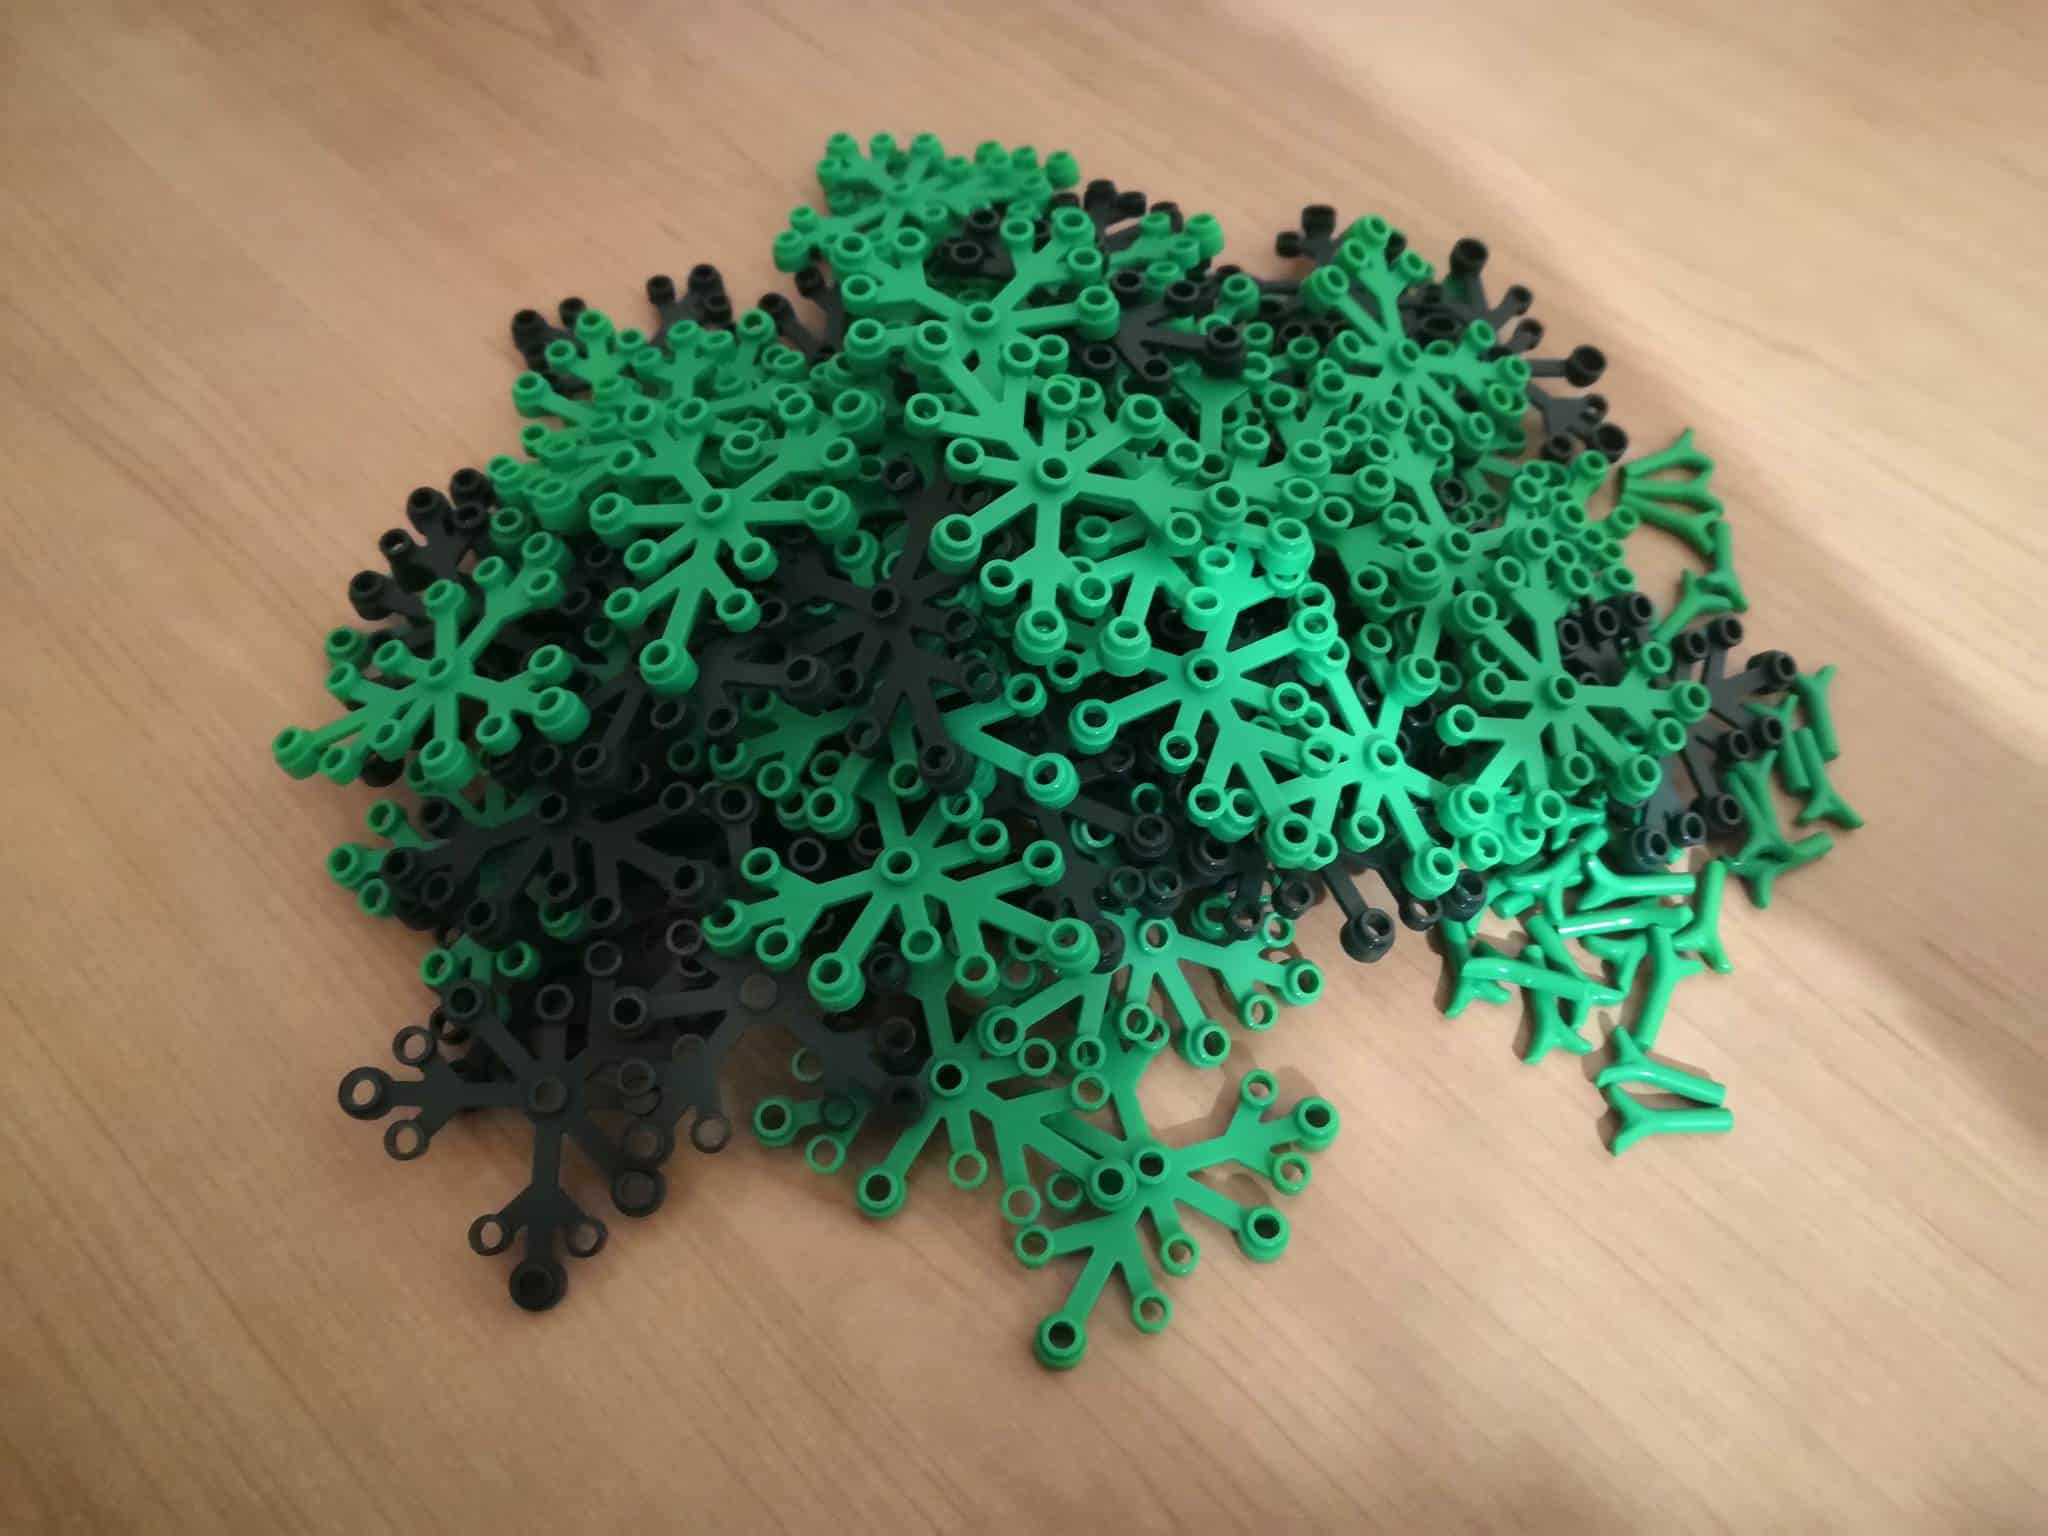
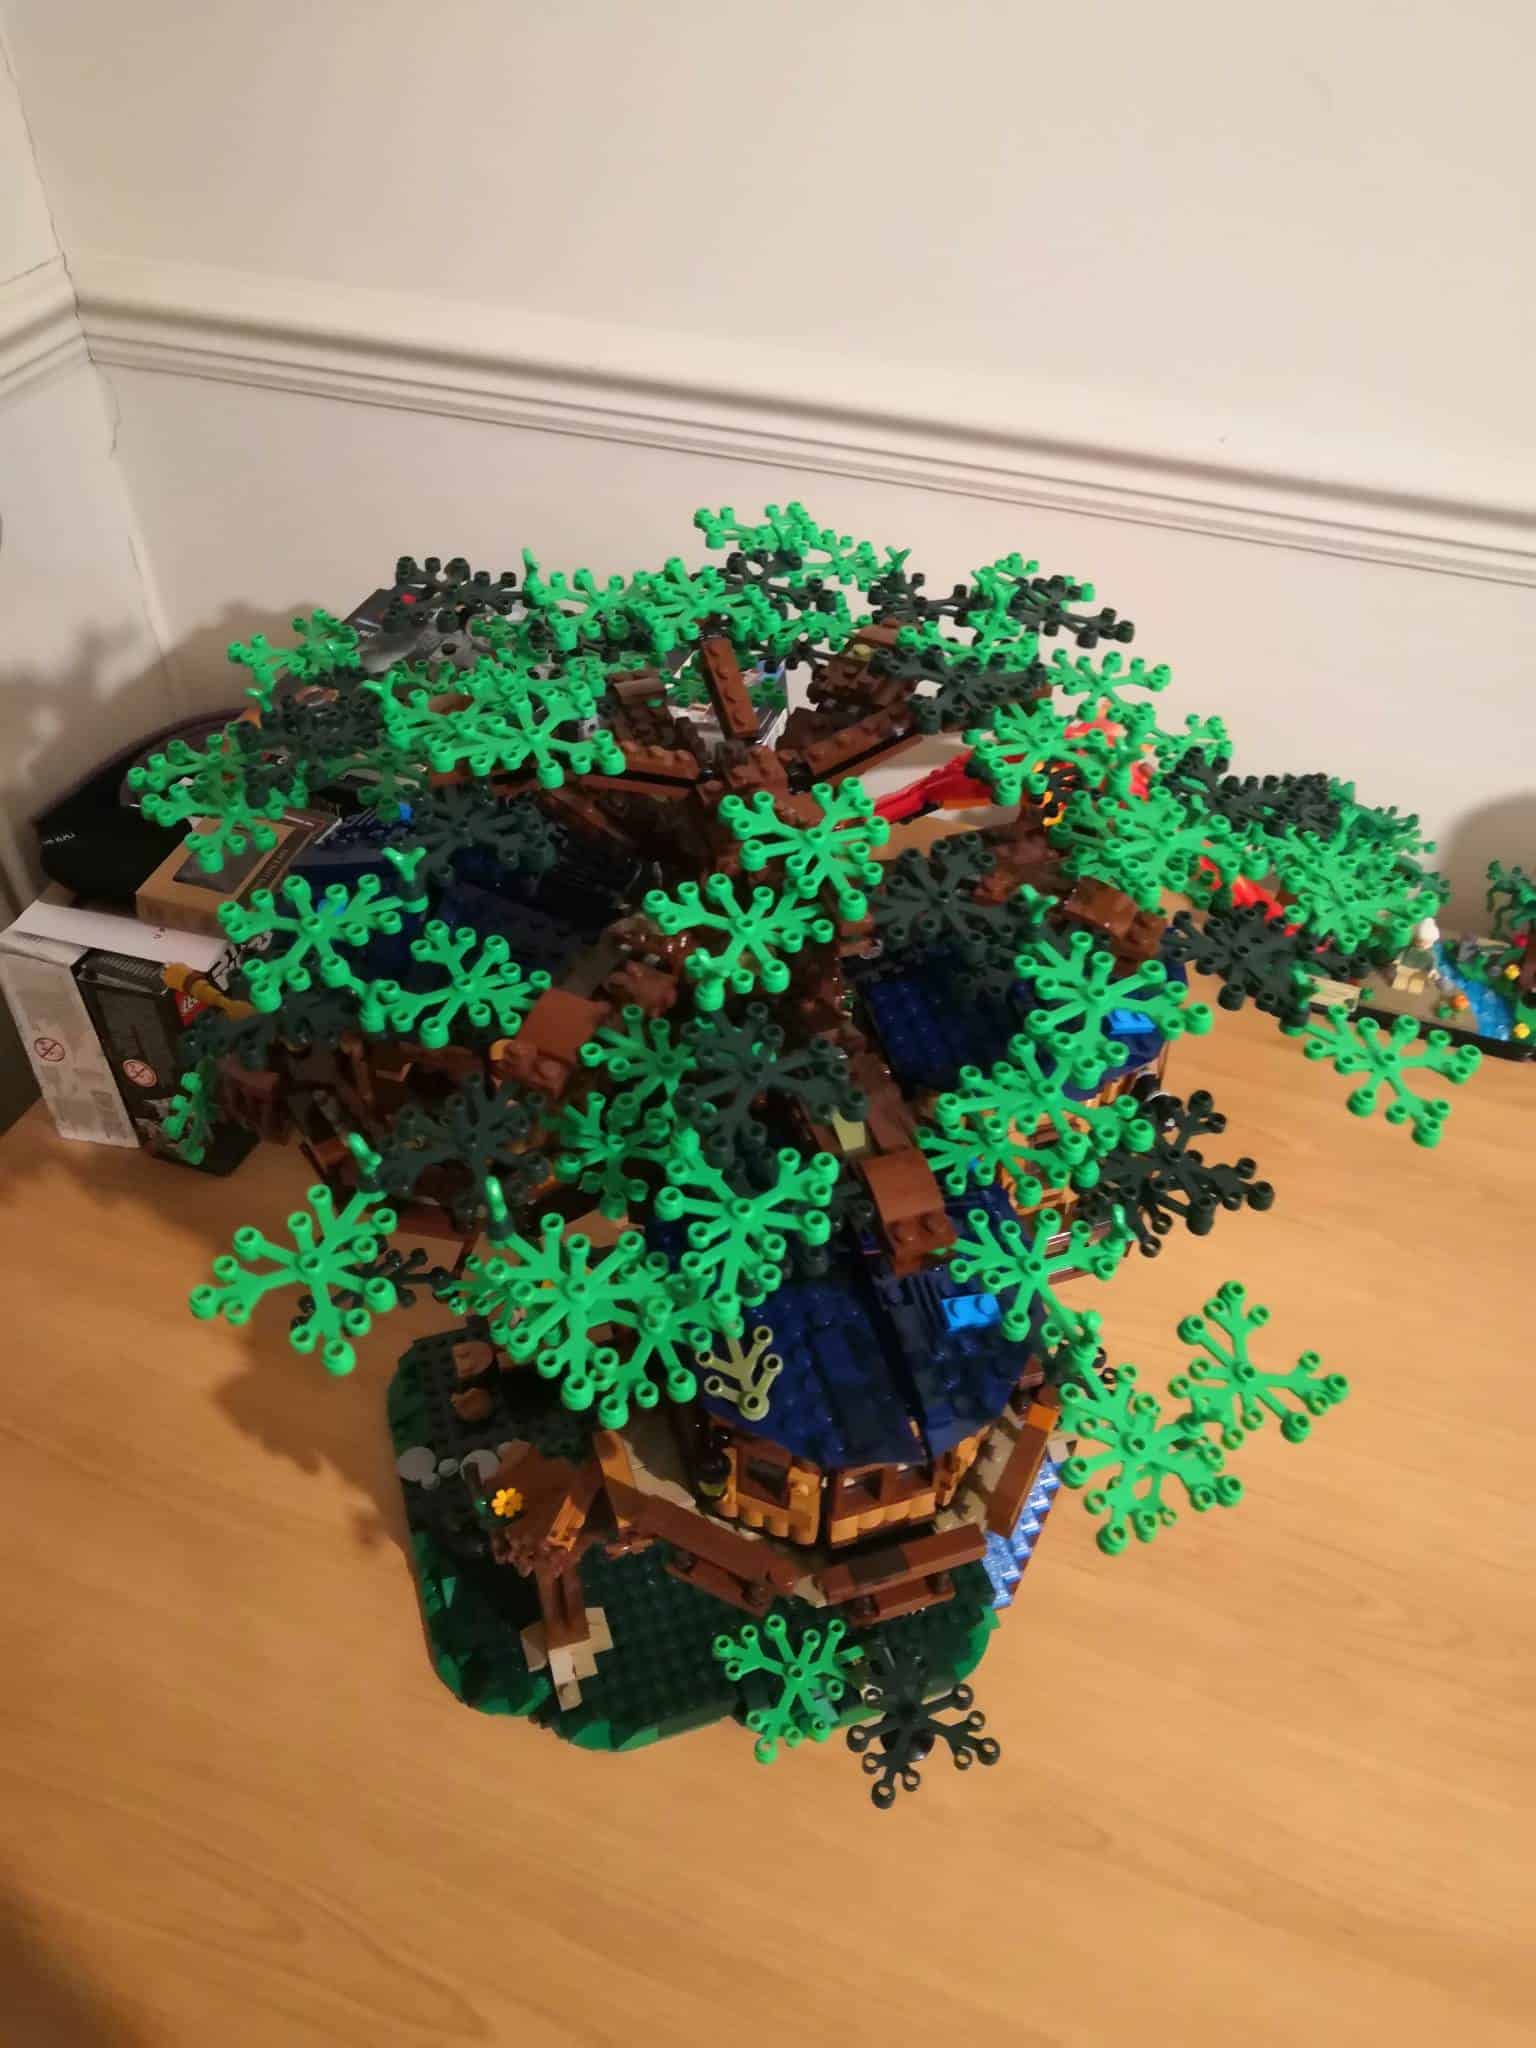
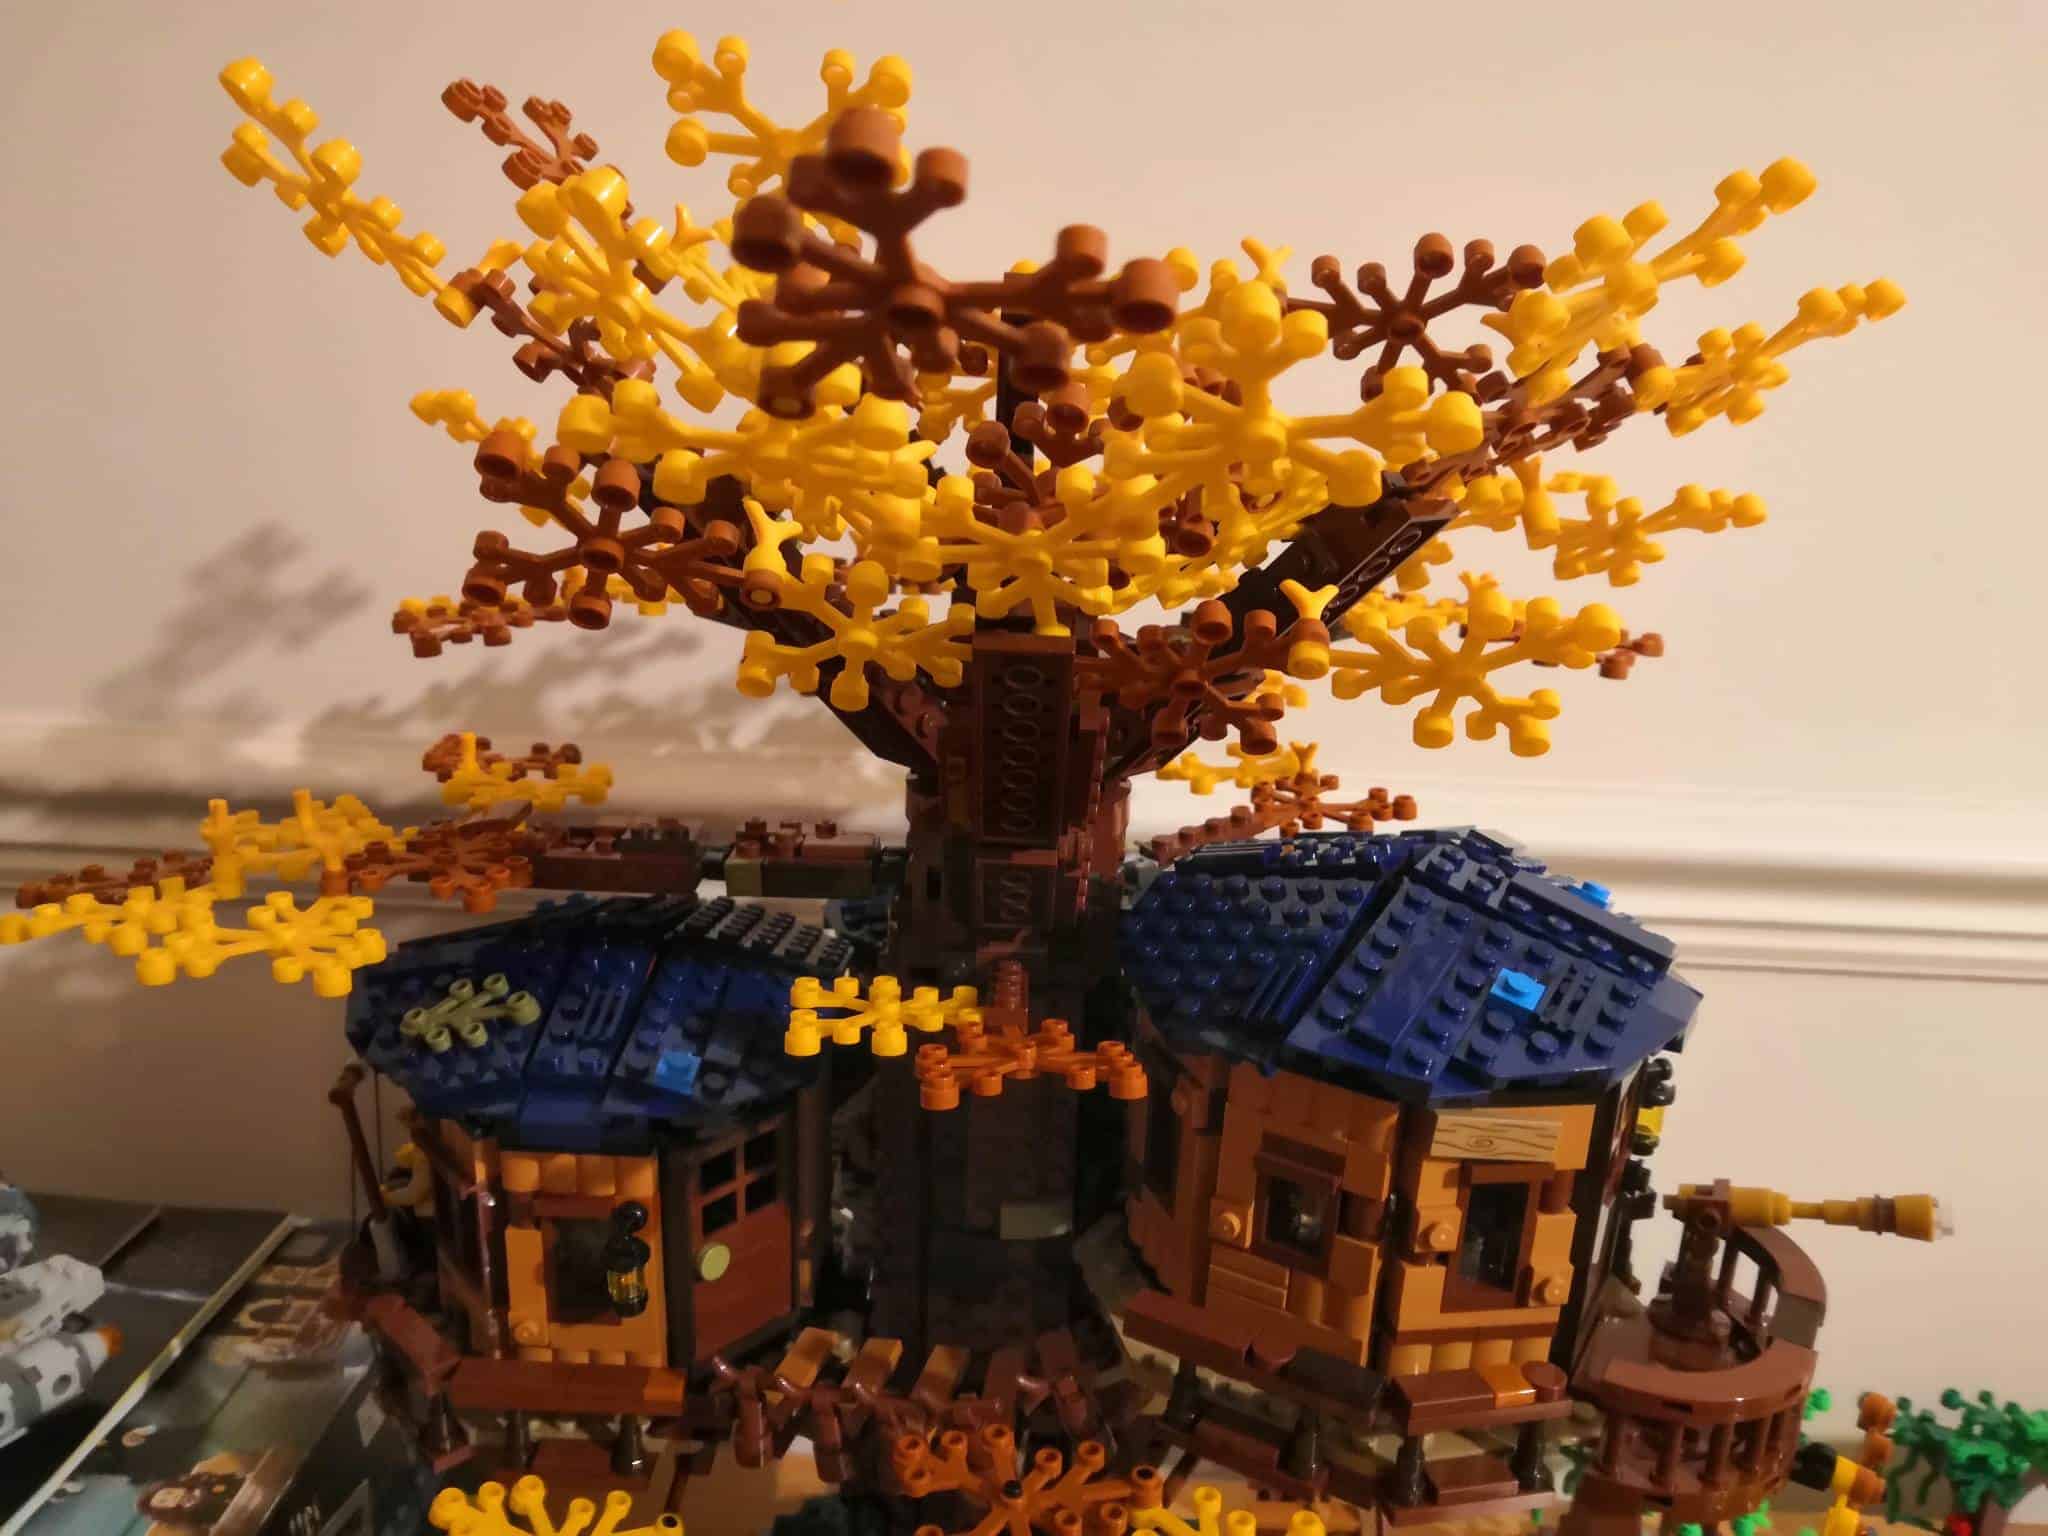
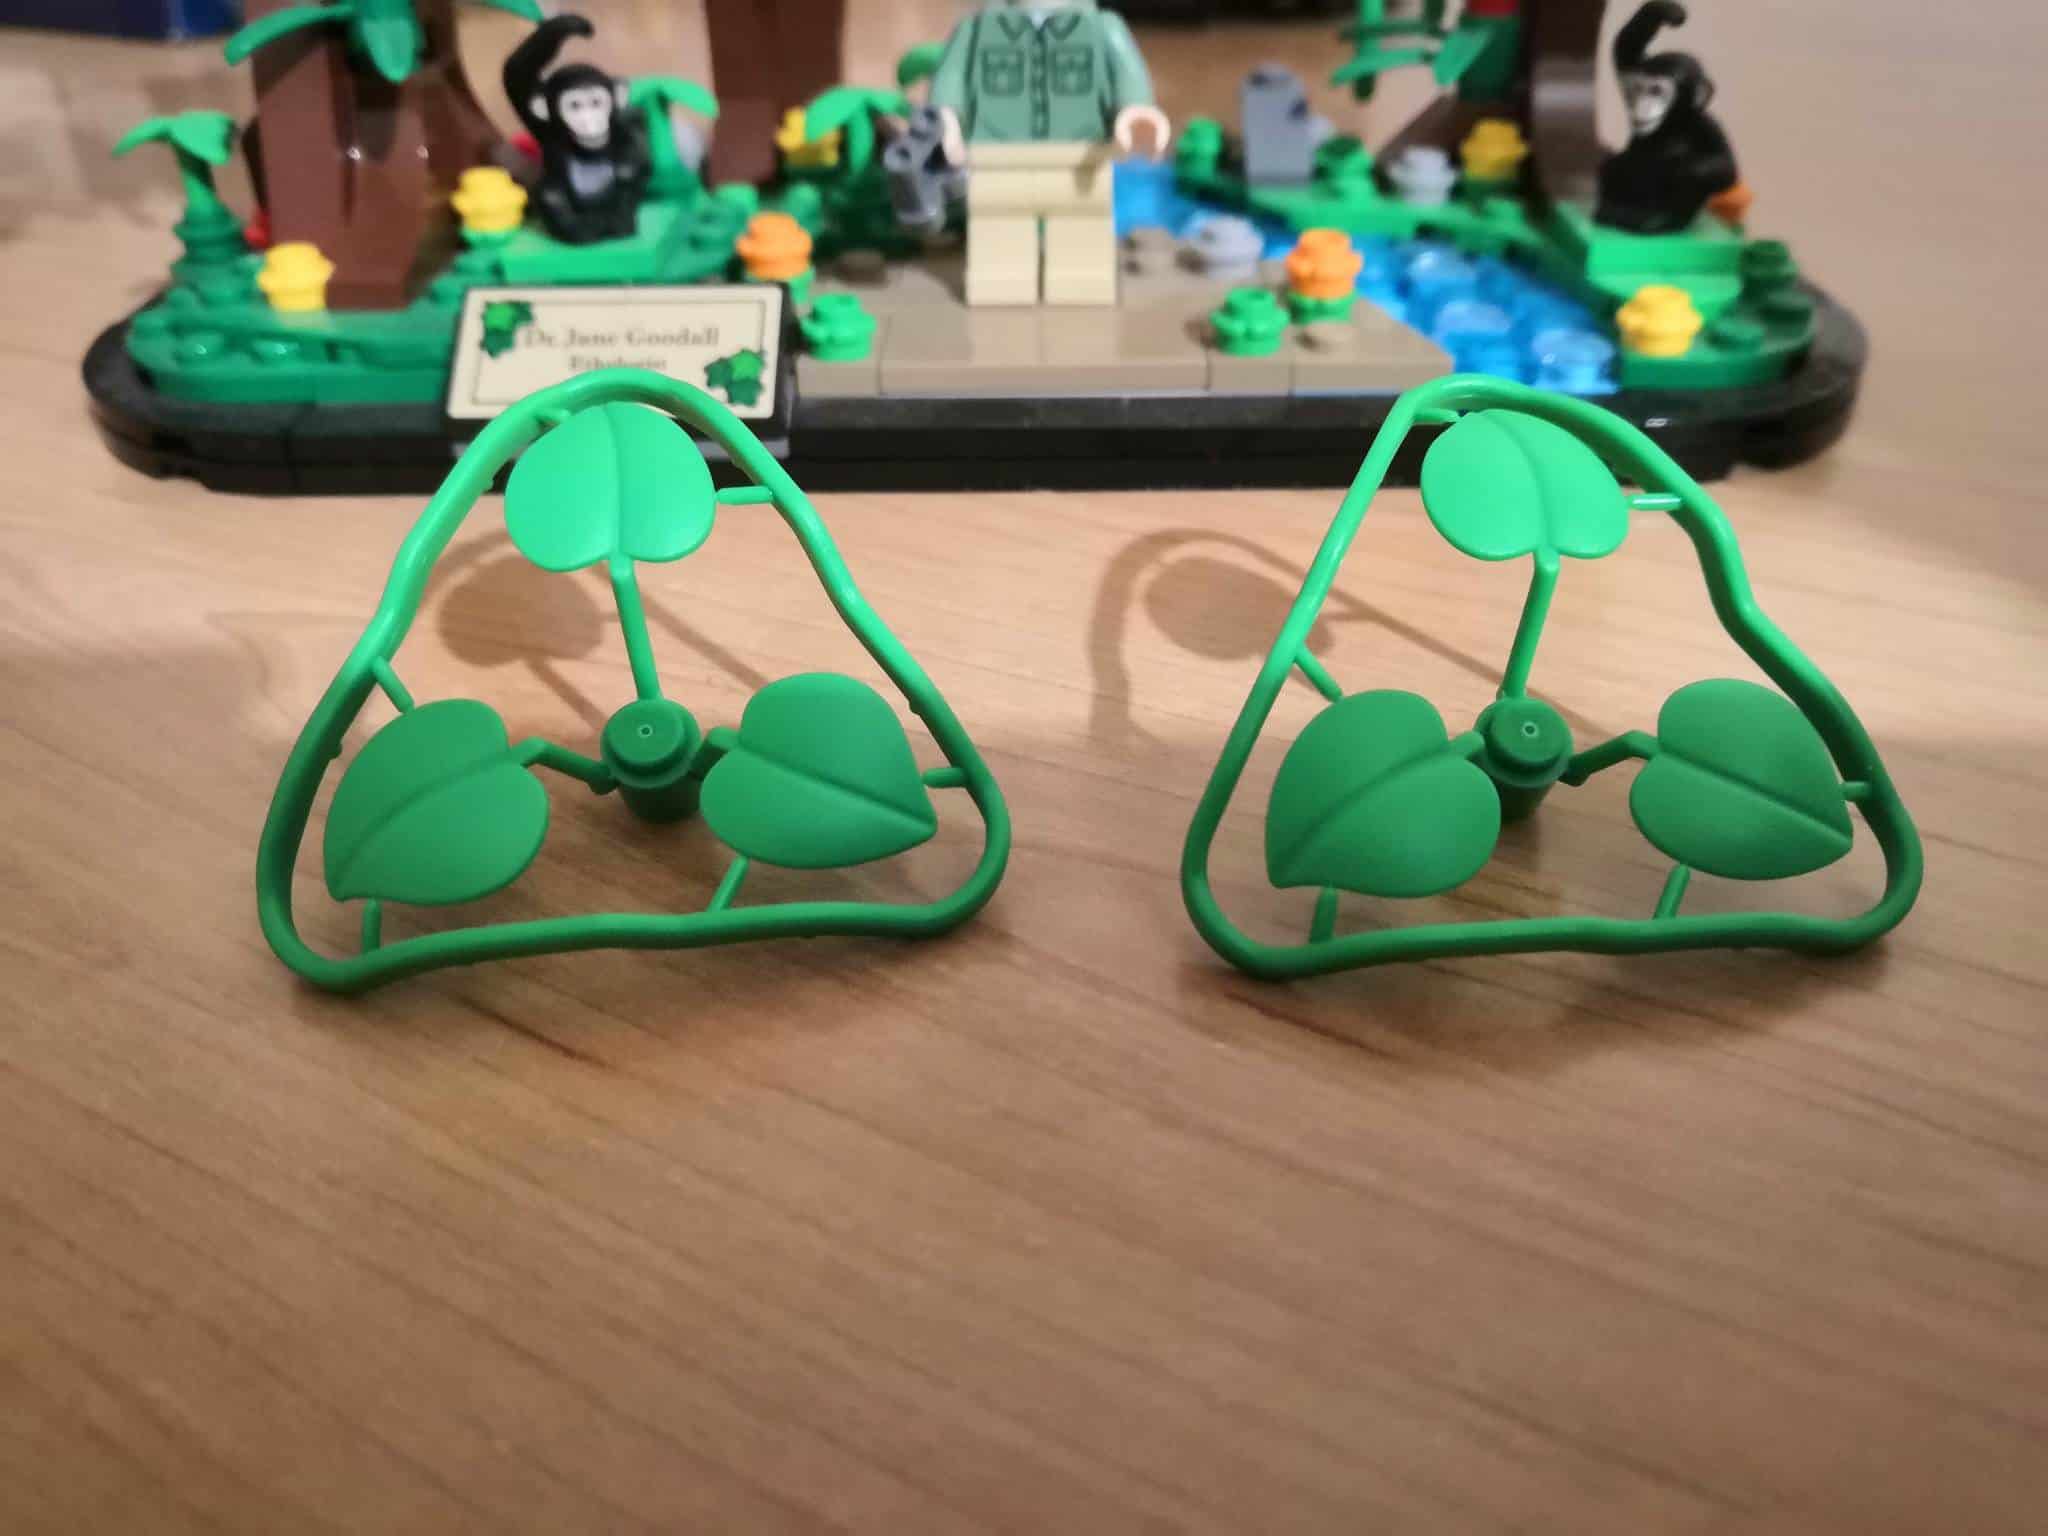
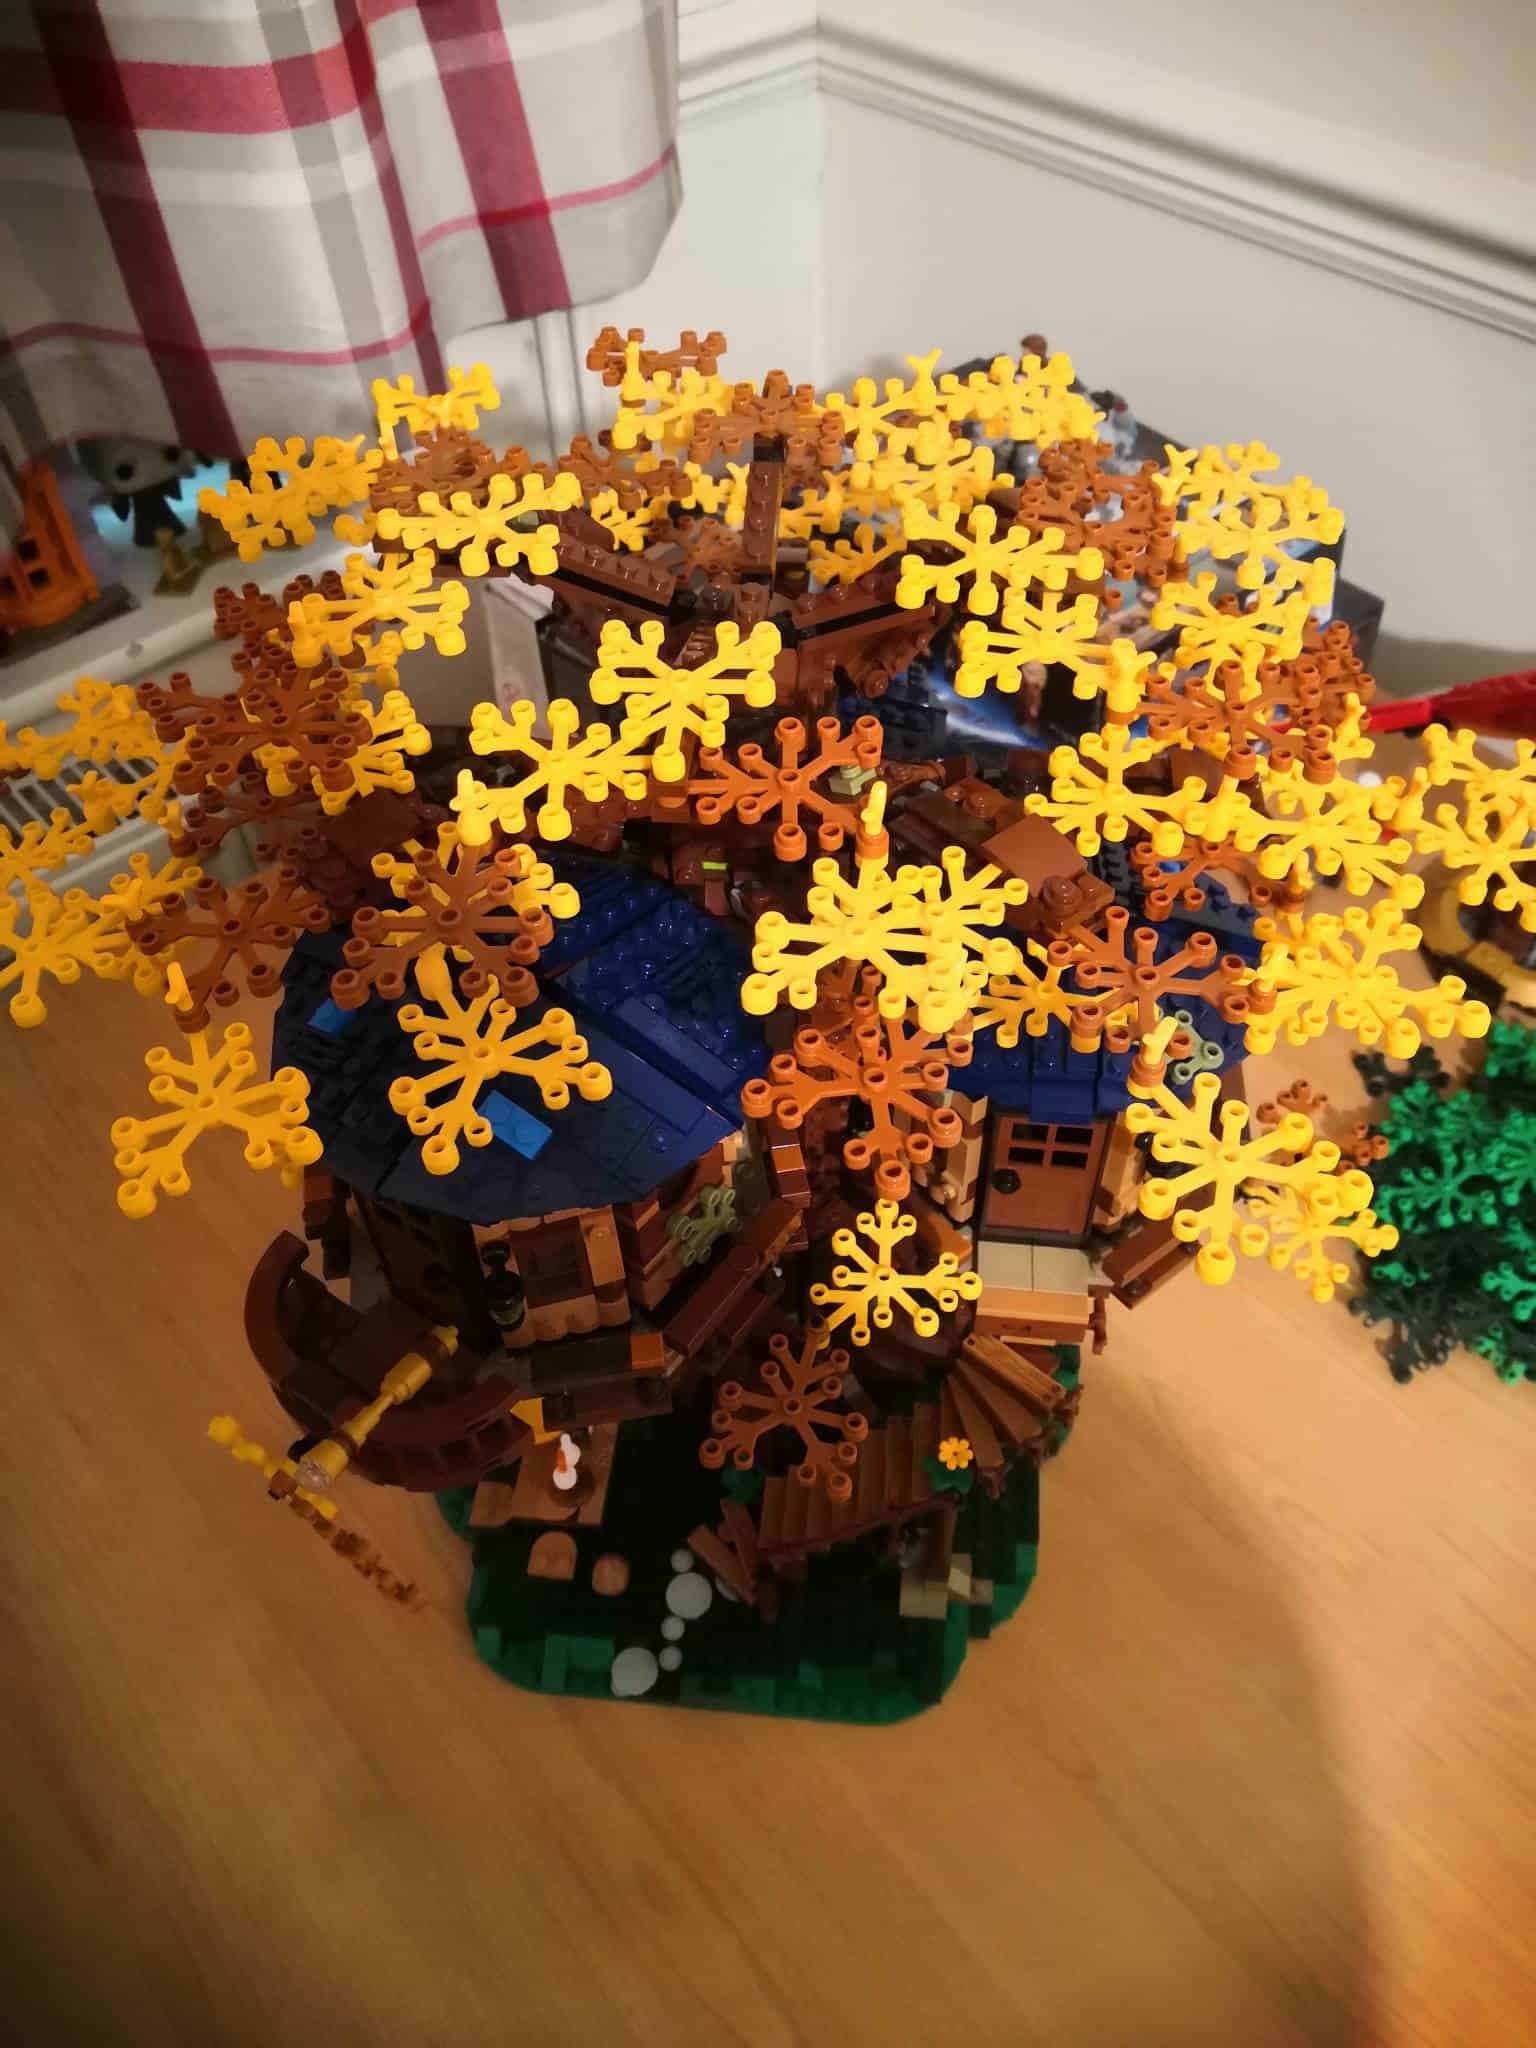
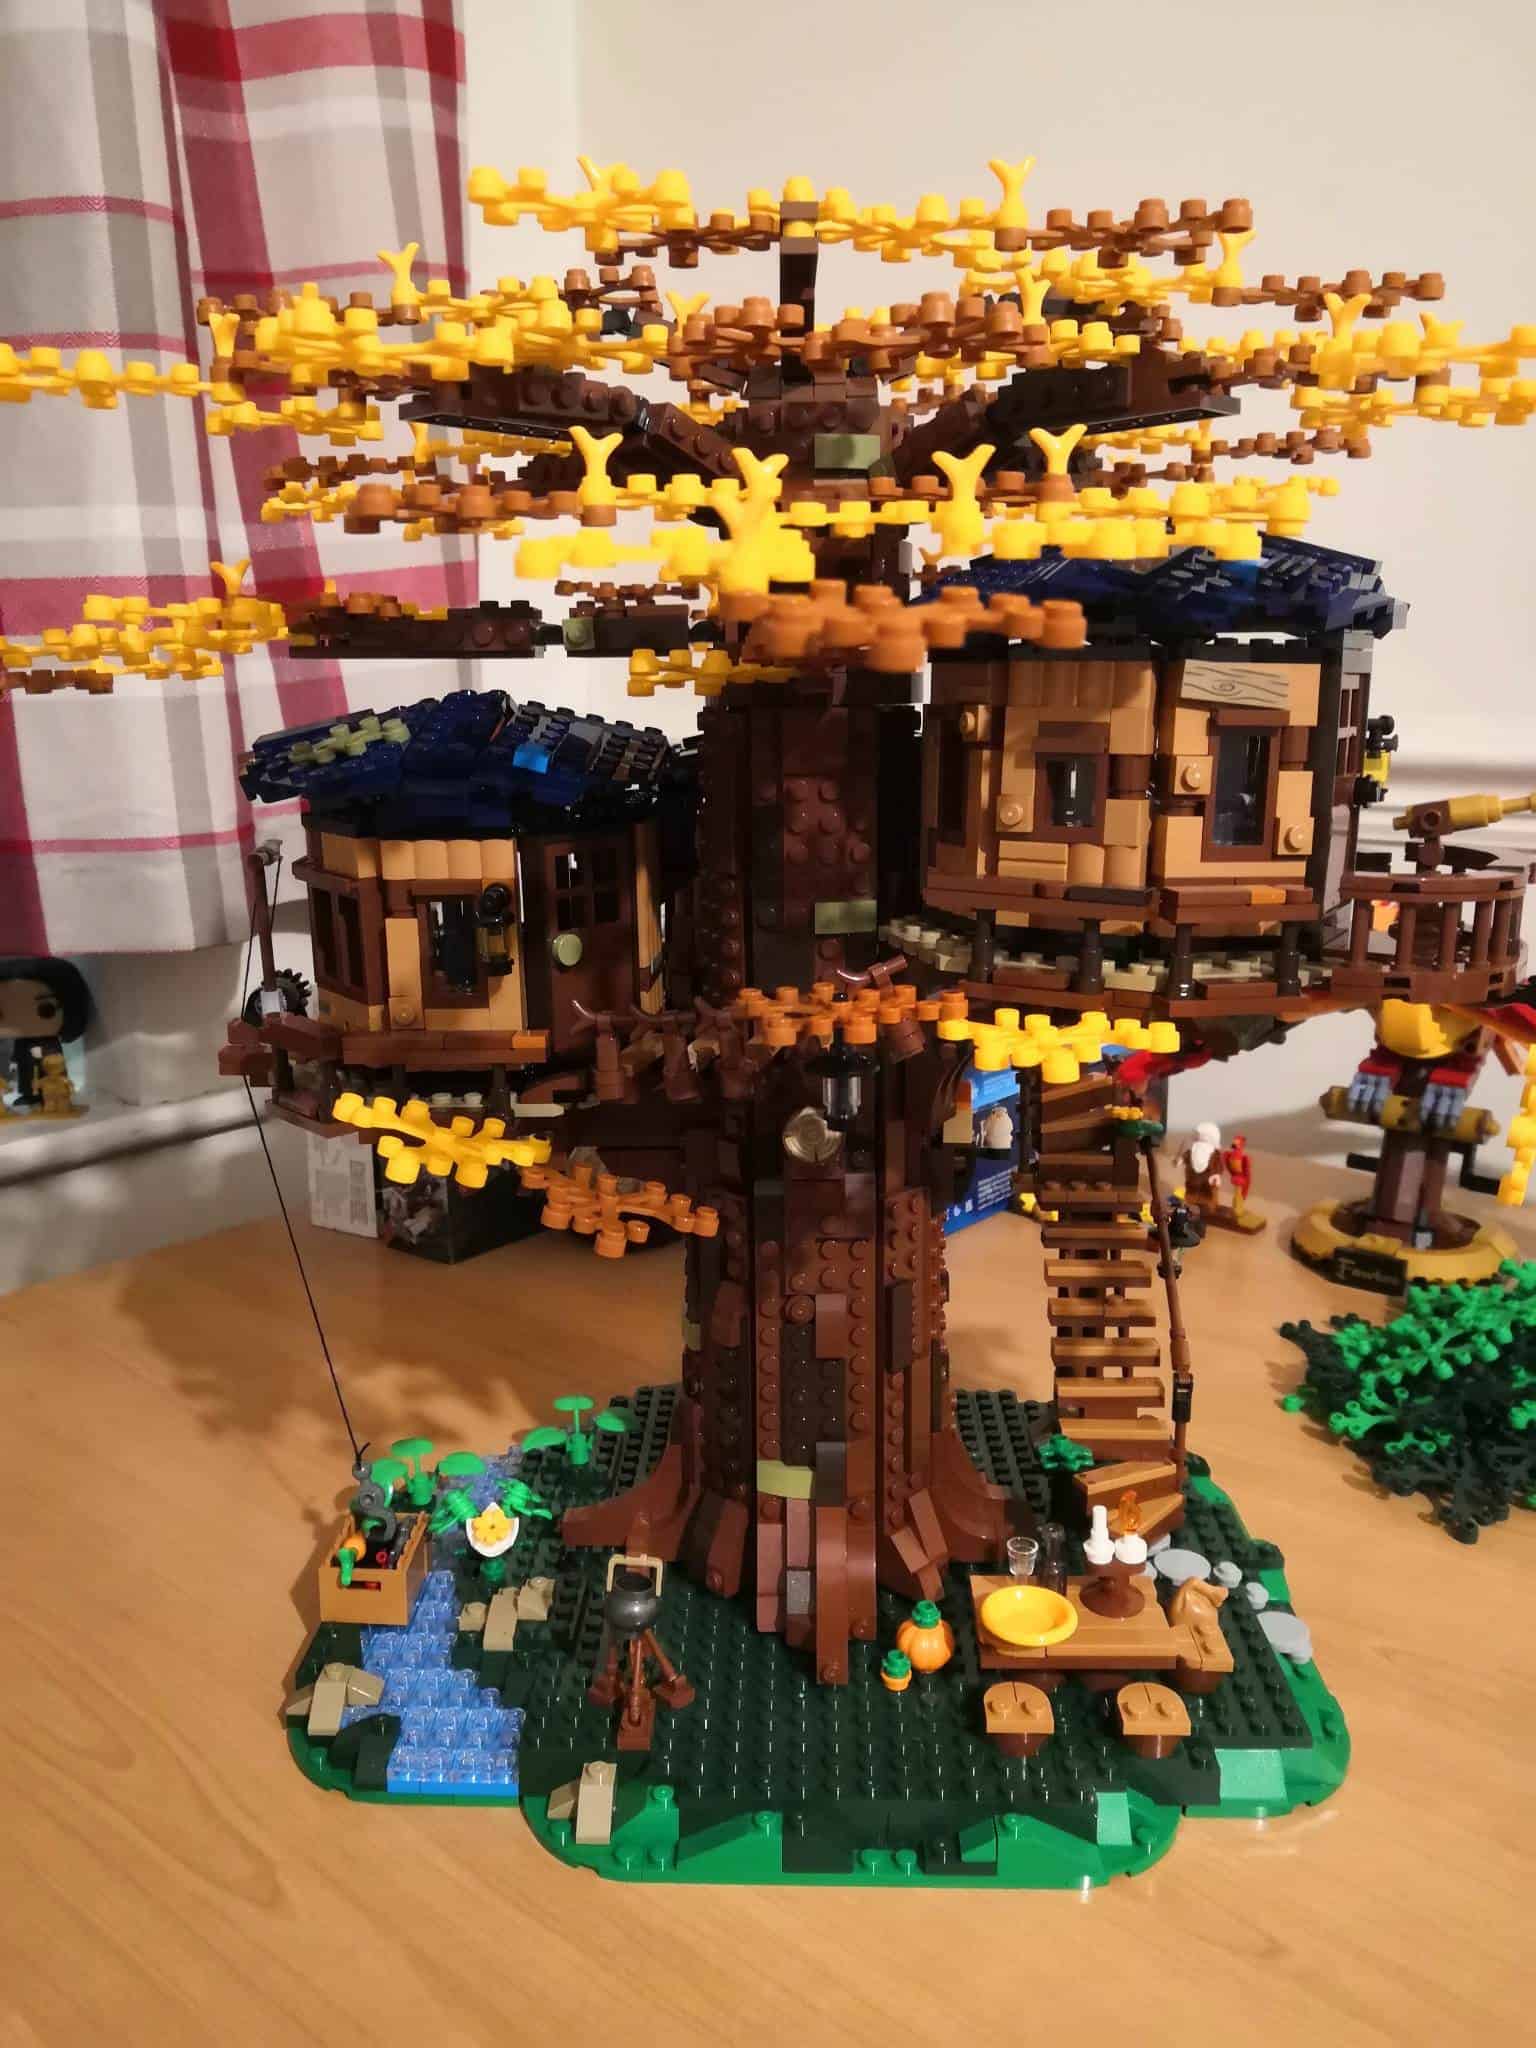
One of the major draws of this set is the ability to change the seasons. It comes with two sets of leaves, one in shades of green to represent summer, and then fall colors of yellow and brown. Going into this, I was excited to change them seasonally, but that changed when I put the first set of leaves on.
I don’t know why, but I’d assumed the leaves would just be attached randomly on top of the branches… That’s not the case. Instead, they’re built into the branches and then connected to each other using sticks as supports. Admittedly, that part is pretty genius, as it holds the leaves together much more firmly than just a 1×1 stud-on-stud connection.
However, it does mean it’s a bit of a pain to change them. Thankfully, I found an efficient method to do it, so it only took me 40 minutes, which isn’t as long as I expected. Here’s how to change the leaves more easily –
- Lift the upper and middle branches – The branches are all attached on a hinge, so you can bend them upwards. Do this for the top two layers so that the lowest layer is easily accessible.
- Work in a circle – Choose one of the lower branches to change first. Once you’ve done that, you’ll go around and do the full lower layer. After that, do the same for the middle layer, and then the top layer, bending them back down flat each time.
- Only remove the end of the branch – Most branches are attached with two hinges, and you only need to take off the outer hinge. This’ll make it easier to reattach once the leaves are changed.
- Count the pieces – Dark-green corresponds to brown, and light-green corresponds to yellow. Count how many of each color there are, as well as how many sticks, and prepare the pieces for the new season.
- Build the structures – Then, use the sticks to build the leaf structure. Pay attention to how the leaves connect in the original season.
- Dismantle only as much as you need to – Once all the structures are prepared, carefully remove the branch pieces that are on top of the leaf pieces. Only move the ones directly on top of leaves. Take off the old ones, paying attention to which stud they were on, and then attach the new leaves. Finally, replace the branch pieces, and then click the whole thing back into the hinge on the tree.
Time to Build
Overall the time to build this set was as follows:
- Stage 1 – 55 minutes
- Stage 2 – 35 minutes
- Stage 3 – 10 minutes
- Stage 4 – 55 minutes
- Stage 5 – 40 minutes
- Stage 6 – 1 hour
- Stage 7 – 40 minutes
- Stage 8 – 35 minutes
- Stage 9 – 30 minutes
- Stage 10 – 55 minutes
- Stage 11 – 40 minutes
- Stage 12 – 35 minutes
- Stage 13 – 50 minutes
- Stage 14 – 25 minutes
- Stage 15 – 20 minutes
- Stage 16 – 25 minutes
- Stage 17 – 30 minutes
- Stage 18 – 30 minutes
- Stage 19 – 25 minutes
- Total – 11 hours and 35 minutes
- Changing the Leaves – 40 minutes
All stages were 1 bag except for stages 1 and 13, which both used 2 bags. Stages 17-19 also used leaves (either green or yellow/ brown), which are bagged separately.
Finished Product
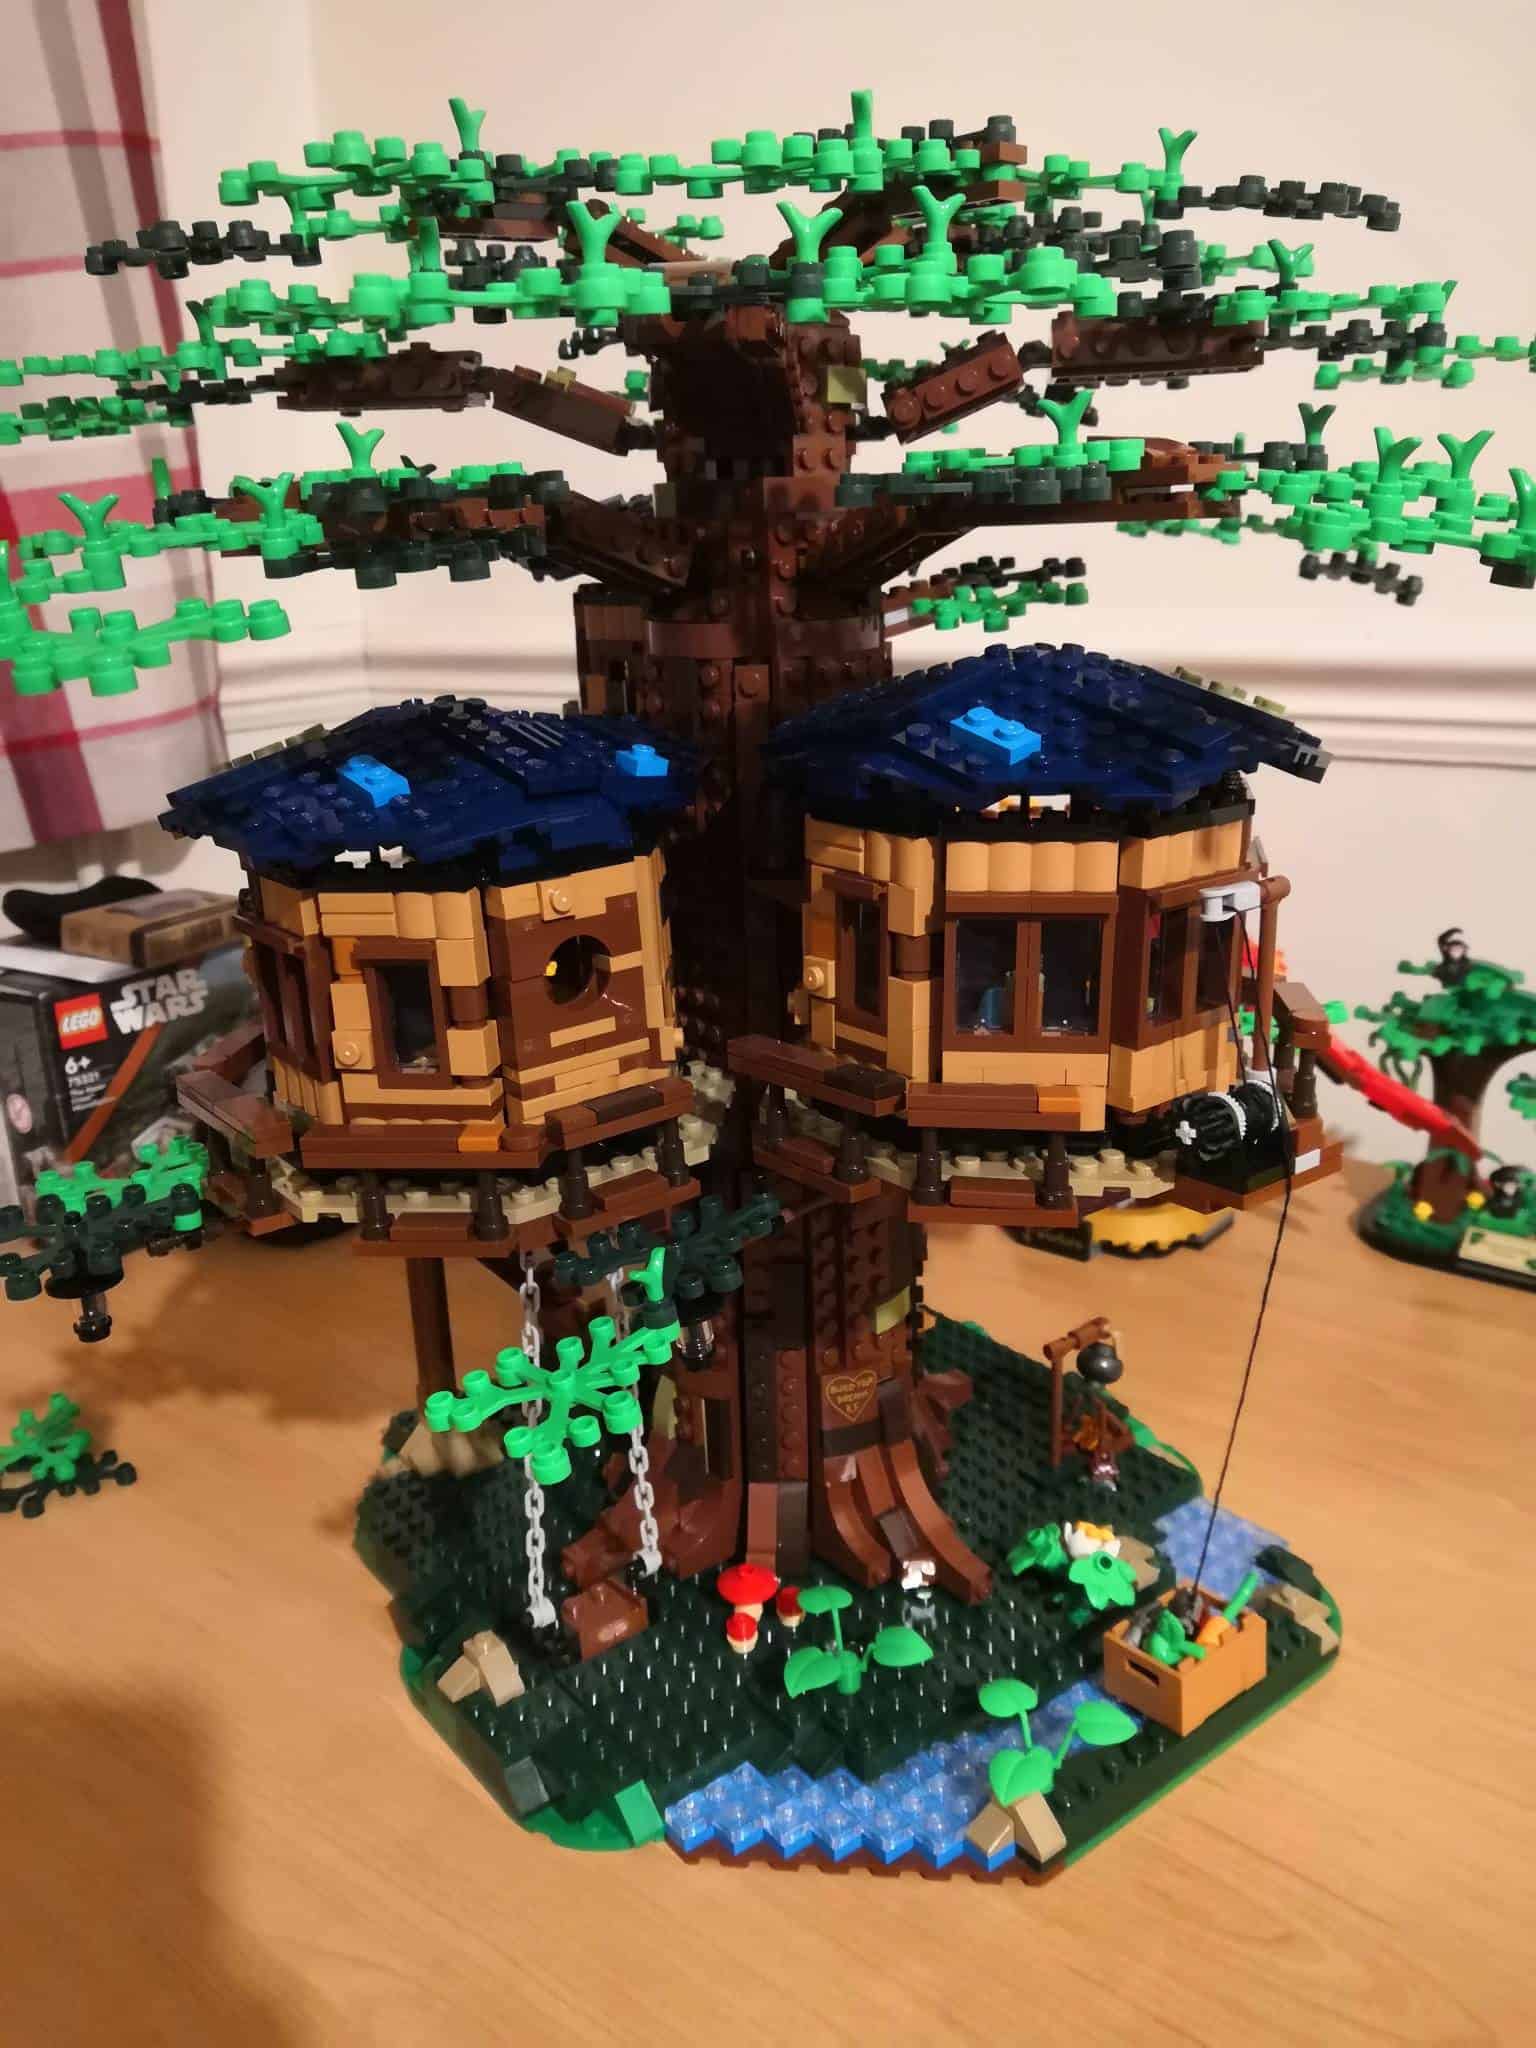
I cannot express how much I love the look of the finished set. I honestly didn’t realize just how gorgeous it was going to be. It looks amazing on the box and was tempting enough for me to buy it, but it’s still even better in real life. It’s so captivating and really draws your attention.
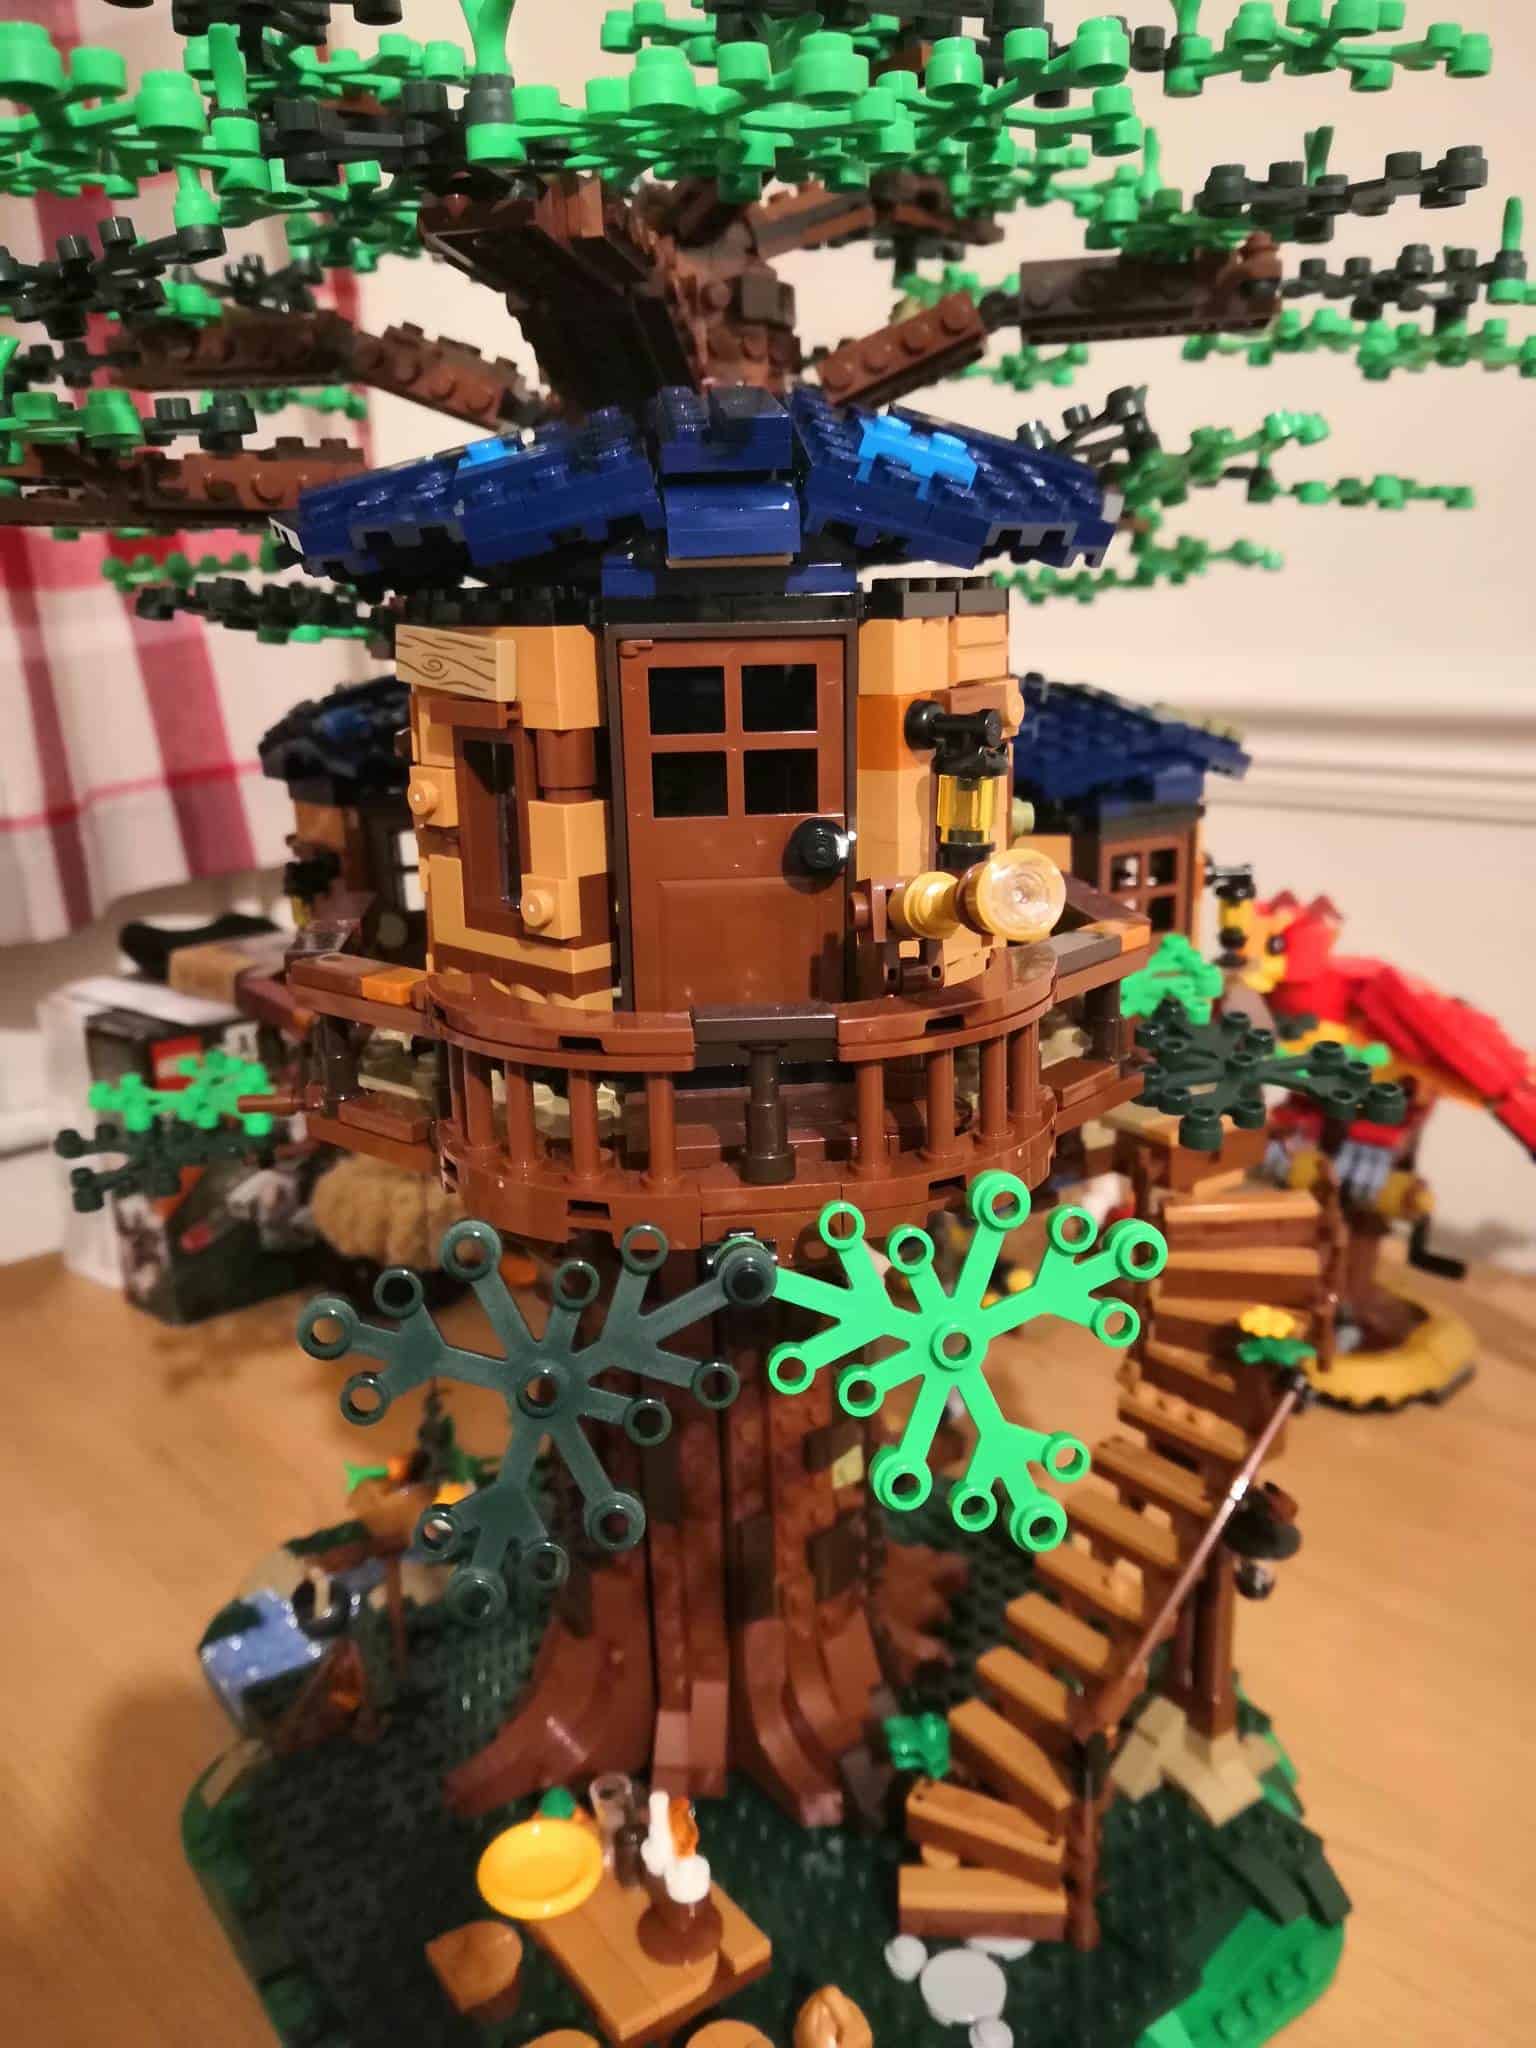
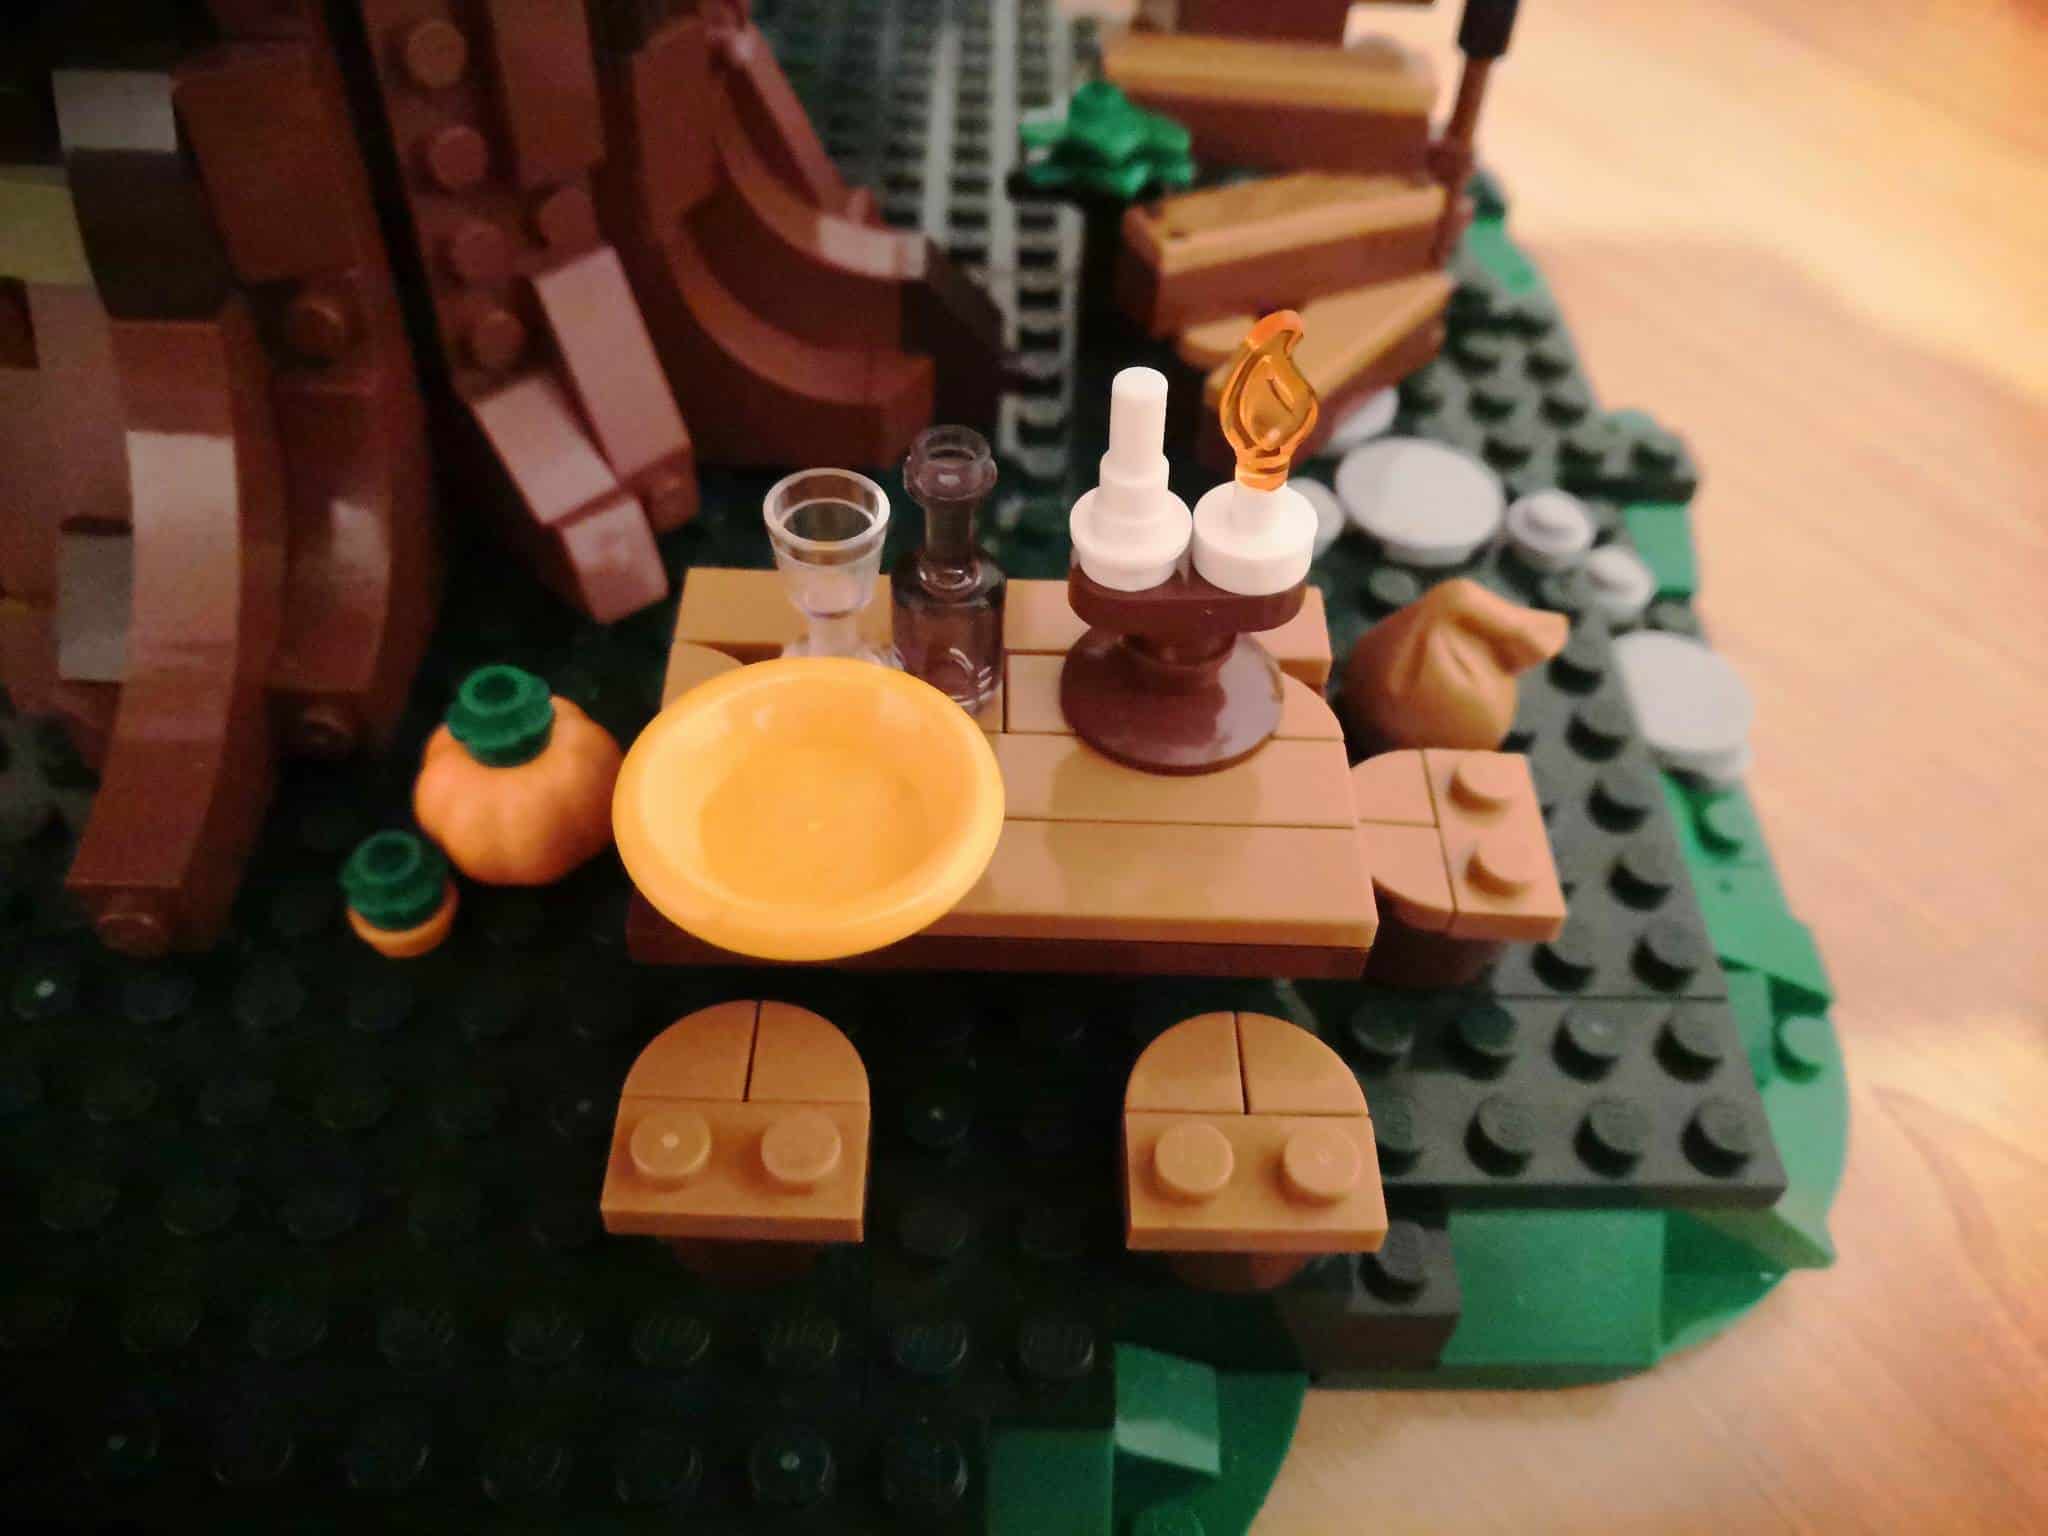
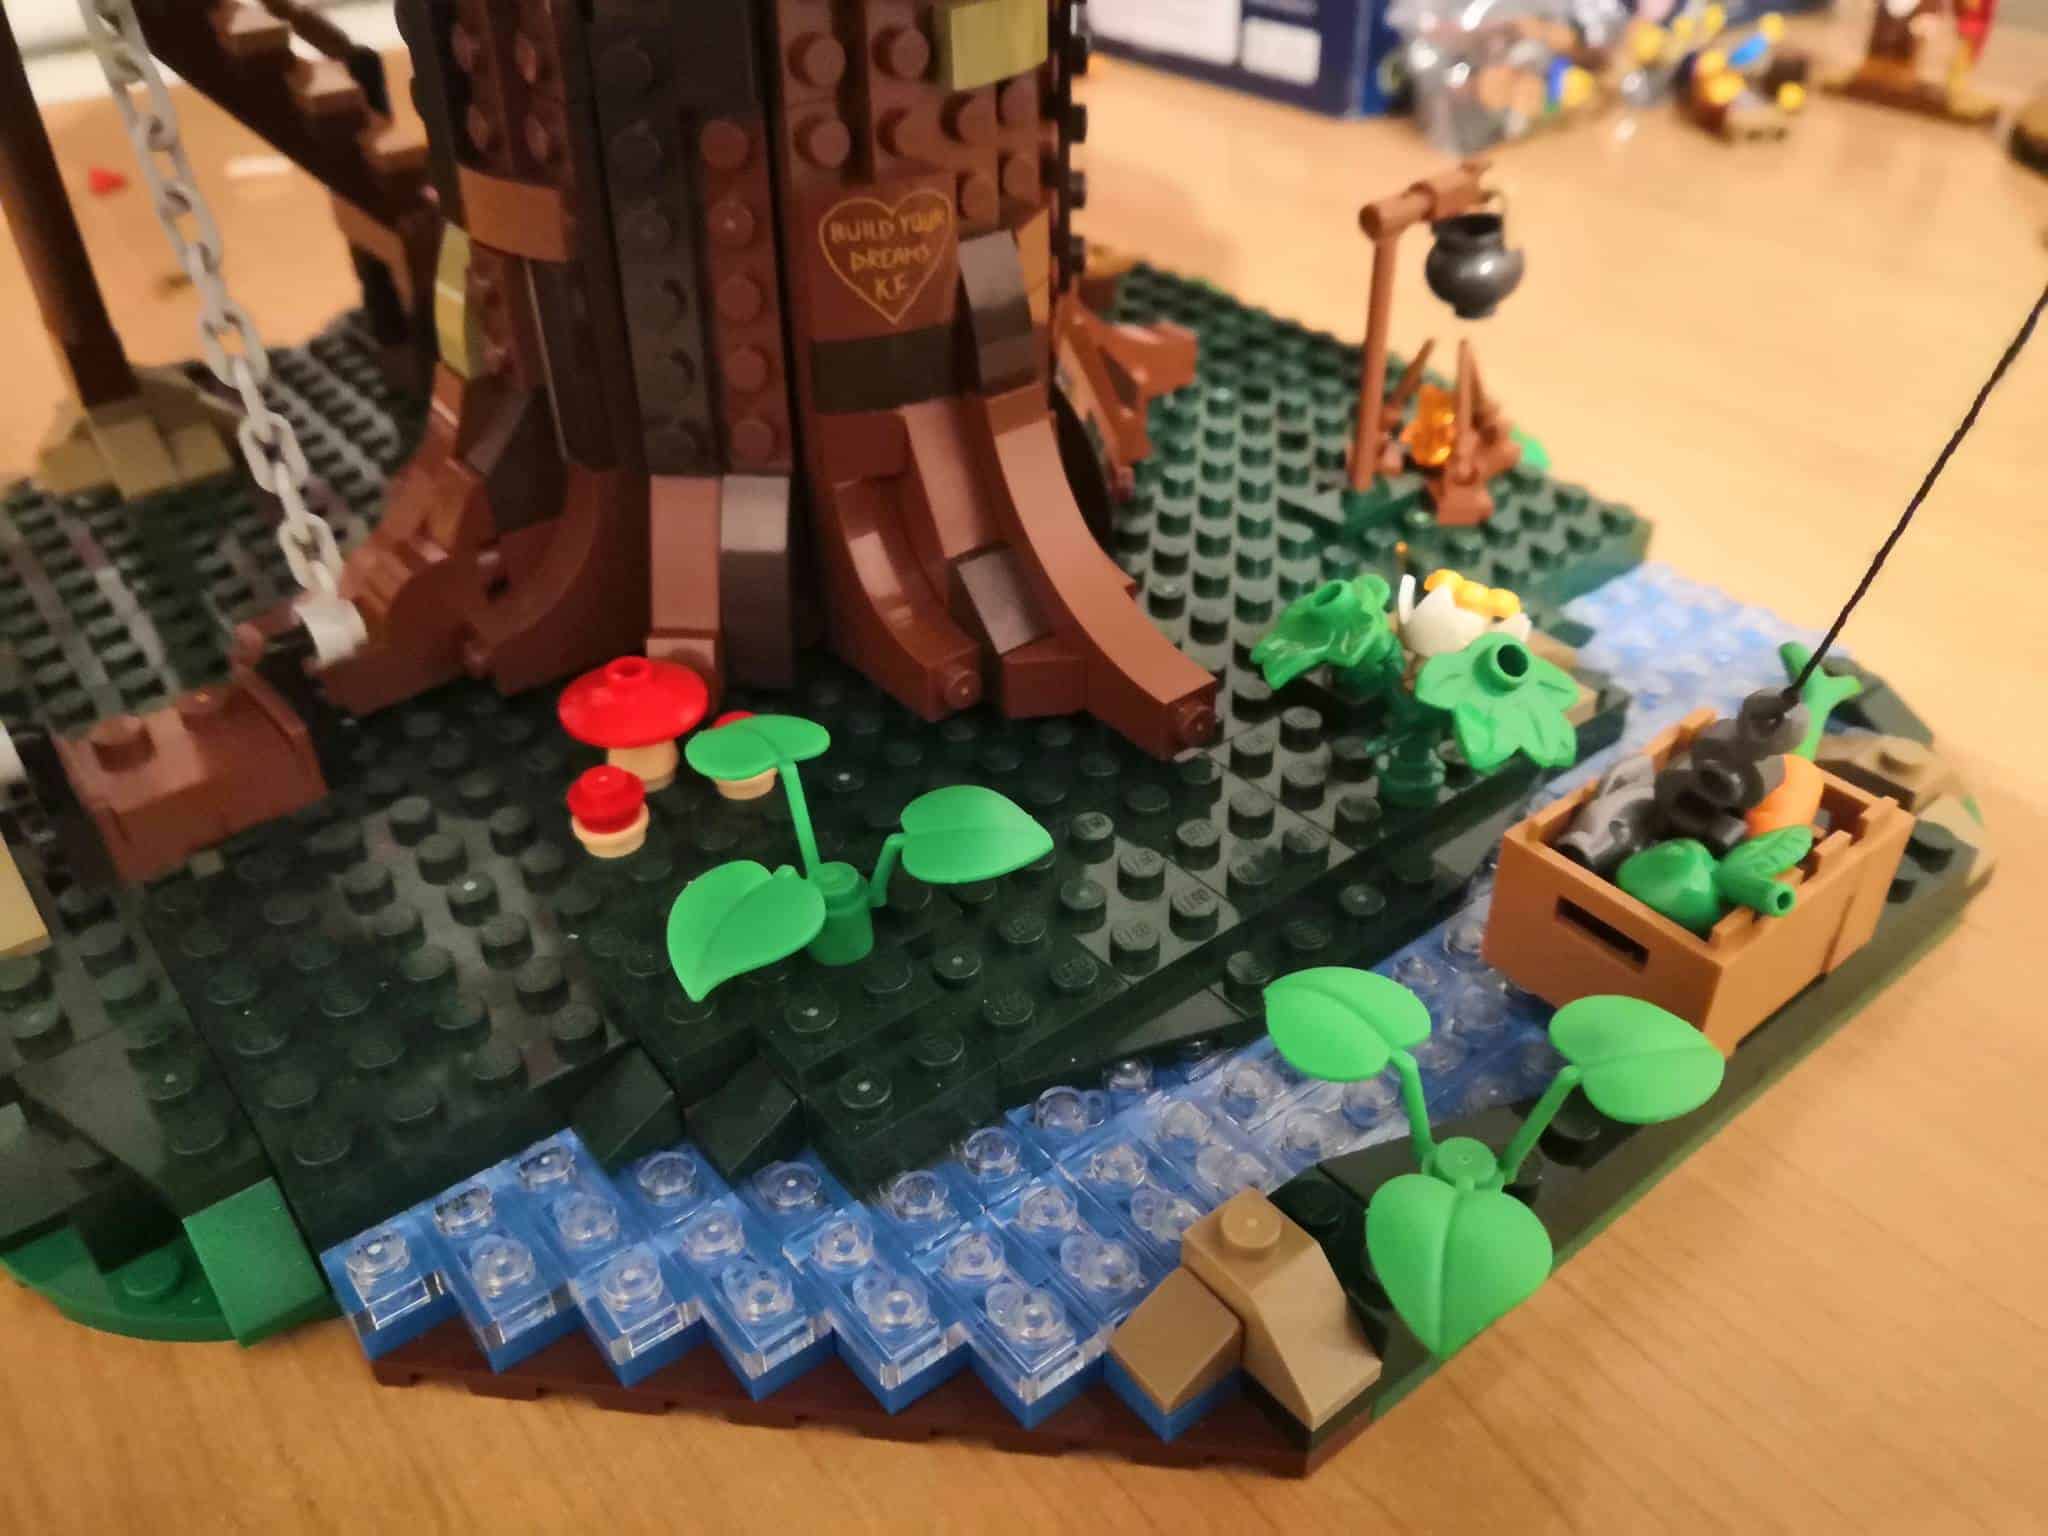
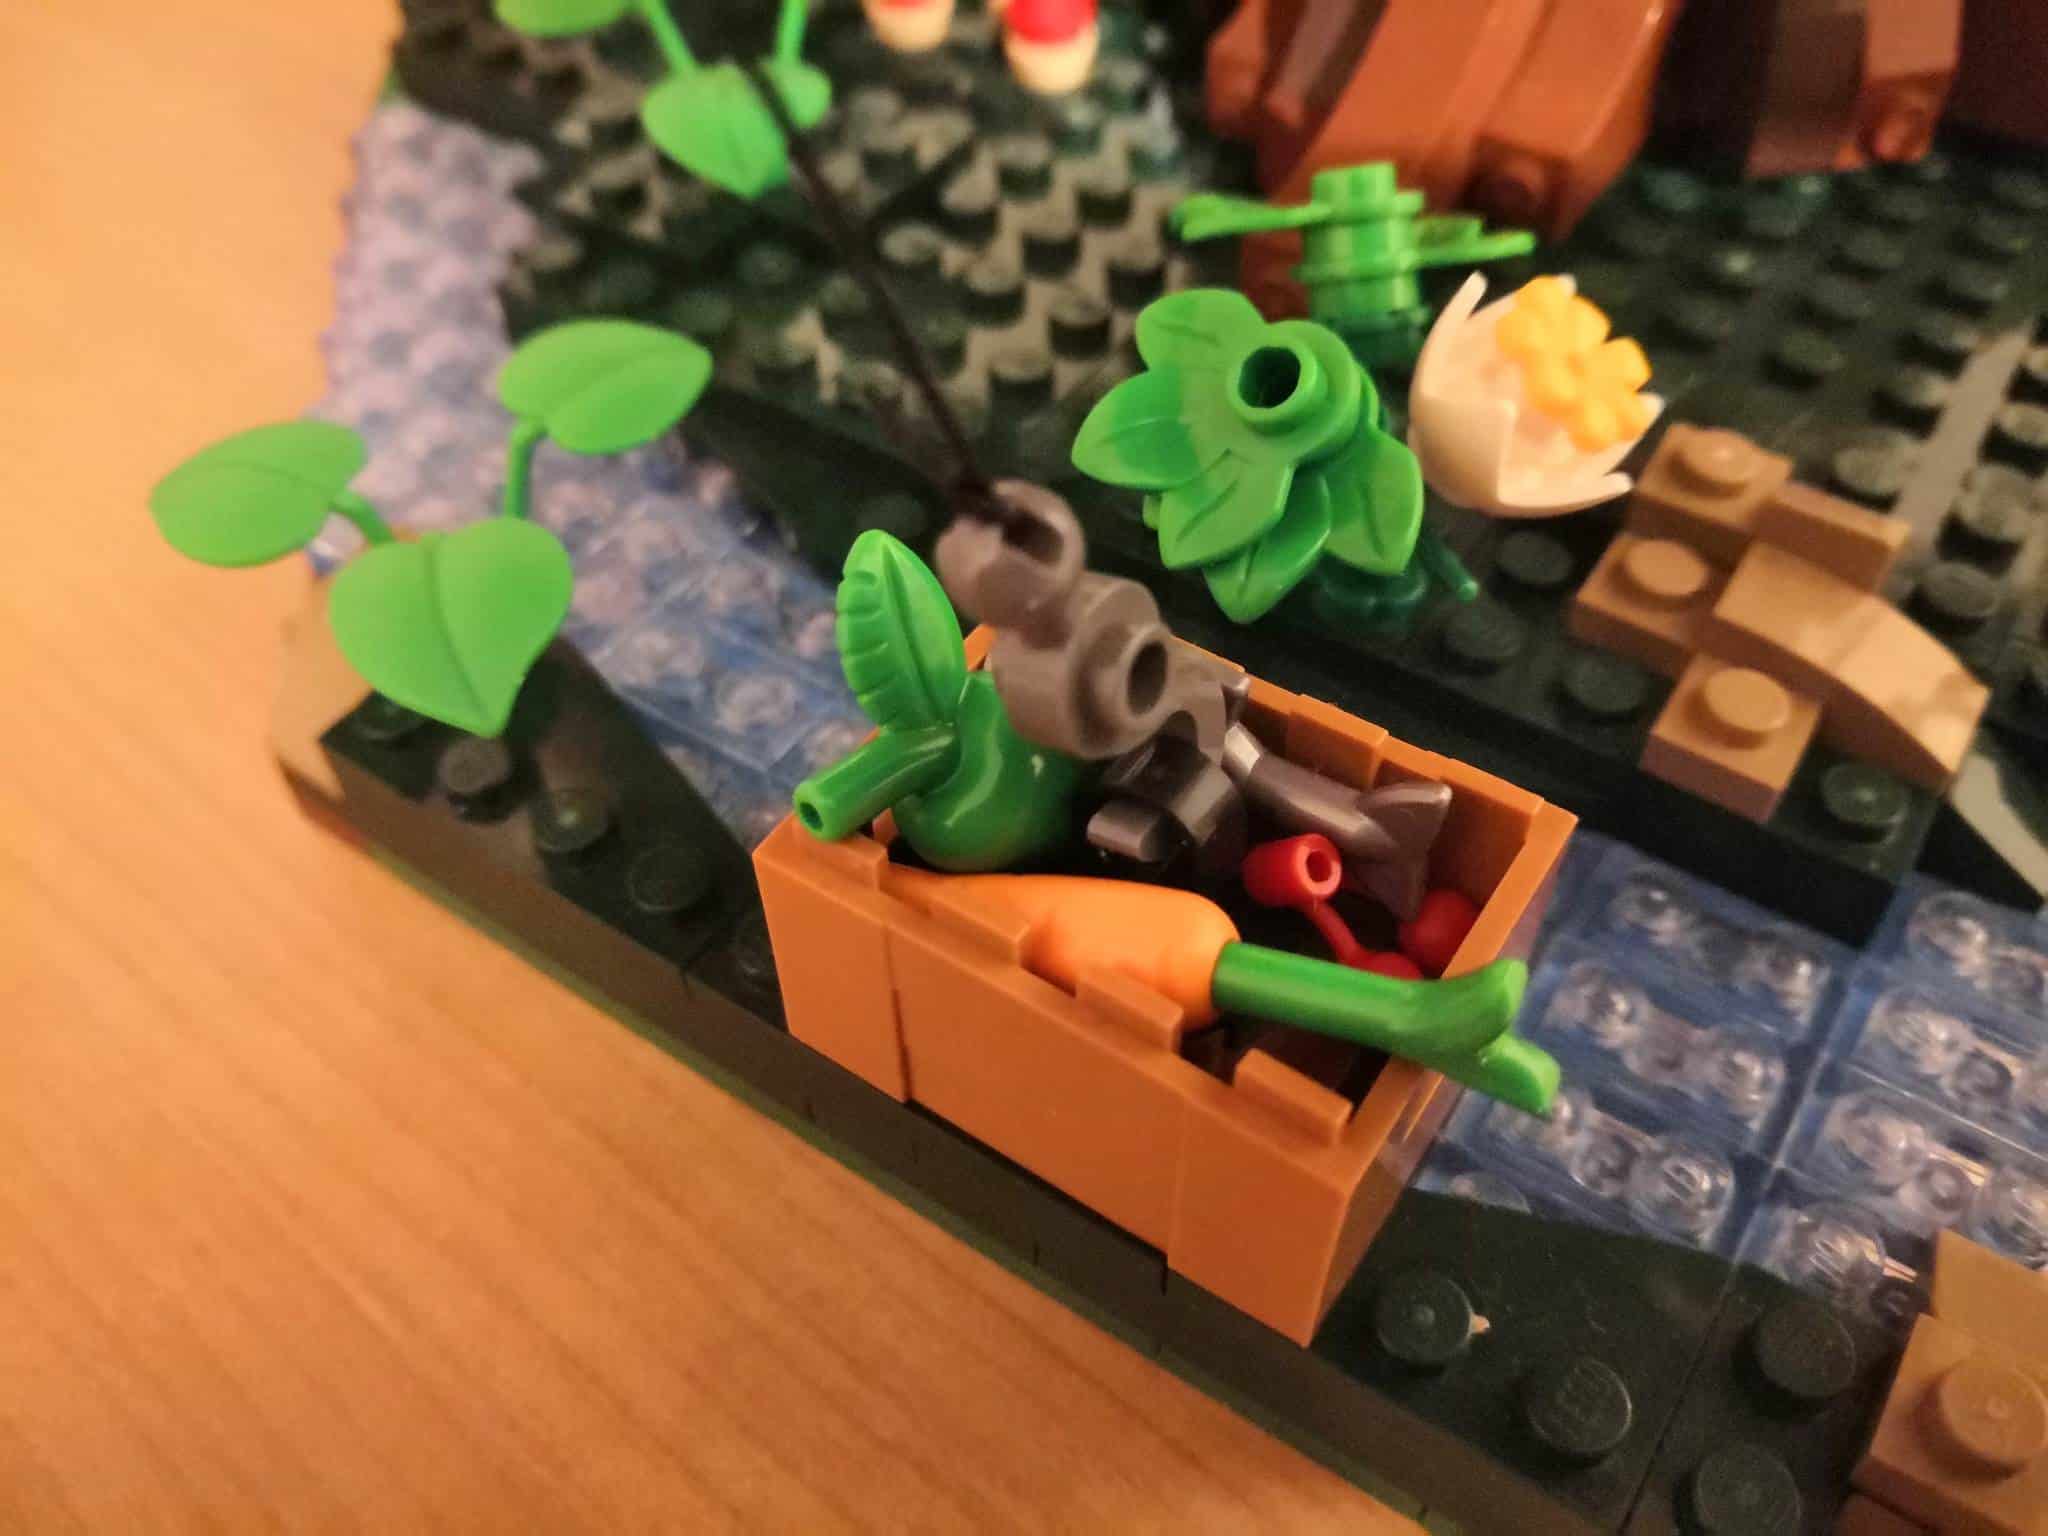
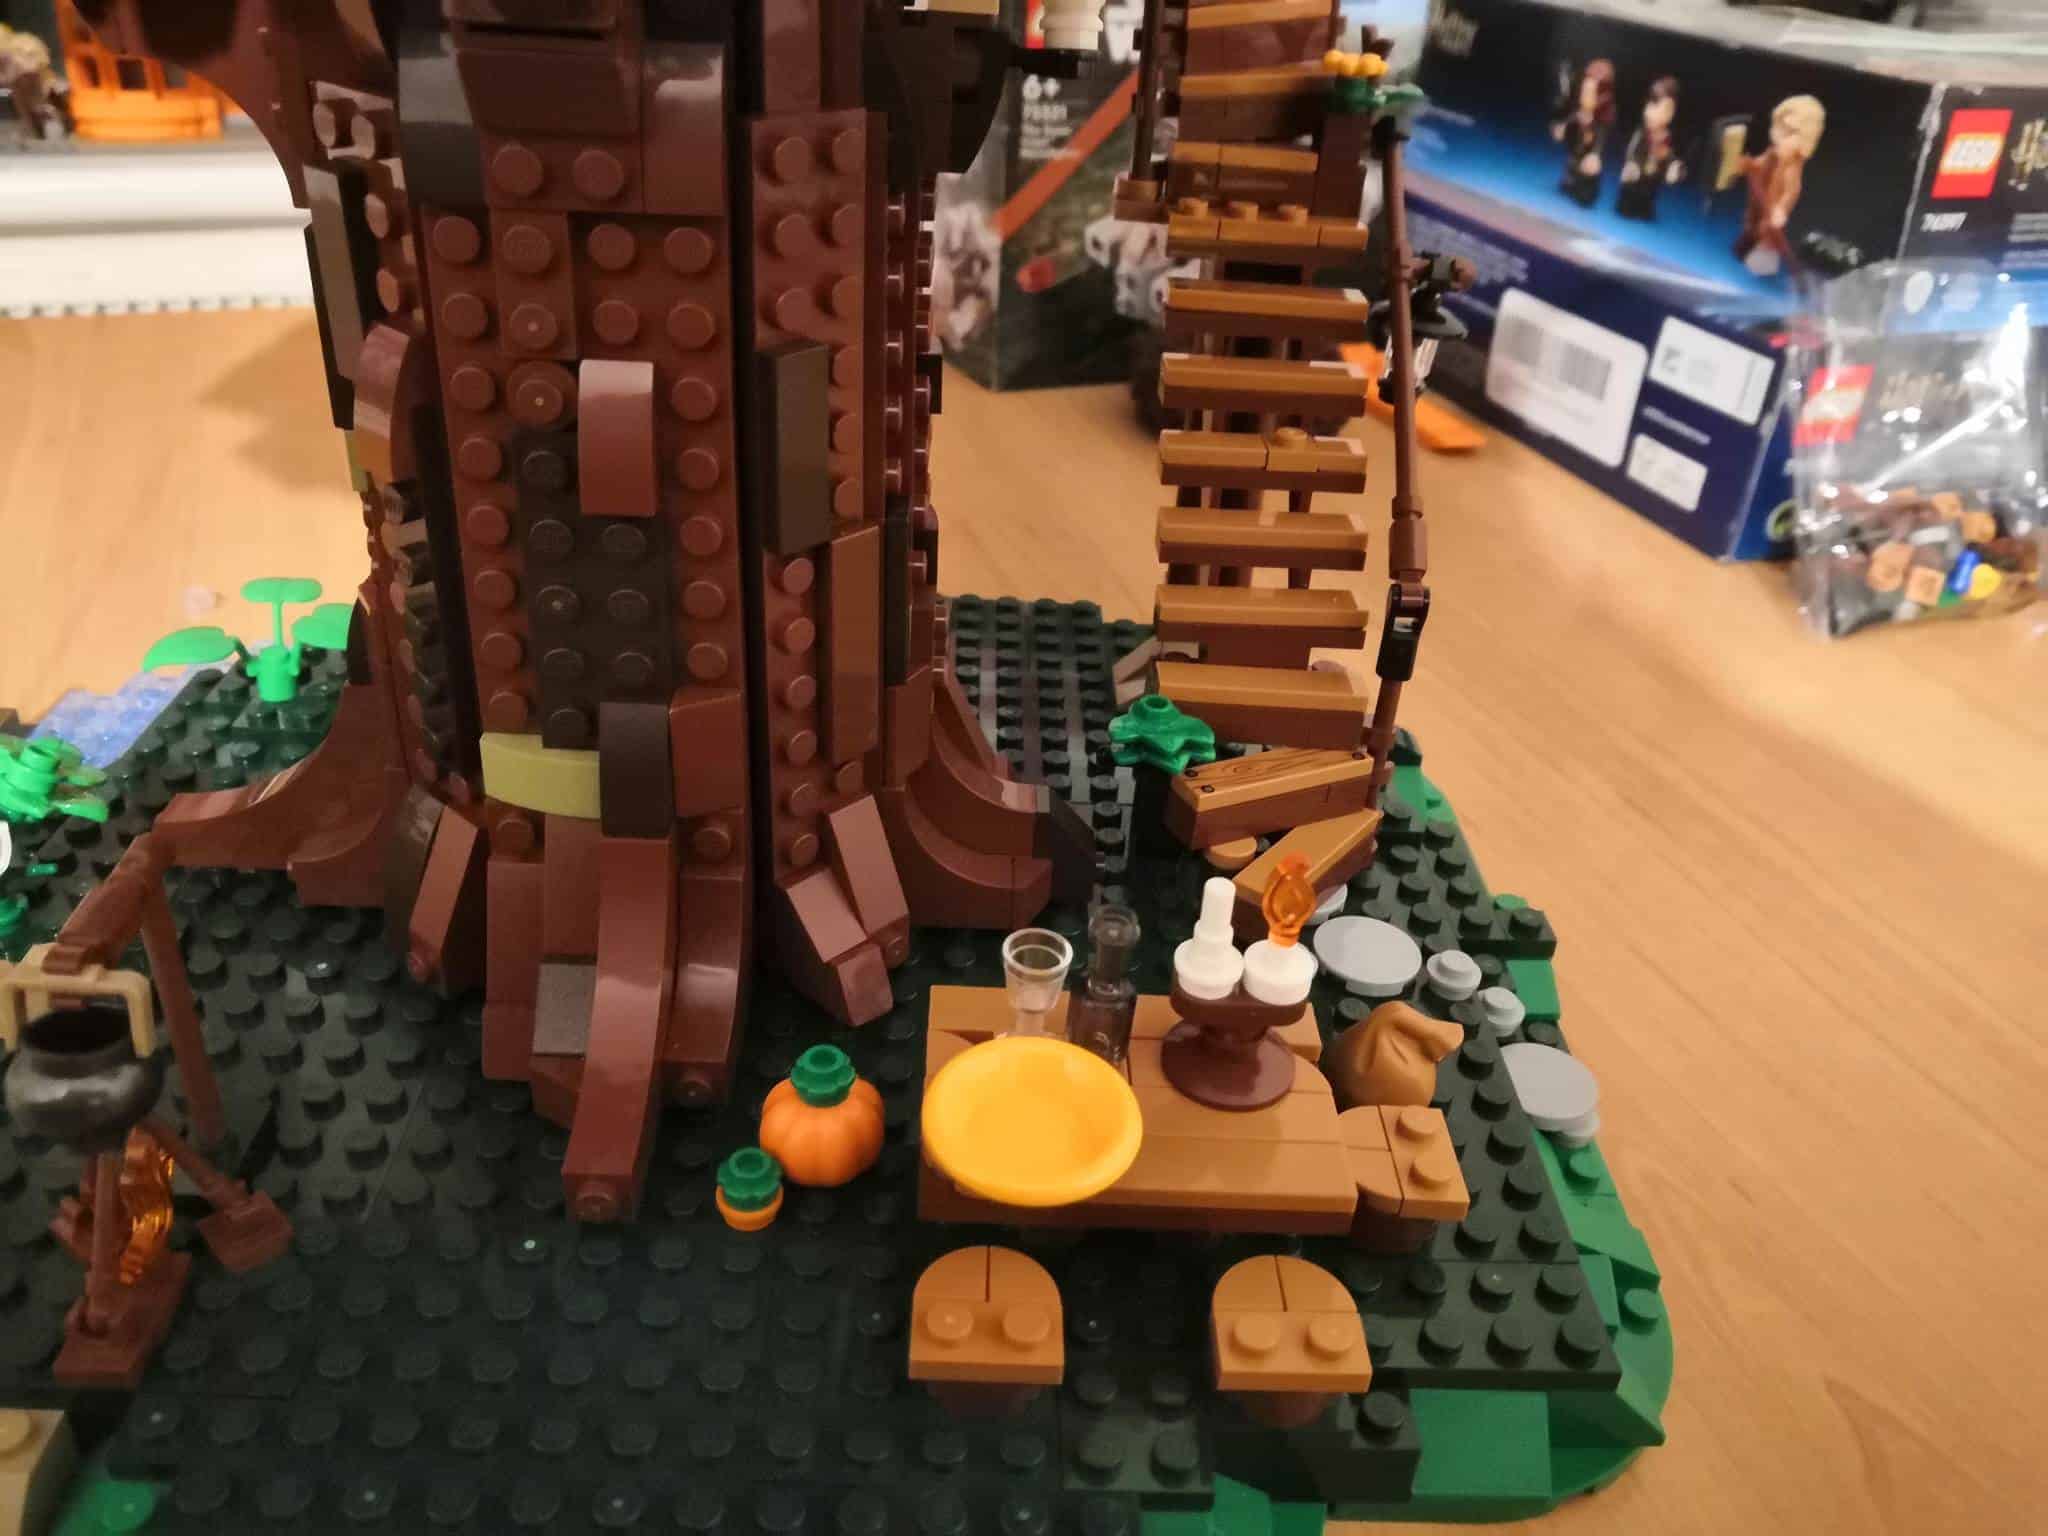
I love the little details, such as the stepping stones in front of the stairs, or the mushrooms at the base of the trunk. I also adore the little stream that runs alongside the treehouse. In my mind, I can almost hear the water babbling away. The pot over the fire and the picnic table are fun additional details, too, really lending credence to that rustic lifestyle.
There are several interactive features in the final model. For starters, all the cabin rooves lift off, allowing you to play with the items inside the cabins before replacing the rooves once you’re done. You can also tilt the tree branches upwards to get better access.
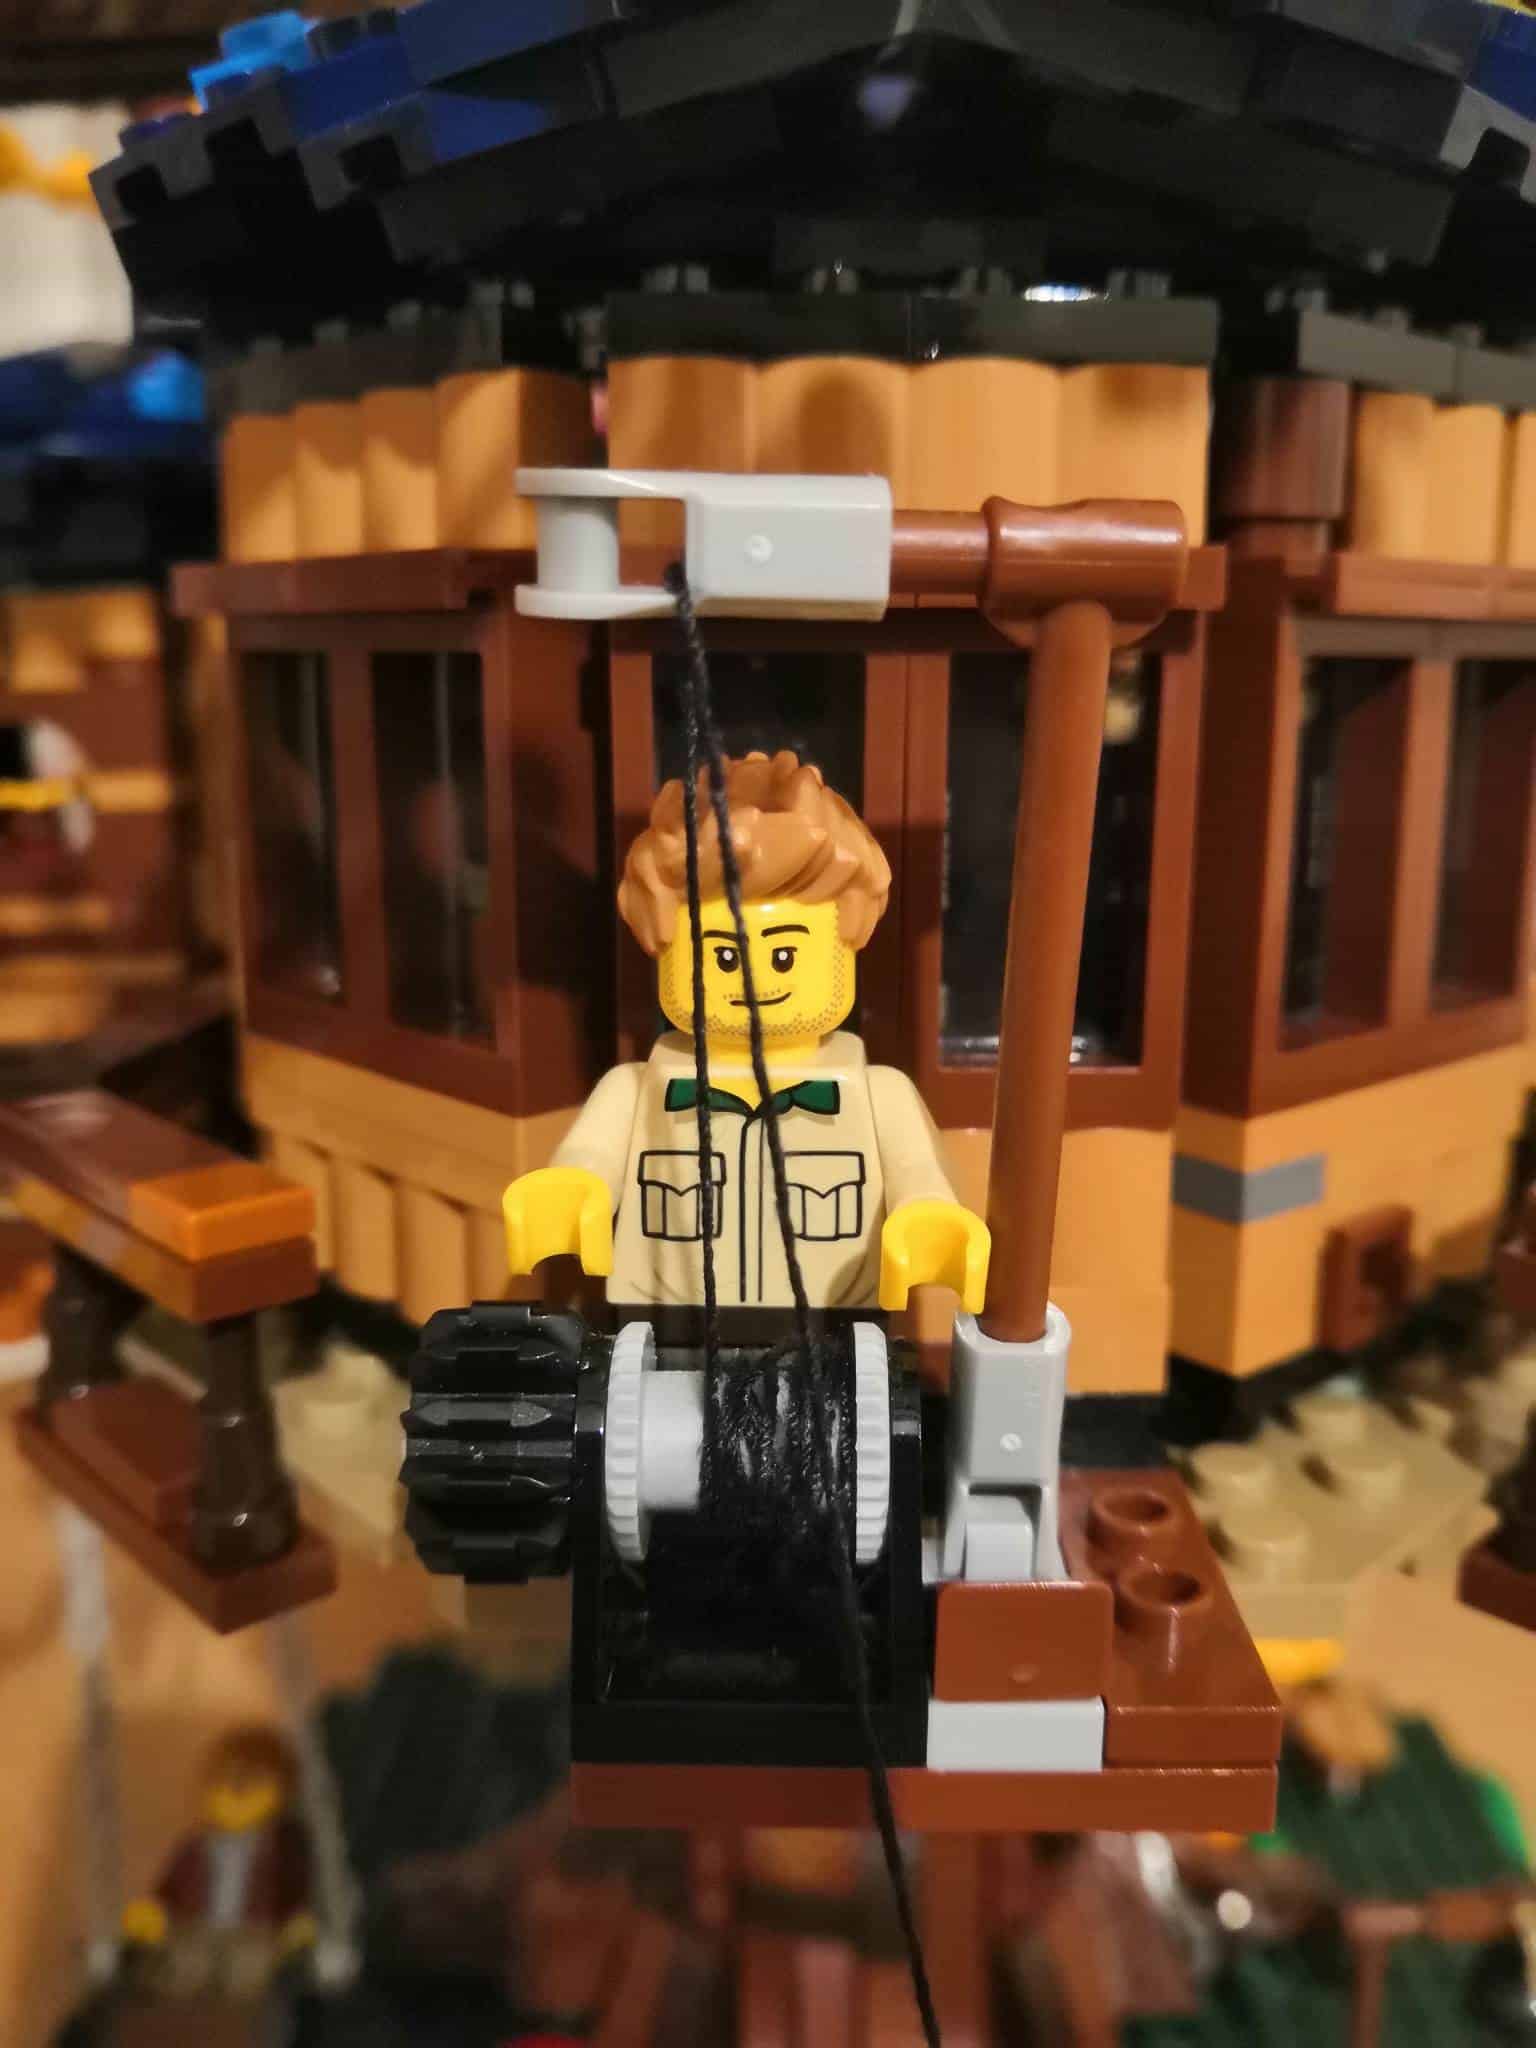
Then we have a telescope outside the kids’ bedroom door. This is attached to a hinge and can be swivelled about 270° horizontally and about 90° vertically. The range of motion makes you feel like a real explorer. There’s also a pulley system attached to a basket, so supplies can be lifted up and down the treehouse.
Minifigures
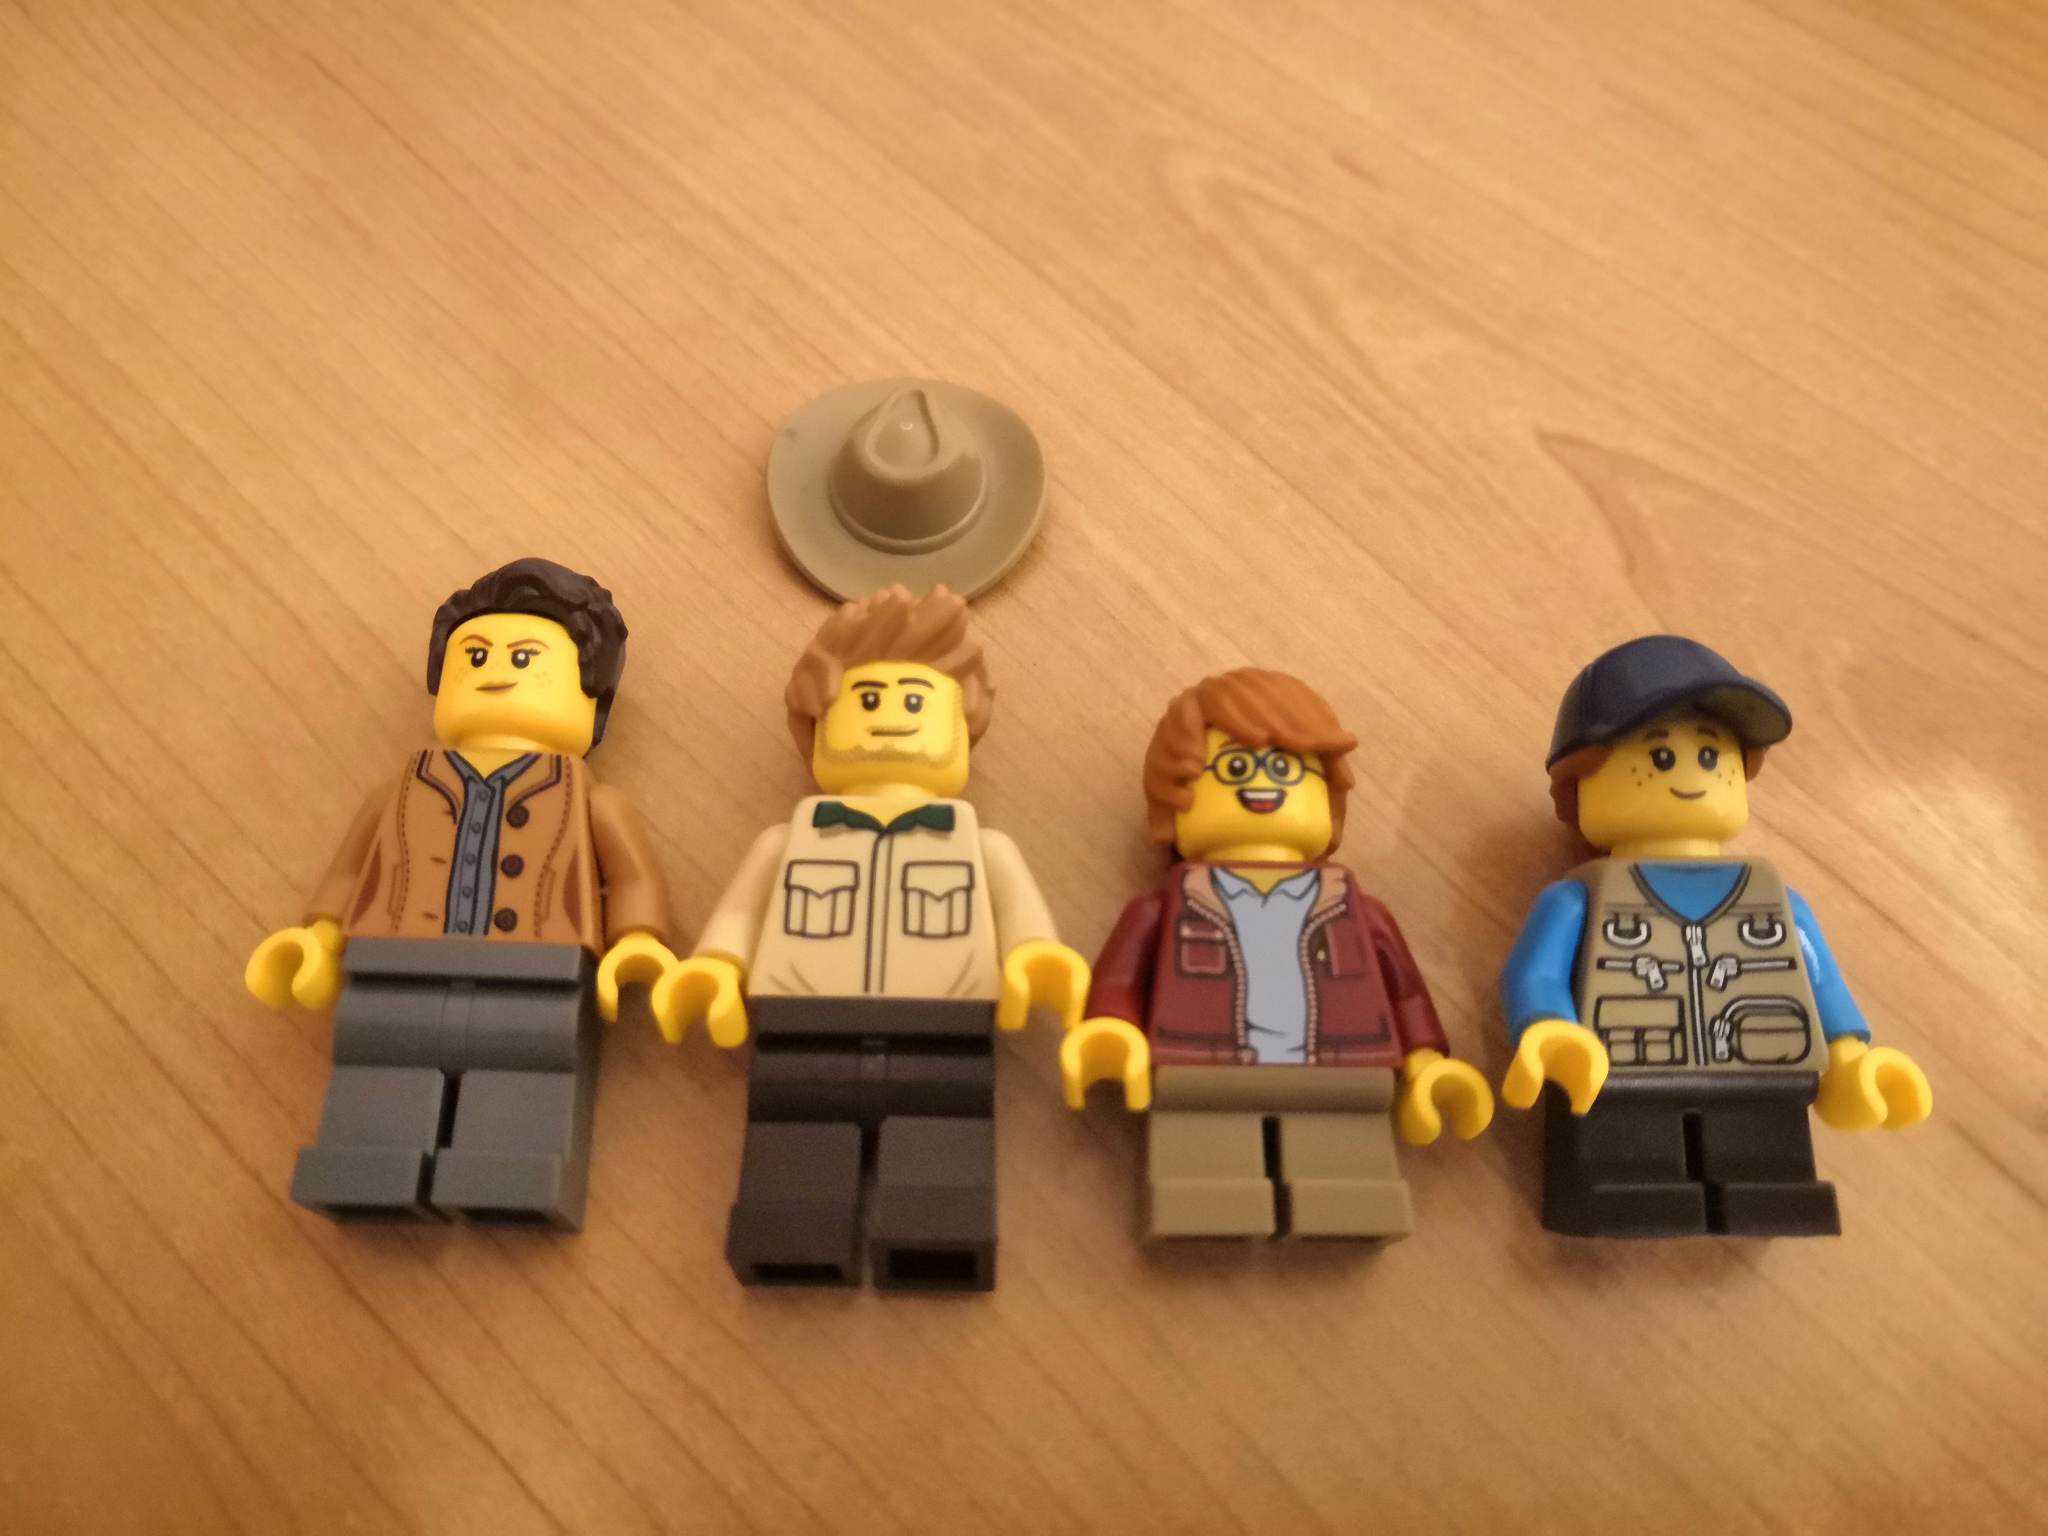
The set comes with 4 minifigures, which in a way feels like not enough. For $249.99, it would be nice to get at least a couple more. Having said that, the minifigures chosen do work well for the set, as they form a family unit. Two adults and two children, a boy and a girl for each age. It’s the perfect nuclear family and certainly fits the nostalgic theme.
The dad comes with a hairpiece which can be interchanged with an explorer’s hat. However, none of the others come with interchangeable pieces or accessories. This is an oversight, I think, as it would’ve been cool for them to hold things like binoculars or a rope.
I think my favorite minifigure design is the little girl. She has a hairpiece which is a ponytail with a blue cap on top. She’s also wearing a fishing vest, which makes sense as they live next to a stream. She has cute dimples on her cheeks, and overall, she’s a great minifigure.
I’m not a fan of the minifigure for the mother, though. Her two facial expressions are a stern smile or a terrifying wide-mouthed winky face. I usually opt for the happier of two facial expressions, but I made an exception here as the winky face was so disconcerting. Her clothes and hairstyles are bland, and it’s a tad disappointing. Still, I enjoy the other 3 minifigures, so it’s not too big of a deal.
Botanical Elements
I’m an environmentalist, so one of my biggest gripes with LEGO is all the plastic that’s used. That’s why I was thrilled to see that the Treehouse set has so many botanical elements.
All the LEGO botanical elements are made using sustainable plant-based material. It’s a fantastic idea, as it means that the pieces that look natural are natural. If you’re curious, the plastic is made from sugarcane, and it’s all sustainably sourced.
Better yet, LEGO seems committed to improving their effect on the environment. They aim to have all their elements made from sustainable sources by the year 2030. This should make a brilliant difference to global plastic use as LEGO produces 100,000 tonnes each year (0.25% of all the plastic produced on the planet).
Furthermore, they’re in the process of transitioning to recyclable paper bags for their stages instead of the single-use plastic ones that they currently use. I’m really happy to see this move towards sustainability. I love collecting LEGO, and it’ll be great knowing that it no longer conflicts with my environmental morals.
Is it Worth Buying?
Whenever I review a Lego set, I always use 3 distinct criteria. These are ease/ enjoyability of build, playability/ displayability of the finished product, and value for money. I also never give a definitive yes/ no answer to the question of whether it’s worth buying. Everyone has different preferences and weights certain criteria differently. I choose to give you all the information so you can come to your own conclusion on whether or not to buy it.
Ease/ Enjoyability of Build
Nearly every set I’ve built that’s rated 16+/ 18+ has always been unnecessary. A lot of the time I feel those sets could be feasibly built by younger teenagers. However, with this Treehouse set, I’ve finally encountered one that I think is accurately rated. It’s a tricky build, and I think younger teenagers would lack the patience and fine motor skills needed. For this reason, I also think it’s an unrealistic purchase for elderly LEGO fans as they may struggle to attach the more fiddly connections.
Although not everything about this build was difficult, there was definitely a consistent level of challenge. Almost every stage brought something tricky, and I certainly wouldn’t call this an easy build. Overall, it’s probably the hardest set I’ve ever put together. I don’t think it’s prohibitively difficult, but if you prefer something quick and easy, this set isn’t for you. Luckily for me, I rather enjoyed the challenge for the most part.
In terms of enjoyability, I really liked the majority of the build. Surprisingly, the trunk of the tree doesn’t feel all that repetitive despite the overwhelming amount of brown. In fact, right up until the last few stages, I was having a lot of fun and found the process pretty diverse. However, stages 17-19 involved attaching the branches and leaves, and that was indescribably monotonous.
It probably didn’t help that I was building it at night, but at times I found myself wanting to cry out with boredom. Nearly all the connections were the same as each other, so I was going through the same motions over and over again. I was so thrilled when I finally finished it, and not for the right reasons. It’s a shame because the rest of the build was great, and it would’ve been nice to go out on a high note.
Playability/ Displayability
Once this set is built, it looks fantastic. It’s even better in person than it looks on the website or in photos. It radiates fun, and I honestly smile with glee every time I look over and see it. It’s phenomenally gorgeous. The designers have done an excellent job of capturing the natural aesthetic with just a few thousand small pieces of plastic.
I adore the fact that this set looks delightful from every angle. There’s no front or back, there’s just a multitude of features that can be viewed on any given side. You can choose how you wish to display it, and you can switch it around every now and then to keep it fresh. I’ve chosen to have it so that the telescope is facing the rest of my living room. I like the idea of the little LEGO people watching me go about my day and them thinking of it as some unexplored territory.
There are also so many ways to play with this set. I used to spend hours playing with LEGO as a kid, but as an adult, I tend to keep them for display only. Even with really detailed sets that lend themselves to play, such as Diagon Alley, I just put them on a shelf to look at. But with this Treehouse, I found myself absent-mindedly walking the minifigures up the stairs, or pushing them on the swing.
There’s something about this set that really brings out my playful side. So if I, as a jaded adult, can get enjoyment out of playing with this, then I can’t imagine how exciting it’d be for a child. Because there are so many sections (a stream, a picnic table, stairs, cabins, etc), there are so many different scenes to act out. This one set could keep a child entertained for hours, and most importantly, bring out their imagination.
Value for Money
This set is $249.99, the same price as the Sanctum Sanctorum that I recently built. You get 3036 pieces, which is over 300 more than the Sanctum Sanctorum set. On paper, it sounds like that’s a firm tick in the ‘value’ column. However, you have to consider that a lot of these pieces are either pretty small or are very common (and therefore cheap) pieces like 1×4 brown plates.
There’re also hardly any tiles, which makes it considerably harder to keep clean. Unless you’re able to keep the set safely in a display case, you’re gonna need to dust it at least once a week, and it’s going to be hard to get in all the crevasses between studs. I wish that the rooves of the cabins had tiles instead of plates as it would make the process so much easier.
You also need to consider that often it’s the minifigures that drive up the price of a set. This one only comes with 4 minifigures, which is considerably fewer than most other sets its size.
Especially given the fact that it’s not a franchised property so they don’t have to pay for a copyright license, I think this set is a bit overpriced. Not massively, but I think $224.99 would have been fairer for what you’re getting. Interestingly, it used to be $200 until LEGO raised their prices in 2022. Nevertheless, I still don’t think it’s as much of a rip-off as many sets are. It may cost $249.99, but for that price, you’re getting a superb display piece with lots of playability.
Potential MOCs
One thing I really love about the LEGO Treehouse set is the potential for MOCs. These are unofficial designs where fans either create something entirely new or modify an existing set. This set really provides so many different avenues for modification.
Firstly, you could capitalize on the seasonal differences. The set comes with two different colors of leaves, one to represent summer and one to represent fall. But there’s nothing to stop you from coming up with your own additions for spring and winter.
For spring, you could take advantage of the many floral elements that Lego creates. You could use different flowers and stick them on the green leaves. Perhaps you could add in some tendril pieces. You could even take a leaf out of the LEGO Bonsai Tree, and use pink frogs as cherry blossoms!
For winter, you could take the leaves off completely, leaving just the bare branches. Of course, that might look a bit boring, so you could use some brown plates attached to hinges to add in extra branches. You could also use white 1×1 plates and tiles to represent snow. If you wanted to really commit to the theme, you could even replace the cabin rooves with white variants of the pieces.
Another fun idea would be to decorate the treehouse for holidays. Imagine having vibrant 1×1 studs to represent fairy lights, and building a Christmas tree on the grassy base. Or for Halloween, putting extra pumpkins outside the cabin doors. You could really get creative with different ideas.
Conclusion
Overall, I’m really happy with the LEGO Treehouse set. It’s certainly not flawless, at least not when it comes to the building process. I mostly buy LEGO for the joy of building it, and I must admit the repetitive last few stages let me down on that front. I also hated the stress of attaching the cabins.
Nevertheless, the finished product is absolutely superb, and I know that this set is going to bring me so much fun in the future. This is one I can genuinely see myself playing with from time to time, and I never thought I’d see myself say that. I’m usually a staunch display-only LEGO collector, but I guess I’ve finally been swayed!
If you’re looking for a fun set that can be enjoyed by adults and children alike, then I’d certainly recommend the LEGO Treehouse. But if you’re after something natural-looking but with an easier building process, then you may wish to try something simpler like the LEGO Dagobah Jedi Training Diorama 75330 set.
FAQs
Question: How many LEGO IDEAS sets are there?
Answer: As of February 2023, there are currently 51 sets under the LEGO IDEAS range (formerly known as CUUSOO). However, with new ones being produced every year, this number will certainly change in the future.
Question: Why are there scissors under the bed in the LEGO Treehouse?
Answer: This was a delightful feature that made me laugh when I built the set. It turns out, this was an Easter egg referencing the fact that Kevin Feeser (the set’s fan designer) works as a hairdresser!
Question: When will the LEGO Treehouse set retire?
Answer: LEGO haven’t confirmed a retirement date for this set as of yet, but as it was first released in 2019, it’s likely to be discontinued soon. My best guess would be somewhere between mid to late 2023.